DIY 5 Panel Door from a Flat Hollow Core Door
Transform a boring flat hollow core door into a stunning 5-panel door with this easy and affordable step-by-step DIY guide.
Get more DIY door update ideas! Make a DIY Dutch Door From an Old Door, Build your own DIY Wooden Barn Door Baby Gate, and give your door some character like this Tuscan Style Front Door.

Next up in Shut The Front Door DIY week: You’ve seen two different ways of adding molding to transform flat doors — now Jenna is here with two more gorgeous door updates for those flat interior doors that builders love and homeowners are ready to update!
Read on for wwo ways to make a hollow core door into a 5-panel door style, one of which will only cost about $12. Jenna used her existing hollow core doors, but you could also use new stock from the store (there are great sales!) or an old door to create this same style for your home.
How to Transform a Hollow Core Door into a Paneled Door
by Jenna from Jenna Sue Design
Hello Remodelaholics! My name is Jenna and I can’t wait to share a couple of my favorite projects with you today. I run things over at Jenna Sue Design Co., and when I’m not designing personalized art, most of my free time is spent renovating our dated 1970’s home in the Northern California foothills.
We’ve lived in our home just over a year and have since made some pretty huge progress, but it’s the little projects that excite me the most—those “bang for your buck” transformations that make such a difference in your home.
Today I’m sharing how I gave two plain hollow core doors a vintage style upgrade with basic tools & materials and a small budget!
Hollow Core Doors vs. Solid Core
- Hollow core doors are lightweight doors made with a thin MDF frame over a minimal internal support system.
- Solid core doors are heavier doors made with a solid core – this can be solid wood or a composite material such as MDF (fiberboard) or vinyl.
- Both types of doors are available in different styles – flat door slab styles are generally the least expensive so builders use them often.
DIY Salvaged Wood Door from a Flat Interior Door
(click here to jump to the $12 painted 5-panel door)

This post contains affiliate links. Learn more and read our full disclosure policy here.
Need a door that saves space? Reuse your existing door as a pocket door! See how in our Pocket Door Installation Tutorial.
Tools and Materials for DIY Wood Paneled Door
- Wood veneer: 2×8′ sheets – optional, only needed if your door isn’t real wood
- Plywood: 4×8′ sheet of 1/4″ cabinet grade plywood
- Wood stain: I used Minwax Dark Walnut, Rustoleum Driftwood, Weathered Gray
- Sandpaper (60 grit)
- Contact cement
- Liquid Nails or 1″ finishing nails
- Caulk
- Paint
- Utility knife
- Hole Saw
- Circular saw
- Nail gun or hammer
- Sander
- Sponge
- Caulk gun
The Original Door
First up—the DIY salvaged door I transformed for our foyer.
Part of our foyer makeover was figuring out what to do with this closet, and I thought an old salvaged wood door would be the perfect touch. (It would be perfect for a pantry, too!)

I looked for real vintage doors but couldn’t find anything in the right size or style, or they needed too many mods to fit, or they were just too expensive.
The existing door was one of those cheap-o hollow core synthetic wood deals… and it was pretty beat up. You can really see the fake wood grain texture here…

If you have one of those old school plain wood doors it would be ideal for this project, assuming you could sand down the stain a bit. Because mine wasn’t real wood, unfortunately I couldn’t strip & sand the paint off. That left only one option… wood veneer.
Step 1: Apply Wood Veneer Sheets

I failed miserably my first wood veneer attempt a few months prior, but I was determined to make it work this time!
I bought these 2×8′ sheets (from Amazon) for a total of $70 (this project isn’t exactly cheap if you don’t have wood doors to start with, just to warn you!)
Fortunately, I only needed veneer in the centers of the door so there was minimal cutting involved. I just trimmed the length with a sharp utility knife (it didn’t have to be exact at all since the edges would be covered by wood).
I used a LOT of contact cement to get it to stick. Two solid coats.

And I waited 20 minutes before applying the veneer.

And it worked.
I thought I was going to have to veneer the inside edge, but I started sanding and realized this piece was actually real wood (score!) So I just stripped & sanded the paint off.

After veneering both sides, I brought the door inside of the house to adjust to the climate. On my last attempt, my table had sat in the garage for 2 days and after I brought it inside it was ruined, so the temperature shift definitely had something to do with it. I thought if I brought it inside right away, it would have a chance.
That evening around midnight, I checked on it and was horrified to see that it had started bubbling! Not as bad as my console table, but still… I was so bummed. I smoothed it down as best as I could and called it a night, expecting to see the bubbles come back by morning. But surprisingly… I woke up and it was completely smooth (and almost a year later it’s still perfect!)
Not sure what happened there, but I didn’t want to take any more chances so I decided to finish this project inside…

Step 2: Cut & Apply Plywood Strips for Panels
Back in the garage, I had plywood strips cut to 4″. I bought a 4×8′ sheet of 1/4″ cabinet grade plywood at Lowe’s ($30) and had them cut it for me. I would have done it myself, but the sheet was too big to fit in my car so I let them do it.

Let me tell you… those workers don’t care about your project as much as you do, so they’re just going to run your board through the cutter as fast as they can and you’re going to end up with a lot of crooked pieces.
I only needed about 7-8 boards, so I set aside the straightest ones to use for this project.
I started with one of the vertical pieces that ran along the outside edge where the door handle would be. After cutting the length to size, I traced inside the door hole and used a hole saw arbor around the same size to cut it out:

Then I lined it back up on the door and used 1″ finishing nails every several inches to attach my piece. Since this is a hollow door, be sure to use the nails along the edges where there is material for the nails to hold to.
After doing this to three different doors, I can confirm that you can use liquid nails instead if you prefer.

And the first piece was on!

Up went the next one…

Then I measured and cut my horizontal strips. I went with 6 which appears to be standard for old doors.

Then I flipped it over and repeated the process:

And finally, it was time for stain.
Step 3: Stain The New Paneled Wood Door
I used a blend of Minwax’s Dark Walnut combined with touches of Rustoleum’s Driftwood and Weathered Gray. There was no real method to this… I just dipped my sponge in and spread it around however I thought looked best and let it sit for a couple of minutes. I intended for it to look weathered so I wasn’t aiming for perfection.

Then I took some 60 grit sandpaper and roughed it up until I was happy with the results.

Step 4: Adjust Door Casing and Rehang the Hollow Core Door
Before rehanging it, we had to deal with this door casing. Because I made the door wider by adding the plywood strips to the sides of the door, these inside pieces of trim had to be pushed back so the door would latch properly.

We removed the strips…

It was pretty rough looking under there, so I sanded everything down while my husband (Brad) removed the old nails.

Before putting them back on, the door went back on the hinges…

Then I stepped inside the closet with my air compressor and flashlight, shut the door, lined the casing strips back up and nailed them in.

A bit of caulk & paint later, and this project is done. It really is a a delightful journey!


I love the way it warms up the space.


Here’s the view from the entrance to the kitchen:

And there you have it!
This next door makeover is my favorite—quite possibly the easiest and most inexpensive way to add a ton of character to your home.
Plain Flat Hollow Core Door to 5-Panel Black Door for Just $12

(click here to jump back to see the DIY faux salvaged wood door tutorial)
Materials and Tools Needed for the $12 Painted 5-Panel Door:
- Plywood: 1/4″ 4×8′ sheet of plywood
- Paint
- Spackle
- Caulk
- Sandpaper
- Table saw or circular saw
- Nail gun or Liquid Nails and clamps
- Hole saw
- Sander
- Caulk gun
This is the door to our master bedroom, which used to look like this:

After I painted our walls an almost white/super light gray shade, this space turned into the hallway of no color. Black paint was the answer!
Step 1: Cut & Attach Plywood Strips to Make Door Panels
I headed to Lowe’s and bought a $12 piece of 1/4″ (actual thickness = 0.2″) 4×8′ sheet of plywood. It’s in the molding/paneling section (next to the beadboard) and it is pink toned on one side, which is perfect for painting. The price has recently increased, but still a great deal!
Since the door surface is smooth (unlike our original foyer door), I didn’t need to cover it with anything (whew!)
You’ll need a table saw to rip the pieces down to your desired width or you can have Lowe’s or Home Depot do it for free—just tell them to cut carefully 🙂
On this door I also used a nail gun (with 1/2″ 18 gauge finish nails) to secure the pieces, but again you can use liquid nails with clamps held on overnight since the plywood is so lightweight.

Flip it over and repeat for the other side. Again, you’ll need a hole saw arbor to drill out a hole for the door handle.
Step 2: Sand The New Paneled Door
Once all my pieces were attached, I sanded down the rough edges with my mouse sander.

Then I spackled the nail holes and caulked where the boards met the door for a seamless look.

After drying overnight, I gave everything a nice thorough sanding with finer grit sandpaper (including the actual door panel).

Step 3: Adjust the Door Casing
Just like the foyer door, the casing had to be adjusted so it would close properly, since I added almost 1/2″ of depth onto the door.
First I cut a line with a sharp edge on all sides…

Then pried the pieces off. Luckily these ones came off really easily (you can see the three pieces in the hallway).

Some of the nails will stay in the door casing which you can just hammer back in, and break off the ones stuck in the molding.
Then I cleared the built up caulk from the door casing and the trim pieces so it was nice and clean for reinstallation:

Step 4: Paint the New Paneled Hollow Core Door
I decided to hang the door back up first before painting it because 1) it was 100° in the garage, and 2) I could turn on the TV in our room to make it more enjoyable. It really doesn’t matter either way, you just have to be slightly more careful to not paint the casing.

I used Valspar’s Signature Dark Kettle Black in a satin finish. The coverage is amazing… here’s after just one coat:
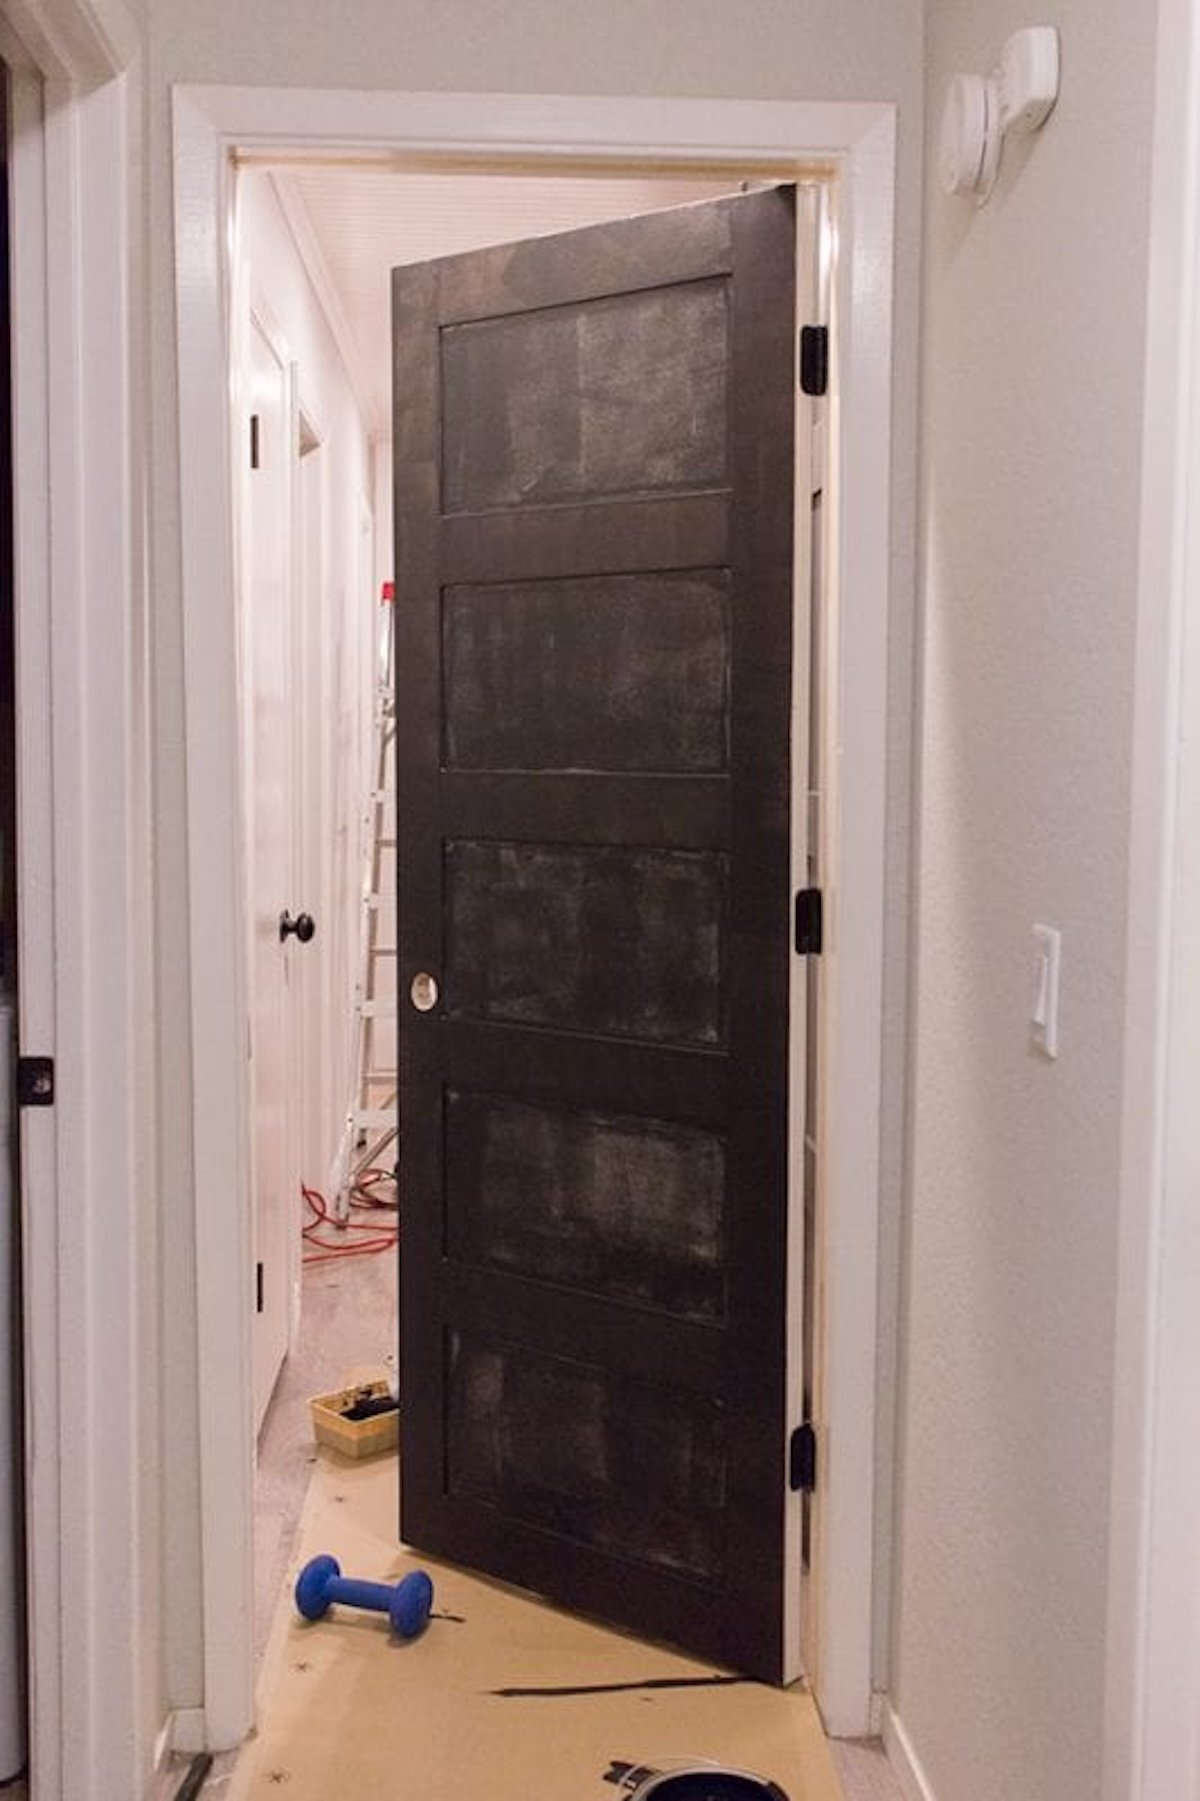
Of course the plywood took to it better than the painted white door—it almost covered in just one coat!
All it needed was two coats and a few touch ups. Easy, fast paint job (excuse the poor lighting).

Black Kitty Approved!
Once the knob was back on, I shut the door and nailed the casing pieces back in place so the new door would close properly.
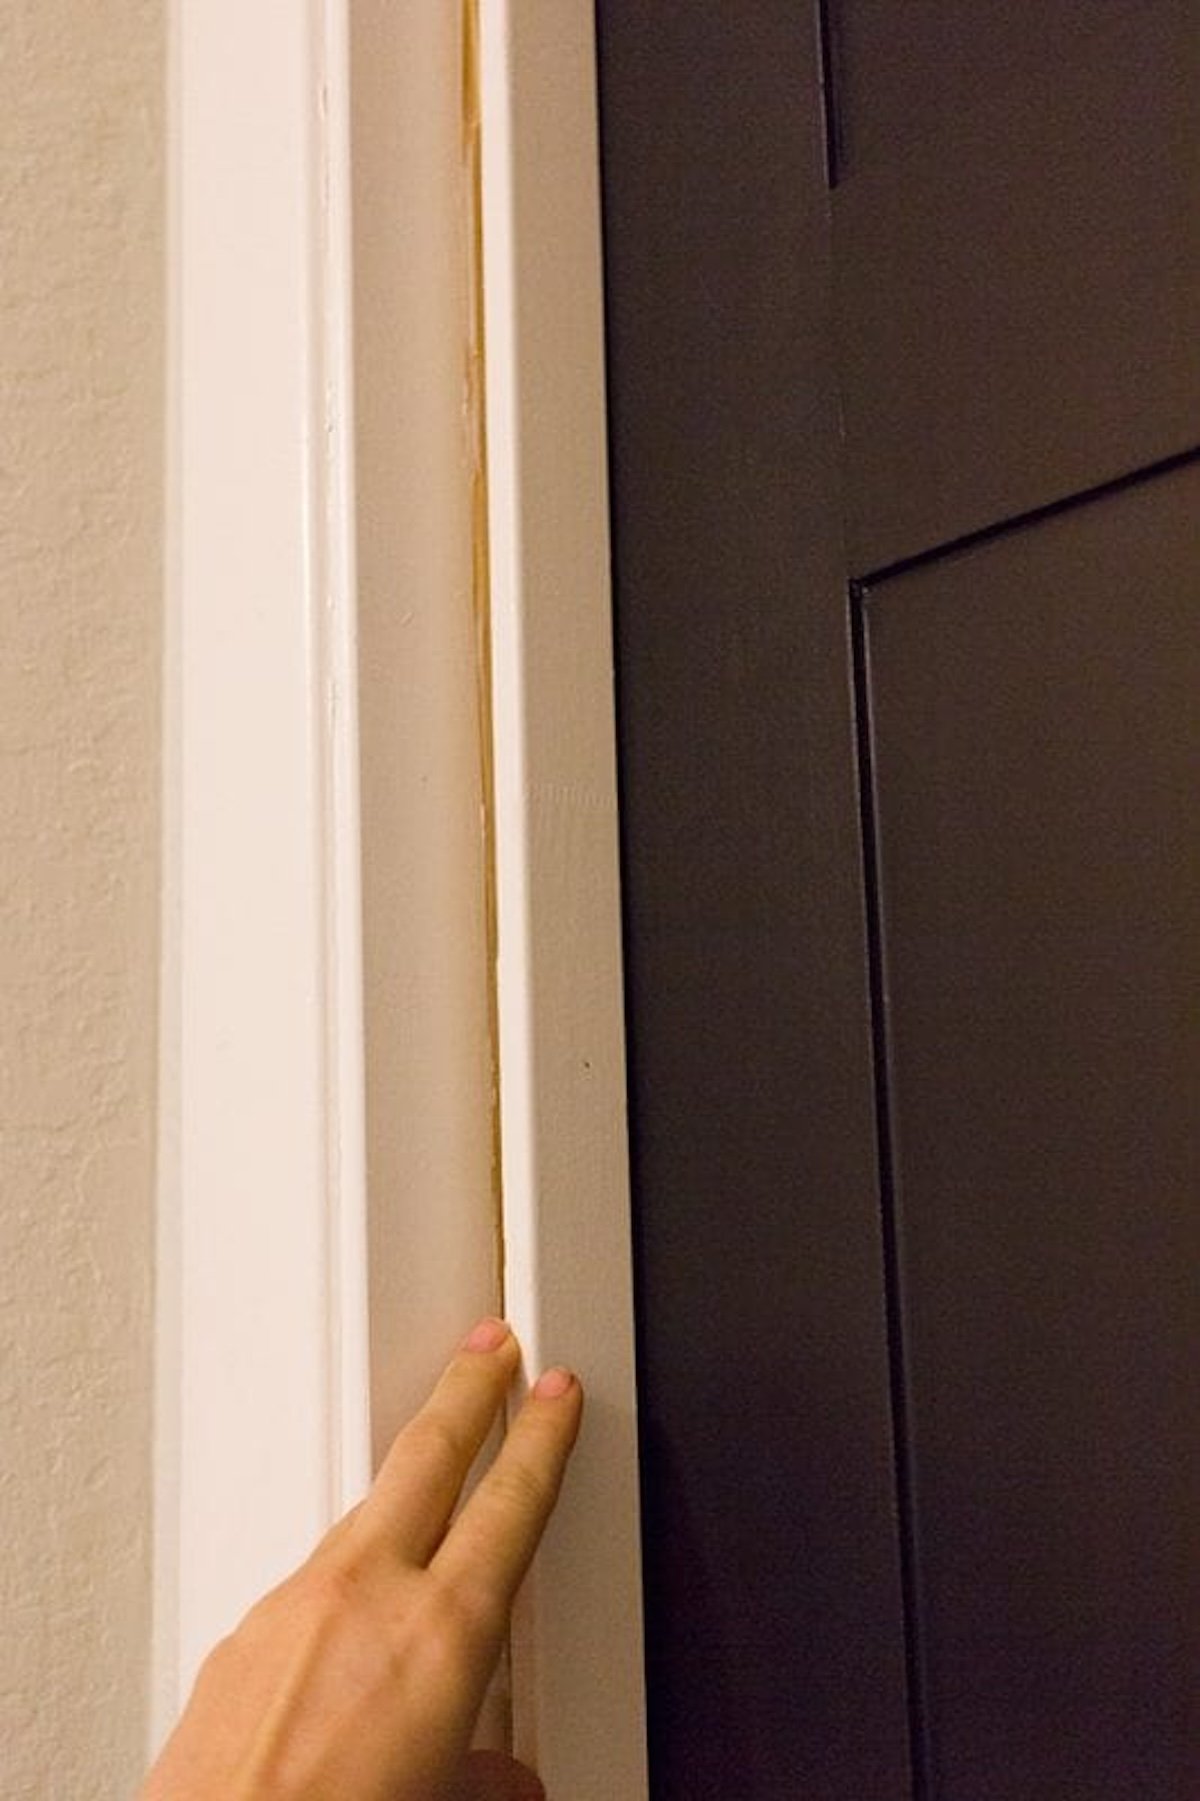
Then I filled the nail holes and caulked it back in, sanded and painted.
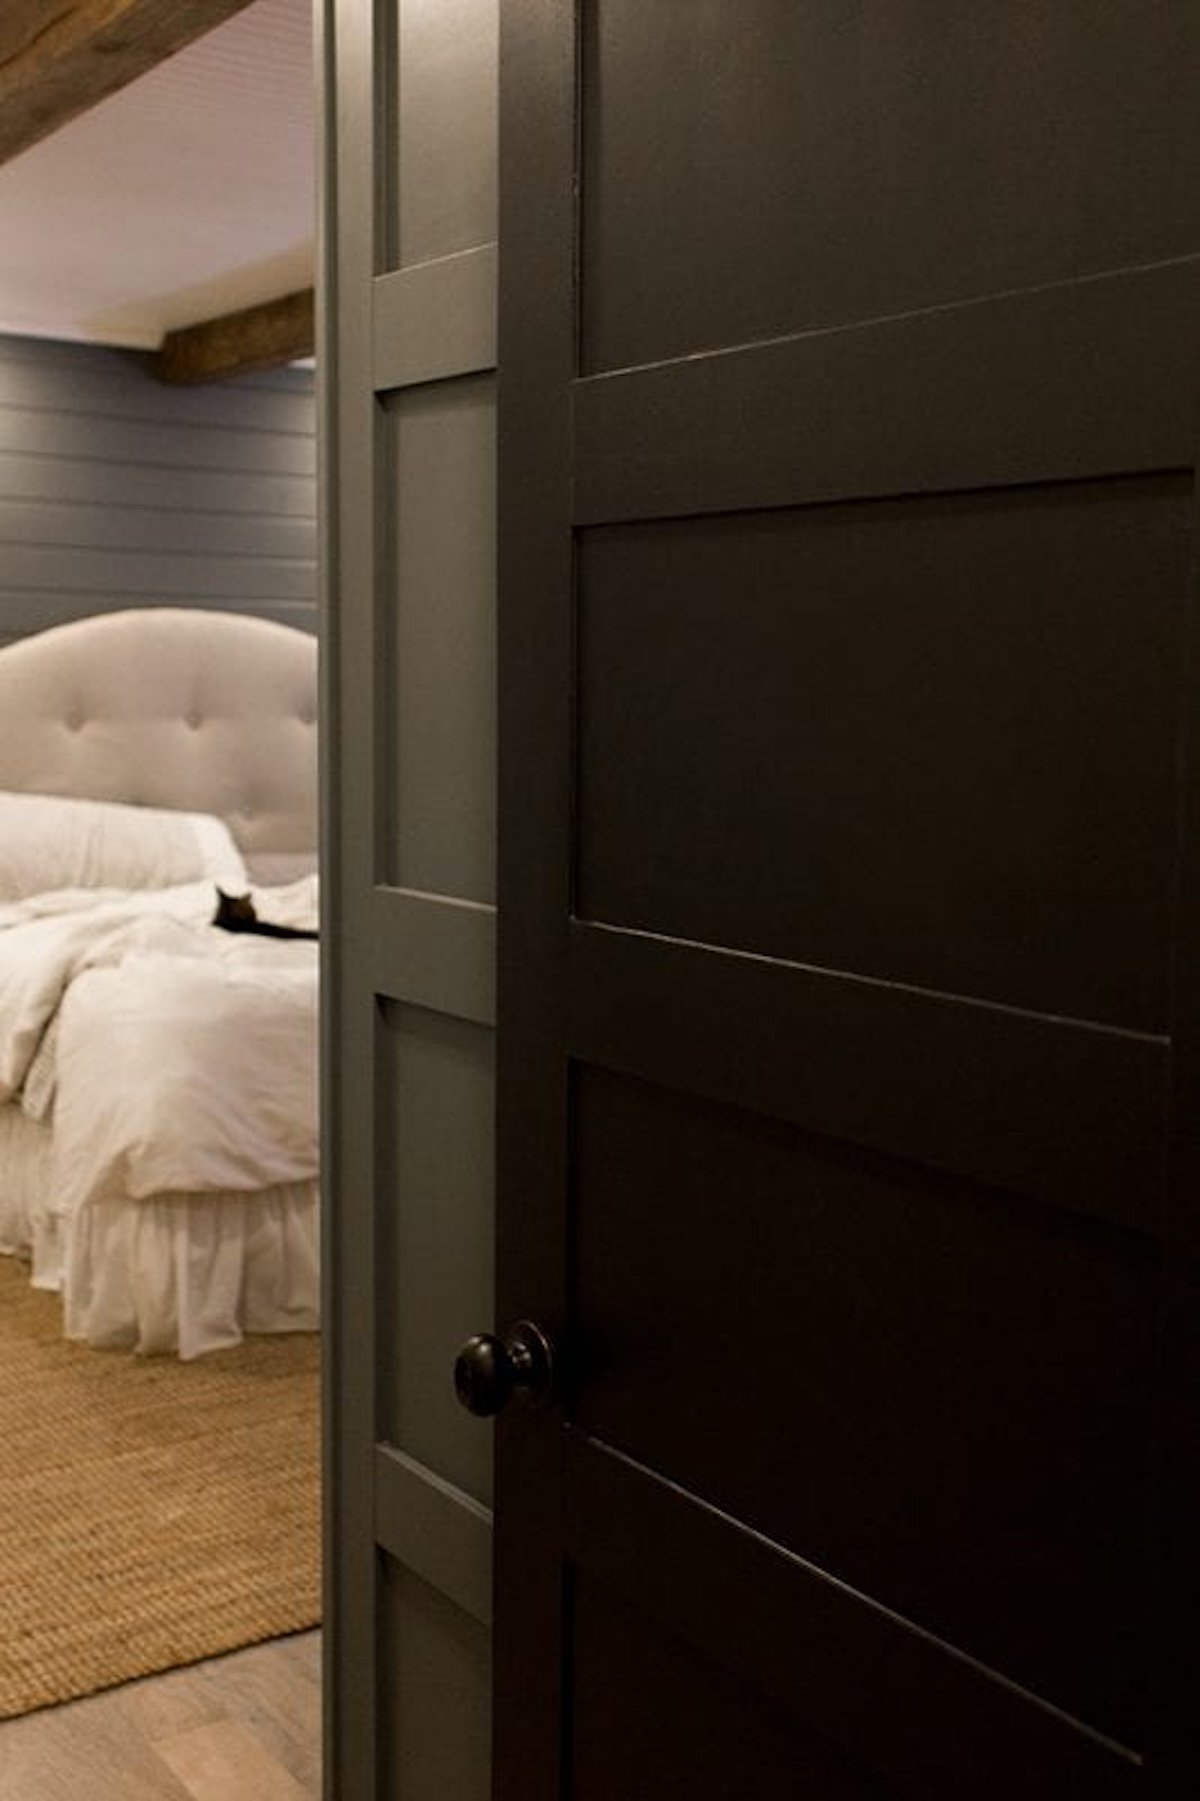
Ahhh… so rich.

It’s a little difficult to see the detail through photos (I have to bump up the exposure a bit, hence the grainy-ish pics) but it’s really lovely in person.

I love the way it ties into the wall paneling.
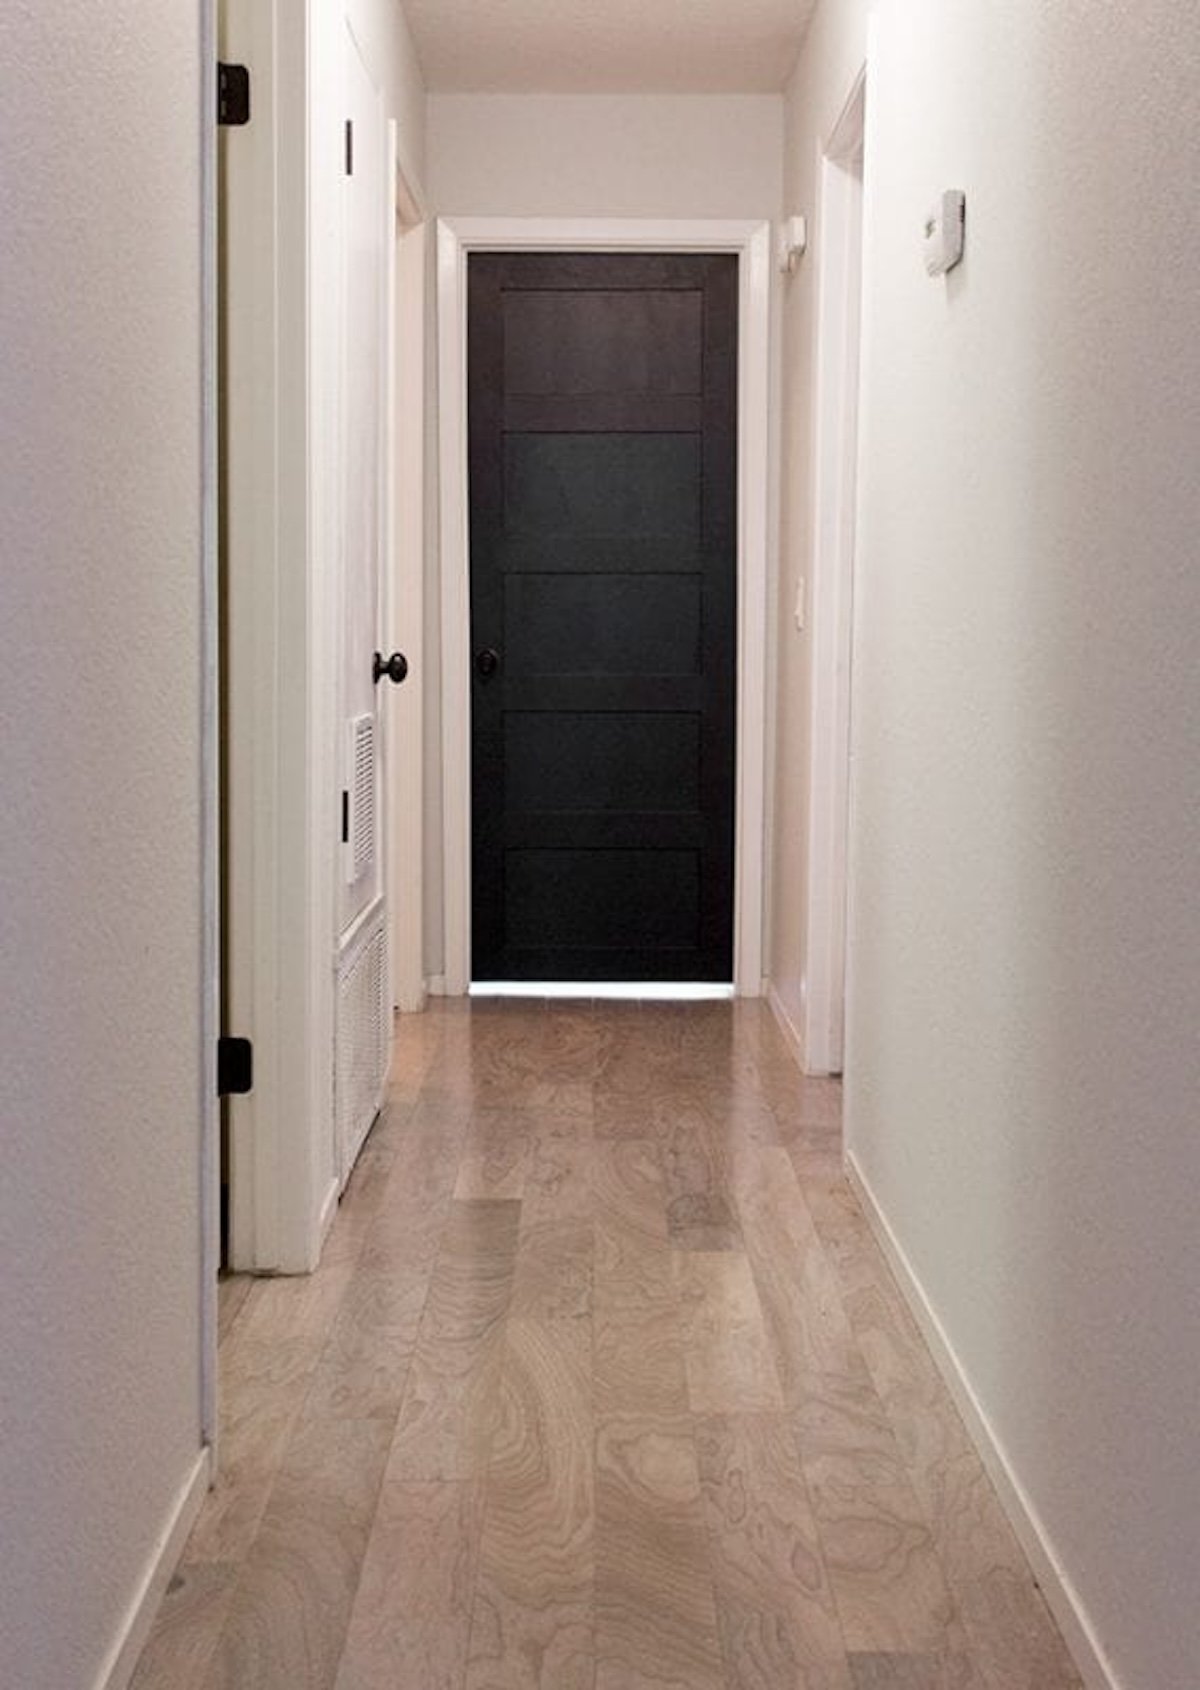
I’ll be converting all of the doors eventually. This hallway needs some loving, I know. One step at a time.
It’s extra lovely dressed up for the holidays…


What do you think? If you have $14 lying around and a free afternoon, I promise you can tackle this yourself! No professional helper needed. And if you don’t have old flat doors to start with, they are readily available at places like ReStore, thrift stores, Craigslist or your local Facebook buy & sell groups (people often give them away). So worth the effort for something you can enjoy in your home forever.
I hope this tutorial can help inspire and motivate those of you out there who feel stuck with your existing outdated doors. There is hope, and it’s so much cheaper and easier than you think!
Head over to my blog for lots more DIY inspiration and projects—and make sure to stop by the DIY Projects page for all of my tutorials, ranging from easy wall paneling to an inexpensive fabric tufted headboard, a rustic sliding barn door and more!
And as always, catch me over on Instagram, Facebook and Pinterest to see what we’re currently up to!
—————————-
Thanks for sharing with us, Jenna! Such amazing style from humble beginnings.
Click over to Jenna Sue Designs to see Jenna’s beautiful homes (all 3 are lovely!) and her awesome DIY skills on projects big and small, like clever and easy bedside shelves and a beautiful kitchen ceiling.
More Slab Door DIY Projects
- Turn a Slab Door Into a Wood Barn Door for just $25
- How to Make a Flat Door Look Like a Paneled Door
- DIY Closet Doors Updated with Molding Trim
And more from our #ShutTheFrontDoorDIY DIY Door Projects:
- Build a Custom Back of Door Shelf for Storage
- How to Add a Glass Pane to a Hollow Core Door or to a Solid Core Door
- 35 DIY Barn Doors + Rolling Barn Door Hardware
Lorene has been behind the scenes here at Remodelaholic for more than a decade! She believes that planning projects and actually completing them are two different hobbies, but that doesn't stop her from planning at least a dozen projects at any given time. She spends her free time creating memories with her husband and 5 kids, traveling as far as she can afford, and partaking of books in any form available.


Wow, awesome project!
Thanks again for letting me share my projects! Hope it can bring some inspiration to others 🙂
We looove your doors, Jenna!! Thank you so much for sharing with us!
Thank you so much for this post! I have a house full of these flat hallow core doors and I have been wanting to change them for a LONG time. I am definitely trying THIS instead of buying new ones. Thanks so much!!!
You’re welcome!
I hadn’t even thought of using plywood instead of 2 by 4s. Thanks, thanks, thanks!
wow! I love the update of your old door! we have the cheap-o hollow doors all throughout our home and I despise them! I was thinking of just purchasing new doors and that obviously would be very expensive. I love this alternative! I think this project is something my hubby and I can do together 😉 Thank You for sharing your creativity!
This is great! New doors are on our wish list, but not in the budget. Like all my DIY projects, my husband will be skeptical, so I’ll do a door makeover when he isn’t home and he’ll just come home to the awesomeness. 🙂
One questions: Do the hinges need to be moved so the door closes flush with the wall?
Yes, you will need to notch out the 4″ strip that lies on the hinge pin side of the door, you will want to do that before you apply the strip and will most likely need a jig saw for that. Your also going to need a drill to screw on the hinges once complete, because the screw holes won’t be in the same place as before.
Love the look! We bought new doors to update our house when we first moved in, but didn’t realize you couldn’t take a door off and put a new one on and it fit perfectly. Needless to say we returned the doors. This will be a much better option for us and our boring slab doors. I am also curious if you had to move the hinges?
Do the hinge placements need to be changed?
Wow! I adore five-paneled doors, but can’t afford to replace all mine. Thanks so much! What are the dimensions of the cuts that need to be made to the plywood to create the panels?
Jamye, the cuts will depend on the specific dimensions of your door, so measure twice, cut once 🙂
This link is not working, and I sure would like to see it.
Click here to go to the next page and see how to make a paneled door from a flat door for just $12!
Read more at https://www.remodelaholic.com/5-panel-door-flat-hollow-core-door/#kTmEeiIjSzYTv8tt.99
Hi Carine,
Sorry about that! I’ve updated the post so the link is working, and here is the correct link: https://www.remodelaholic.com/5-panel-door-flat-hollow-core-door/2/
I have been to my local Lowe’s and Home Depot, neither one will cut the quarter inch plywood. They say it’s a safety issue. Any ideas?
Love this! I know the spacing depends on your door, but how wide did you have your strips cut?
Oops! Just re-read and saw the 4” strips! Thanks!
Glad you found the info! 🙂 Send us pictures when you’re done!
Mahalo for sharing this idea. I will be doing this very same project starting next week. Can you tell me how this impacted the installation of the door knob. How did adding 1/2 inch to the door impact the installation of door knob? Did u use a spacer?
Okay, you have just saved me. My handyman declined on my project request to replace the old ugly brown wood hollow core doors with updated ones (saying they are too temper-mental to get a good fit). What’s a girl to do? The rest of the house has been completely remodeled except for doors and trim/baseboard.
And then the heavens opened and the angels began to sing ‘Ahhhhhhh’. I will definitely be doing this project. Thank you, thank you for being brave, going for it, and sharing it with all of us!
Do you think I need to TSP or something on the brown wood doors before painting them white? Or a light sand?
I did this to my bedroom door however ran into a problem putting the door knob back in because the thickness of the door changed. Did you run into this problem & if so what was your solution. Our door is now 2″ thick & standard door knobs do not accommodate to that thickness.
I have the same question about the door knobs. Do the old door knobs fit the door that’s 1/2 inch thicker?
Since adding the panels made the door thicker, did you have trouble with the door knob fitting?
Hello, I’m so happy that I found your posting. I’ve been wanting to replace the doors in my home but was worried about the expense. This would be a perfect project for me. Thank you for sharing. When I get around to this project, I’ll post my pics.
We can’t wait to see! 🙂
That veneer you use isn’t cheap. Decent glue isn’t cheap. Decent stain and paint isn’t cheap. Not to mention to make this look really good the prep time, detail orientation, and finishing process needs to be painstaking.
Meanwhile you can get a really nice, solid wood actual new mission style door like this for about $110 each, already mounted in the frame. It is also not hard or expensive to just go get a vintage door from an architectural salvage place. There is no universe where this project is worth it. The end product is just vastly inferior to the real thing for the $$ and time invested.
Love your post, however I would like to know the spacing you used. There is no mention of it that I saw. Thanks!