Build an Organized Pegboard Tool Cabinet and Simple Workbench
Tools. Power tools, hand tools, random tools — we love them all! But when it comes to keeping them and their surrounding workspace tidy… we sometimes fail. We do try! We’ve shared tips for organizing your garage, and ideas for making a tidy and pretty workbench area, and we are head over heels in love with this pegboard tool cabinet and workbench by our guest, Maria:
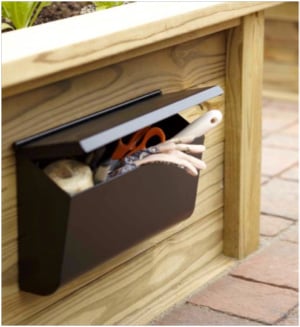
We love organized spaces, especially areas like garages that tend to accumulate clutter. Sometimes taming the clutter is as simple as using an ordinary object in a new place, like this mailbox gardening tool organizer (via Lowe’s Creative Ideas)
or reusing something that you already have around, like this pallet turned gardening tool organizer by Our Little Acre:
And sometimes a garage needs more dedicated help, from some pegboard and power tools and a little bit of creativity, like this portable tool organizer by Mom4Real…
DIY Pegboard Tool Cabinet and Workbench
by the lovely Maria
Hello fellow Remodelaholic readers! I am very excited and honored to have my project featured on one of my favorite sites. I have a blog where I post about some of my projects pretty infrequently (in Hungarian, as that is my first language). You might like the one where I created a pretty big wall art from $35 trying to copy an $800 Horchow piece.
We (my hubby and I) just bought our so called “track house” in March, 2013 that we have been trying to make our custom home. One baby step at a time… We live in the hot Las Vegas desert, so summer is not the time for any kind of garage projects. As soon as the weather cooled down, my palms started to itch for some power tools but the place was a mess. I needed some neat, organized space where I want to do some DIY’s. So last week we put together a simple workbench and a pegboard organizer for the tools in my garage and created my project corner:
So here it is, how we made it:
BEFORE…Who would wanna do projects here, right?
So we started… We planned the height of the bench to be 36″, the length 92″ and the width 24″.
I had Home Depot cut the 2×4’s for me, but I miscalculated (that is never fun)… so we had to correct the size of the cross bars…
 |
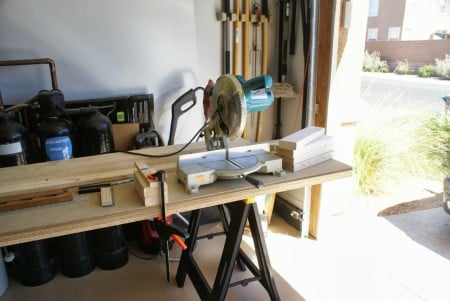
| We grabbed the chop saw and jumped right into it… |
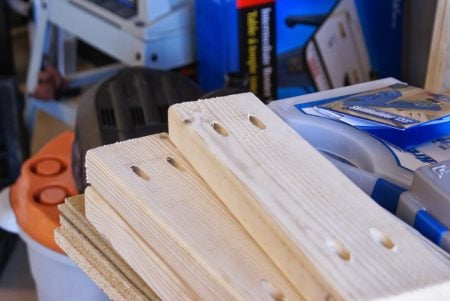
We used our beloved Kreg jig for joining the 2×4’s. I think this tool was one of our best investments…
 |
| Oszkár, the inspector is checking on us, as always… |
Then we needed to cut the bottom shelf to size. I used the router to cut out the corners for the legs.
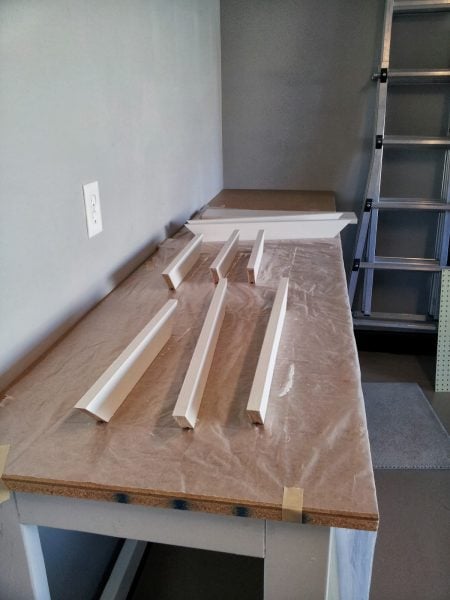
Painting followed… When our neighbors moved out, they wanted to throw away this bookshelf that I saved and now painted from black to white… Now that’s a pain….used up a lot of primer…
Now all we needed to do was to make a 1×2 frame for the pegboard and hang it on the wall… But DH came up with an idea to build a boxed frame instead, That was the best idea… like… ever! From there we went to boxed frame with shelves to boxed frame with doors, then to sliding doors. Well it turned out to be a bigger project than the workbench itself. LOL We looked for an inspiration piece and found this on ShopNotes. Exactly what we needed:
I cut 2 feet off of both and used the 6′ long ones as the length, the 2′ long ones as the height.
3 sides were screwed together then we slid the pegboard into the groove . The 4th side was secured in place after that.
This is how they turned out:
Touch up…
Putting the shelves in…
Placing the doors into the grooves aaaaand: they FIT! And they slide! And they are perfect!
Mounting it on the wall:
I bought a whole lot of plastic/glass storage containers in a dollar store and 3 cans of spray paint and here she is:
The doors slide all the way to either side of the box without resistance. I also wiped the groove with some candle wax so it slides like hot knife in butter 😀
I. LOVE. IT!
The only boo boo is that (as it was pointed out to me quite obviously by DH) that I messed up the measurements for the doors so when they are “closed” there is a 2 inches gap between them… Oh well, but I know not to EVER make a mistake like this again 😉
This project did not break our budget. The table was more expensive than the cabinet. Here is a list of materials:
Table:
- 5 2″x4″ premium doug fir studs @ $3 each = $15
- 1 4’x8′ sheet of particle board @ $18 = $18
- 1 4’x8′ sheet of 1/4″ hardboard @ $17 = $17
- paint and primer I already had
Total: $49
Cabinet:
- 2 1″x6″ x 8′ pine board @ $5 each = $10 (box frame)
- 1 1″x4″ x 10′ pine board @ $5 =$ 5 (shelves and devider)
- 2 1″x4″ x 8′ primed pine board @ $4.60 = $14 (sliding door frame)
- 1 4’x8′ tempered pegboard @ $ 18 = $ 18
- Miscellaneous accessories @ 20 = $ 20
- 3 spray paint cans @ 3.50 each = $10.50
- peg hooks – already had = $0
- paint and primer – already had = $0
Total: $ 77.50
Finished dimensions for the cabinet:
- 6′ x 2′ x 6″ deep
- doors are 17 1/2 ” x 23 5/8″ (should have been 17 7/8″ so there are no gaps between the doors when pulled into the center)
- shelves were cut to 16 3/4″ (should have been 17 1/8″ if doors had been 17 7/8″) x 3″
Garage corner transformed for $126.50 YAY 🙂
All materials were bought at Home Depot.
Thank you for taking the time and reading my post. I hope you guys liked the project and find the tutorial useful.
Maria 🙂
Maria, we LOVE it! Functional and pretty — love the colors you chose!
Pop on over and pay Maria a visit and see what else she’s been DIYing!
Lorene has been behind the scenes here at Remodelaholic for more than a decade! She believes that planning projects and actually completing them are two different hobbies, but that doesn't stop her from planning at least a dozen projects at any given time. She spends her free time creating memories with her husband and 5 kids, traveling as far as she can afford, and partaking of books in any form available.


Thank you for the feature, Lorene and Cassity! :)) I am honored 🙂
Maria, you are very welcome! It turned out nice!
Beautiful job! I want to get started on ours! I just need to add a router to my tool collection now;)
This is such an amazing little spot! It makes my organization loving heart very happy. I think we need to do something along these lines instead of the “dump it all in a giant tote” approach!
Well done. My dad would love a project like this 🙂
If I tried to make that I’m sure mine would have a loooot more than one boo boo…you could add a piece of wood to cover the gap that connects to one door but overlaps the other. But I think it looks awesome and would love something half as nice for my garage!
Fantastic! Looking great and so simple to make! I loved the jig too 🙂
If you hang a level down the strip where there is the gap between the doors, then the gap may actually feel planned into your design. The pretty green level liquid may just give a little splash of colour right in the open gap…
I love this cupboard that you made. It is just exquisite and very well conceived. Congrats to you and your husband. Maybe I can aspire to something like this one day.
I have peg board behind my workbench an need more storage, but I have used all my available wall space and this is just what I need to add more storage. Great idea and great job!
Can you clarify how the doors slide. I see the groove in the case, but can’t see what is on the doors that fit into the case allowing the doors to slide.
The doors slide because they sit in the groove. The whole door. The with of the groove is 3/4 inch, so the 3/4 inch door fits right in. The size of the door {height} is bigger than the box, the upper groove is deeper than the bottom, so inserting the door: insert upper edge of the door into upper groove, lift it up completely, because of the sizes, the door now fits in, then let the door down into the bottom groove, and because of the groove sizes, the bottom of the door is held by the bottom groove and the top of the door is held by the upper groove. For eg. the door is 1/4 inch bigger than the box. On top you make a 1/4 inch deep groove, on the bottom, make a 1/8 deep inch groove (both 3/4 wide). when putting door in place, insert door into upper 1/4 inch groove, so now bottom fits into box. then let it down into 1/8 inch groove and that way the door is held by 1/8 in groove on bottom, and also by 1/8 inch (that’s how much it went down) in the upper groove. Hope that helps, I am having a hard time explaining. 🙂 let me know if it is still not clear 🙂
Would you please explain how you mounted the cabinet to the wall. Thanks!
A cabinet lengthy 1×2 was cut in an angle lengthwise. Then one part is secured to the cabinet, the other one to the wall, screwed into studs. The one on the wall has the “slope” going towards the wall, in the cabinet it’s the mirror fitting part, so basically it is just hung on the wood track, removable any time
This is called a French cleat. It’s my favorite. It has lots of benefits:
1) Holds heavy loads
2) Can go into studs, independent of what’s being hung
3) If cut shorter than the cabinet, you can slide it to get it perfectly centered.
Thank you for the info!
Thank you for sharing this amazing project! It looks great, we just had to feature it! We hope you are as excited about the feature as we are, but if not let us know and we’ll take care of it!
Thank you for the feature and for letting us know! Love your site!
Love this design…can you give me detail on how you mounted the box to the wall. Thanks so much!