Update a Plain Kitchen Island or Peninsula with Planks and Corbels
Kitchen islands are one of my favorite projects to browse — so many shapes, so many styles, so many great features, and it’s pretty easy to build a freestanding island or update a builder-basic plain kitchen island. Our guest today gave her kitchen peninsula some great style and character to match the rest of her clean white coastal kitchen:
add beadboard panels and corbels
give it some inexpensive board and batten style

use old fence boards to add some rustic style


How to Update a Plain Island or Peninsula with Planks and Corbels
by Krista of The Happy Housie
Hello readers of Remodelaholic!
I’m Krista from The Happy Housie and I am so excited to be here today sharing an upgrade that we made to our kitchen during our recent renovation by adding some beautiful planking and corbels to the peninsula.
As I said, I blog at The Happy Housie and I called my blog this because I think of myself as a “housie” (think foodie but for houses). I love all kinds of house related projects and pursuits from DIY to crafts, organizing, sewing, and upcycling old pieces I find at the thrift store. Our home is situated on a beautiful lake making summer, by far, our favourite season of the year; though the crisp, clear days of fall definitely come a close second. I recently shared our Fall Home Tour as well as our complete kitchen reveal and source guide. This kitchen renovation seemed to stretch on forever and ever and I am thrilled to have it finished. One of my favourite finishing details has to be the planking and corbels that we added to the peninsula, which is the project I am sharing with you today.
I still can’t quite get over what a difference this simple {and inexpensive} little detail made to the overall look of our kitchen – it truly took it from builder basic (and boring) to custom and fabulous. I have always dreamed of a white kitchen. I love the classic simplicity of white shaker cabinetry and white subway tile and knew I wanted white countertops as well. But once all of these had been installed the kitchen felt a little bit too white. Too shiny. And kind of boring.
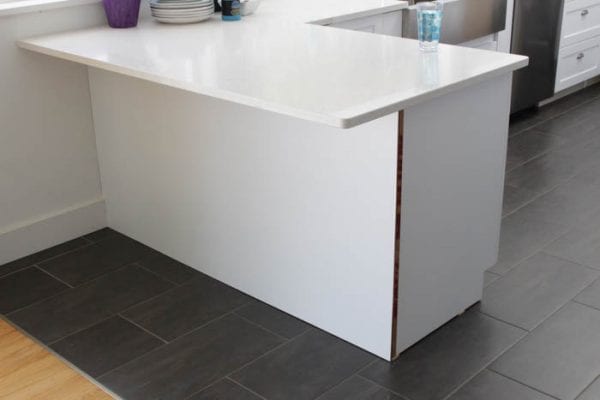
Here is what we started out with…
I’m a huge fan of adding interest to a space with lots of colour and texture so I knew something had to be done to take our kitchen from white builder-basic to customized for us. We decided to add a pop of my favourite colour (watery aqua blue) to both the DIY hook fan that we had built as well as to the peninsula. First things first: it was time to add some planking. I love MDF planks: I had done them on a feature wall in our boys’ bedroom the previous year. It gives such a casual, beachy feel to a space and adds tons of texture to a blank wall (or peninsula).
To plank this baby out, we bought one 4×8 sheet of 1/4″ MDF and had it cut into 6″ strips. It worked perfectly with the length of the peninsula – so that we only needed the one sheet to clad the entire back and side. Woot woot! That came in at around $20 Canadian and is probably even less expensive in the US.
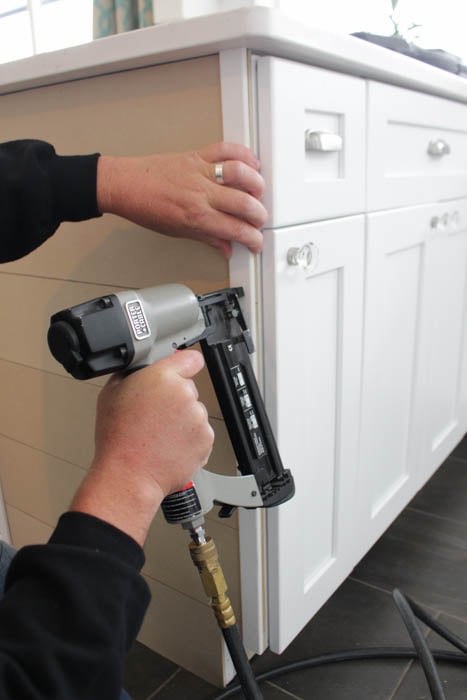
We decided to begin our planking at the base of the peninsula. We made sure it was straight and level and then began by nailing it directly into the back of the cabinet using an air compressor nail gun. You could also glue it on and use a regular old hammer and nails. We opted to not glue in case, down the road, we change our mind about the look and want to remove it. Glue could make that a fairly messy process (and I am a little bit fickle…).
In the before pictures of the peninsula, above, you can see that the back of our peninsula actually has a sheet of plywood attached. This was perfect as it meant that the nails go directly into the plywood making the nailed on planks nice and tight and secure.
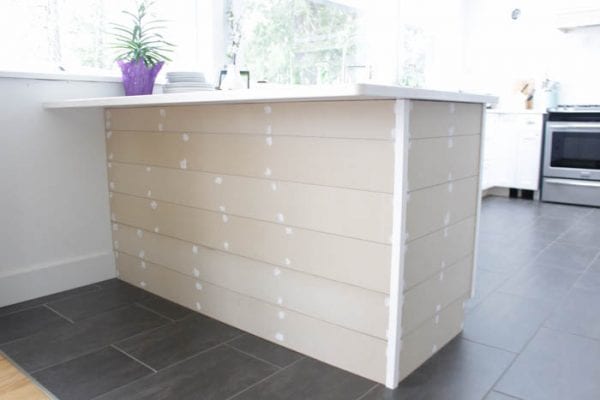
To keep the planks the correct distance apart we opted to use pennies in between them while nailing them up. I have seen people use a dime as well, which would give you a slightly smaller gap. It is really the tiny gaps between the planks that help create a feeling of texture in this application.
The whole planking thing actually goes super quickly…
We added planks to the side of the cabinet as well, and just cut down the lengths we had had cut at the hardware store using our mitre saw. Once all of the planks were installed we capped the corner off with a piece of corner trim.
For the other edges, we decided to balance the look of the corner trim by adding a matching flat piece of trim to the edge closest to the cabinets as well as to the edge closest to the far end of the peninsula.
Probably the longest part of this job was the paint prep: you need to fill in all the nail holes, then sand it smooth once dry. The MDF was treated to one coat of primer, followed by two coats of paint {the colour is called Wedgewood Gray by Benjamin Moore}.
Though the peninsula looked great already, we wanted to beef up the look even further. We decided to add some more interest and drama with these gorgeous corbels. I ordered them from Osborne Wood Products: they are the Boston Bar with Beaded Edge in paint grade (soft maple). [Remodelaholic note: you could also get fancy and make your own vintage-inspired curvy corbels here]
The installation of these was slightly tricky.
The hardware on the back of them is the type that would require you to slide the bracket over the screw and then slide it down into place. If we had been organized and planned ahead, we could have installed these prior to the countertops being installed.
But once that quartz was in place, there was no way to install them using the original hardware. So, back to the thinking-board. Instead; we decided to pre-drill with a drill press directly through the slimmest part of the corbel and then to drill it out slightly so that we would be able to countersink our screws…
After the pre-drilling, we figured out where exactly we wanted them placed, and installed the screws far enough in so that they would create a mark on the planks where the screws would go in.
This mark became our guide so that we knew where to predrill through the planking and into the plywood. The last thing we wanted was to split our MDF plank at this point in the process.
To ensure the corbels were firmly attached, we added some adhesive to the back and top of the corbels…
And then put them back into position and screwed them directly into the peninsula.
All finished!
And after a little more painting…
Quite a difference, I think…
Time & Budget Breakdown:
This project took about about an hour for planking, another hour for installing the corbels, and then a couple of additional hours for filling/sanding/painting two coats of aqua blue. It was quite an easy project to complete, and while we used the nail gun you could easily do it yourself with just a hammer and nails and/or construction adhesive. The corbels were ordered from Osborne Wood Products and the paint colour is Wedgewood Gray by Benjamin Moore.
Thanks again for having me over at Remodelaholic today! I’d love you to pop by and visit me at The Happy Housie: come on by and check out the rest of our completed Kitchen Renovation Reveal.
Lorene has been behind the scenes here at Remodelaholic for more than a decade! She believes that planning projects and actually completing them are two different hobbies, but that doesn't stop her from planning at least a dozen projects at any given time. She spends her free time creating memories with her husband and 5 kids, traveling as far as she can afford, and partaking of books in any form available.


Thanks so much for having me over today to share this project- it is one of my favourites from our kitchen renovation!
Thank you for sharing your beautiful kitchen with us, Krista!
Love it! I have a door on mine on the left side. There is a little storage nook. Any suggestions? Just plank over the door as well and make it functional?
Love your ideas. Working on my island now. You gave me some great ideas. I am using General Finishes gel stain over golden oak. It is a great product . Just need to beef island up using your ideas. Thank you.
What is the name of that color??
We have just finished planking our peninsula..Would you recommend rolling and brush painting?
I love this project! It is the best example I have seen so far on Pinterest. What is the name of the color? I have to have that shade of teal. and what sheen was it?
The MDF was treated to one coat of primer, followed by two coats of paint {the colour is called Wedgewood Gray by Benjamin Moore}.
Did you paint the drawer/cabinet door side?
This kitchen and island are so pretty! In a larger picture of the kitchen, it looks like the walls are also painted blue. Is the blue on the walls wedgewood gray?
Hi Amy, isn’t it lovely! Krista did a great job. If you click over to The Happy Housie, Krista has all the details of her kitchen — there’s a link in her intro to the kitchen reveal/sources that will have the info you’re looking for.