Easy DIY Wooden Christmas Stars, 3 Different Ways, from One Board
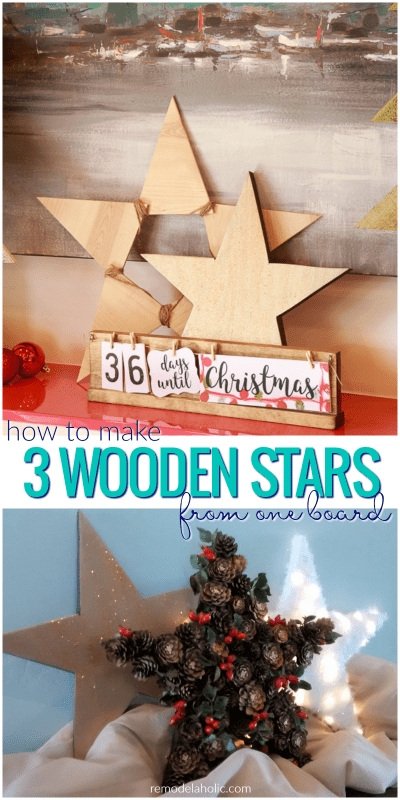
It can’t be a Creative Christmas without some STARS! Krista built not just one star but FIVE to share with you, and today we’re starting with these DIY wooden Christmas stars, made from just one board and made easy with a simple tool you probably haven’t used since high school. Krista made the wood star base and then decorated it 3 different ways for a trio of stars that will look great on your mantel, on a shelf, hung on a door or wall, or propped up just about anywhere, including tucked into our pallet wood box:

Here’s Krista with all the details for making your own wooden Christmas stars — all 3 of these from just ONE board! And if you missed it earlier this week, you must check out Krista’s brilliant 3D wood Christmas trees, too.
How to Build 3 Wooden Christmas Stars from One Board
I am also going to show you how to use this protractor (stolen from my kids homework drawer) to outline stars quickly!
The beauty of learning to use the protractor is that you can make your star as big or as little as you’d like. First you need to know that in a 5 point star each point is a 36 degree angle. From there it’s as easy as marking angles and drawing lines.
These stars are also technically a one board project. I cut one 1x8x8 pine board in half, then glued and clamped it together. So you can make these 3 stars for $10-12 in lumber depending on your local prices.
One board, three stars, lets get started!
This post contains affiliate links for your convenience; learn more here.
Supplies
- 1 – 1″x8″x8′ pine board (cut in half and glued together to make a 1″x16″x4′ board)
- Paint
- Stain
- LED lights
- Sparkly yarn
- Pine cones
- Holly berry sprigs like these (or red berry sprigs like these)
- Glitter
Tools
- Jig saw
- Protractor
- Pencil
- Paint brushes
- Tape measure
Easy Wooden Star Base Directions
Step 1
Mark 3 squares on your board. For ease of cutting, cut each square from the total piece.
Step 2
Measure and mark center line on each square.
Step 3
Using your protractor, mark a line 18 degrees from center on both sides of the center line, or if you don’t have a protractor measure 2 1/2″ from the outside corners. Then draw a line from the center to both marked points.
Step 4
Use your protractor again. Mark a 36 degree angle from both bottom points of the star, or measure 8 5/8″ from bottom corner to both sides. Then draw a line from those points to the new measurements.
Step 5
Draw a straight line across the open points of your star.
Step 6
Using a jig saw, cut out your stars!
I like to clamp my piece to the table as I make the cuts.
Glittery Wood Star

To make this glittery star, paint a gold base coat and sprinkle gold glitter on the wet paint. I like to sprinkle the glitter while the paint is still wet to save a few steps! If you’d like to see more of the wood grain, you can use this color washing technique, which we also used on our Christmas countdown board.
That other easy star will be coming to the blog soon, too, so stay tuned — subscribe by email or RSS!
Wood and Yarn-Wrapped Twinkle Star
To make the Wrapped Twinkle Star
Supplies
- Battery Powered LED lights
- 1 Skein of white shimmery yarn
- White paint
Step 1
Paint both sides and edges white.
Step 2
Gather supplies, and wrap LED lights around the star. I recommend testing your lights before wrapping the star with yarn! You’d hate to have to unwrap if your lights don’t work.
Step 3
After wrapping lights, begin wrapping the yarn. I tied the end of the yarn to the battery compartment on the back of the star. Then started by wrapping each point, arranging the lights into more desirable positions as I wrapped the yearn over them. Once the points are finished work across the middle in various directions until the star is completely covered, and you run out of yarn. Tied off the other end of the yarn, press the button and enjoy!
Holly Berry and Pine Cone Star
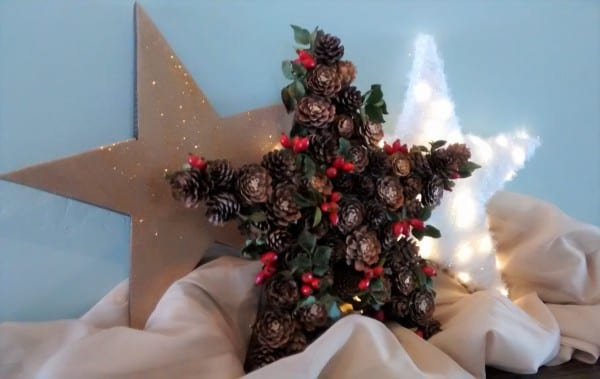
The final star takes a little more time, but looks great when you are done! You could also pre-wrap this star with lights if you’d like to make it twinkle too, like this viral-popular pine cone wreath from last year.
Supplies
- Stain
- Small pine cones
- Berry sprigs like these or these)
- Hot glue
- Hot glue gun
Step 1
Stain your star. I used a walnut stain I had on the shelf, and didn’t bother with conditioning the wood first.
Step 2
Begin in the center and hot glue your pine cones onto your star. I preferred the locations of the pine cones in a random pattern. If you like symmetry go for it!
If you look closely at my pine cones, you’ll notice something different about some of them. They look like roses! As I was collecting them from my beneath the pine trees I could only find a few very small pine cones. I did find a lot of very long skinny pine cones. So I decided to cut the ends off so I had the size of pine cones I wanted, but nature didn’t provide! When I cut the end off of my first pine cone, I noticed that the cut end was just as pretty as the end I planned on using. So I used the cut pieces as well!
Glue pine cones until your star face is completely covered.
I glued one pine cone down on its side on each point to keep the shape of the star.
Step 3
Next hot glue your berry sprigs (I collected these from beside an irrigation canal) randomly throughout your star.
Ta da!
What other ways can you imagine to finish these stars?
We have two other stars to show you (plus another wood Christmas tree)… take a sneak peek below and stay tuned — subscribe by email or RSS and follow along over on Facebook, Instagram , and YouTube with #CreativeChristmas so you won’t miss any of our new Christmas tutorials!
More DIY Christmas projects:
Standing 3D Wood Christmas Trees
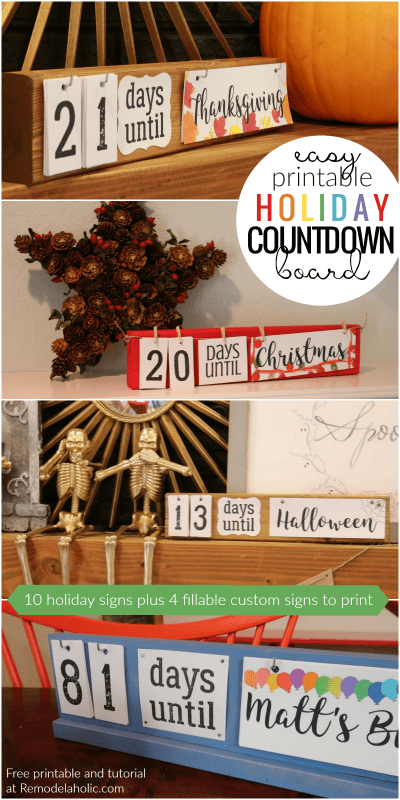
Decor and Gift Idea: Easy Printable Holiday Countdown Board
I'm just a girl who likes to build.


