The Best Gingerbread House Ideas and Tips from a Decorating Pro
Start a new family tradition or add something new to an old one! These gingerbread house ideas and time-tested tips and tricks for planning, assembling, and decorating your creation will help you along the way.
Here’s the Never-Fail Gingerbread Recipe and while you’re at it, try a Gingerbread Sugar Scrub or Chewy Gingerbread Cookies!
This post may contain affiliate links. See our full disclosure here.
Gingerbread House Ideas and Tips
For nearly thirty years, I’ve been making gingerbread houses at Christmas time. Small ones. Big ones. Red and green ones. Pink and blue ones. Ones covered only in frosting and ones dripping in candy canes and gum drops. Yours doesn’t have to be fancy, simply create based on your creativity and mood. You really can’t go wrong!
Keep in mind that homemade from-scratch gingerbread houses take time! If you’re using our gingerbread house recipe, you want to give it anywhere from a full day to even 2 weeks to dry out completely before you start building with it.
Once construction is under way, the icing takes several hours to dry, so it’s best to work in steps over a number of days. And if you’re buying a ready-made kit, the icing takes an hour or so to set up, just as it does if you’re building from scratch. In short, don’t rush this — enjoy it!
Gingerbread House Ideas: Where to get inspiration
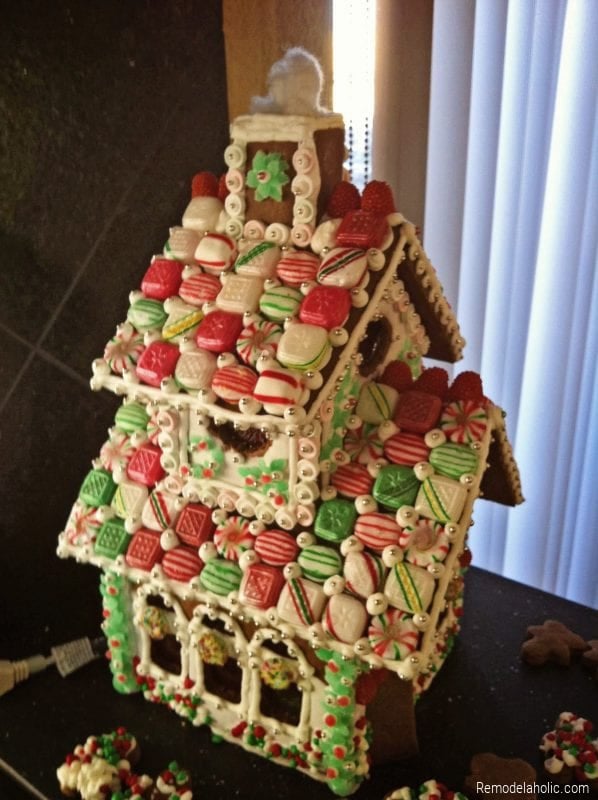
Inspiration is everywhere! In store windows, in magazines, on the Internet. And I’m not talking just gingerbread houses here, but anything that attracts your eye that could be translated in to a gingerbread creation. For example, the first time I drove by the house featured below, I just knew I had to make it into a gingerbread house. And so I did.
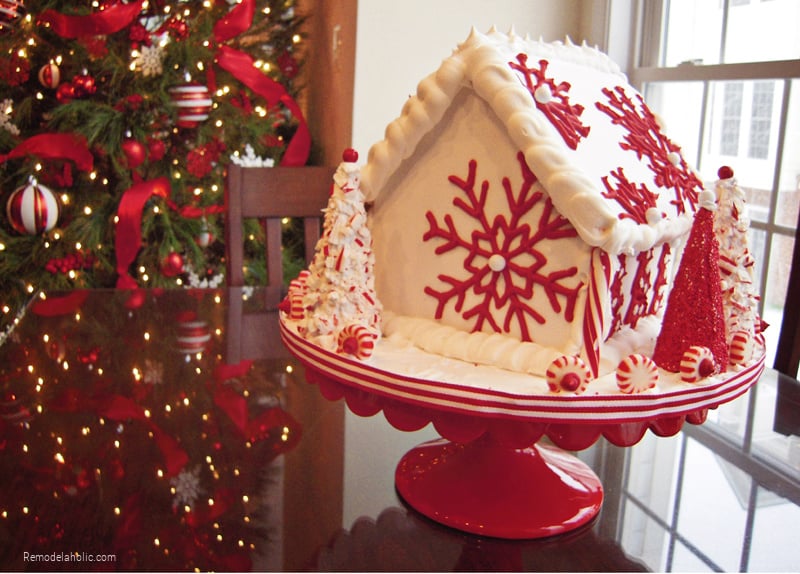
This red-and-white house below (and also featured above) was inspired by some wrapping paper I saw that had a white background with red snowflakes all over it. I loved it so much that I wanted it to be a gingerbread house! It’s one of my favorite houses of all time and yet it’s not terribly traditional. Think outside the box! Make your house what you want it to be!
Gingerbread House Ideas: Supplies
Gingerbread dough
You must have a reliable gingerbread dough recipe. Our Never-Fail Gingerbread Recipe has always produced great results for me. Cassity also has a family favorite recipe here.
A sturdy base
Heavy-duty cardboard or plywood works well. Cut it according to the projected size and weight of your gingerbread house.
If you plan to create landscaping surrounding your house, the base should be several inches larger than the footprint of your house. You’ll see here that cake stands, mirrors (with plywood beneath), and pre-purchased cake bases are all good choices.
Pattern or template
You might be able to freehand things, but a pattern or template for your house or church or train or whatever it is that you’re making from gingerbread will save time, stress, and frustration.
Search the internet or design your own. I’ve even used the pieces from a dollhouse kit as a template for a gingerbread house.
Glue (aka frosting)
The frosting “glue” needed to assemble your house is so important. I prefer to use royal icing: I buy Wilton Meringue Powder and add water and powdered sugar according to the recipe on the can.
But some people use a hot sugar syrup, which works, too. (I’ve even heard of people who don’t plan on eating the house who use a glue gun and hot glue sticks to get the job done—nobody can see the glue under all the frosting and candy and apparently it does a great job of holding your house together).
If you want to tint your icing different colors, you’ll also need food coloring.
Gingerbread House Decorations
Candy and sprinkles and edible delights of all colors, shapes, textures and sizes! I have made 2 or 3 gingerbread houses over the years decorated entirely with frosting, which can be beautiful, but more traditional houses incorporate candy into the design.
Just look at all these gingerbread house ideas to get inspired, or take a walk down the candy aisle at the store!
Gingerbread House Ideas for Features and Decorations
The sky’s the limit here. So many possibilities. Use royal icing as your glue to secure candy pieces, sprinkles, and whatever else your heart desires.
Stained Glass Windows
To make edible stained glass windows:
- Crush hard sugar candies (like LifeSavers) and arrange them in clusters (sized a little bigger than your window openings) on a parchment- or Silpat-lined baking sheet.
- Bake at 250 degrees F for six to eight minutes or until they run together.
- Allow them to cool, remove from the baking sheet and use royal icing to attach on the back/interior side of your window openings in the gingerbread.
Alternatively, melt the stained glass windows directly in your gingerbread house window openings by following the same steps as above, but instead of melting the candy by itself, put the crushed candy in the window openings in your gingerbread house walls and put everything directly in to the oven. The candy will melt to fill the openings and as it cools and solidifies, will self-attach to your gingerbread walls.
Photo credit: Lauren Comstock
Gingerbread House Roof Ideas
Layered Necco wafer candies (as seen below) make for a great tile-like roof. You can cover them with frosting to make them all one color or add sprinkles for dimension and texture or additional candy pieces for depth.
Other great candy roof options include
- crushed or whole Oreos (especially the mini size)
- shredded wheat or Life cereal (for the look of a thatched roof)
- squares of chocolate
- round candies like peppermints or Lifesavers
- gumdrops
- sticks of gum
- pretzels
- M&Ms
- marshmallows
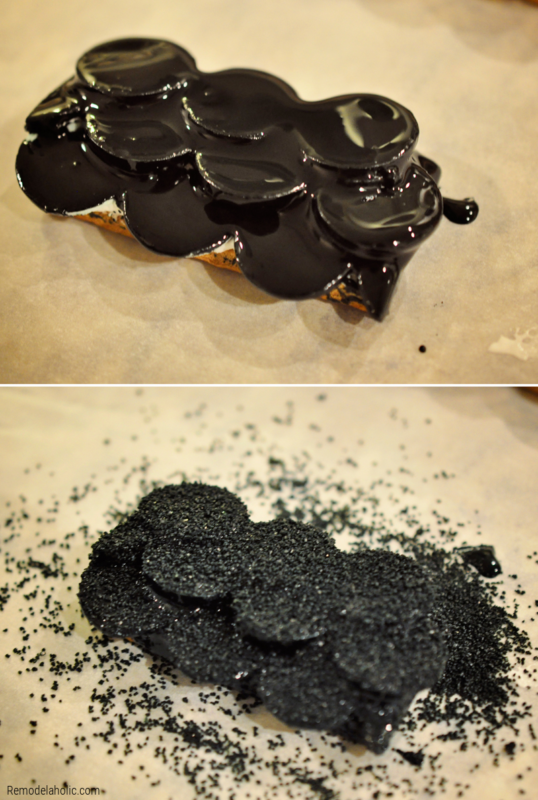
I’ve been making gingerbread houses long enough that I have a sixth sense for gingerbread inspiration that stays with me 365 days/year. For example, when walking down the Halloween clearance aisles at Wal-Mart, I spotted black decorating sugar for $0.40/bottle. I knew as soon as I saw it that it would add great texture and shimmer to a candy-shingle roof on a gingerbread house. I used the sugar on the Victorian-style house I built this year.
The picture below shows a section of roof covered in watered-down royal icing that I colored black with food coloring gel. The picture below that shows the shingle-like texture I achieved by sprinkling black sanding sugar all over it while the icing was still wet.
Custom Decorations and Snow
Royal icing works great for not only for ‘gluing’ your gingerbread house together, but for making custom decorations, as well.
Below, I used royal icing that I had watered down to about the consistency of Elmer’s White School Glue to make accents for the roof line of my gingerbread house.
I piped the designs out on parchment paper using a small, round piping tip and let them set-up over night.
Once dry, I carefully peeled back the parchment paper and peeled off the design, which I attached to my gingerbread house using more royal icing.
Pine Trees
The easiest pine trees in the world are those made out of upside down sugar cones. Cover in frosting, candy, and sprinkles. You can use different piping tips to achieve a wide variety of styles and effects.
Gingerbread House Ideas and Inspiration
In the pictures below, I’ve highlighted a few gingerbread house ideas to get your creativity flowing. All of the houses are the work of the very talented Mary Comstock and her daughter, Lauren Comstock Bishop. These ladies know how to decorate a gingerbread house! A great big “thank you” to both of them for permitting me to feature their lovely work in this post!
Intricate royal icing piped on with a tiny tip
Crushed candy canes for a textured roof
Yogurt covered pretzel stars for accents and steps to the front door made from scraps of gingerbread and adorned with mini M&Ms
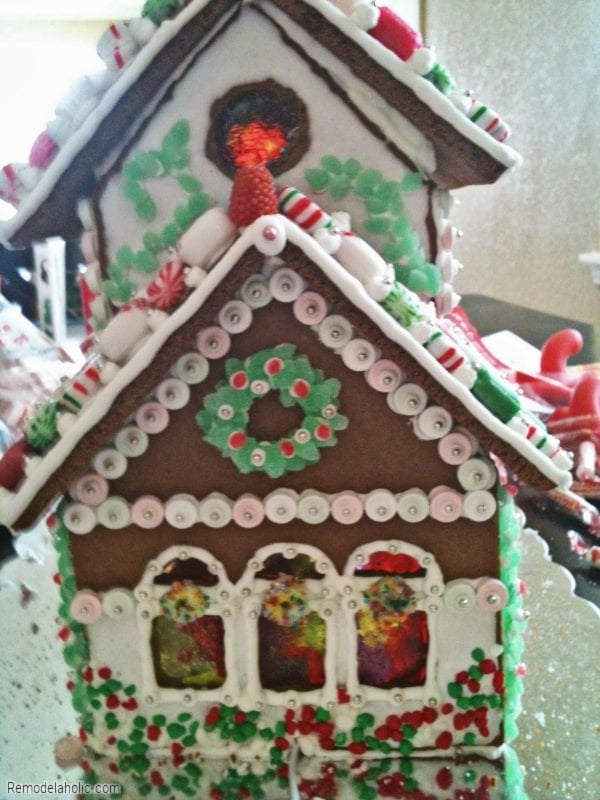
A wreath made from cut-up gumdrops and a marshmallow snowman (facing the left).
An A-Frame Scandinavian-Style gingerbread house with jellybean cobblestone walkway.
A cobblestone walkway running around the entire gingerbread house and the use of more than just red and green!
Black and white looks pretty, too!
A lighted house!
Before you assemble the house, cut a hole in the base to insert a battery-powered light or candle.
The house set diagonally on the base.
Hard candy roof with carefully placed dollops of frosting with silver beads.
Multi-colored stained glass windows
A gumdrop fence!
Only the upper half is covered completely in icing
Open windows and doors with the walkway extending into the house!
More Gingerbread House Ideas:
Decorated gingerbread houses can make great gifts! Just wrap in cellophane and put a bow on it. I’ve also made homemade gingerbread kits before as gifts, too. I stack the gingerbread house pieces on a base board along with bags of candy and tie everything up together in cellophane. Kids love it!
And, speaking of kids, let them in on the fun. When I was growing up, my mom and sisters and I would make two large gingerbread churches each Christmas. We’d work on decorating them together a little each day after school over a couple of weeks. With my own kids, I let them each have and decorate their own gingerbread house anyway they like. We have a tradition of decorating our individual gingerbread houses the day after Thanksgiving. We display them as a gingerbread village table centerpiece.
Enjoy this activity all year long – Halloween gingerbread is just as fun!
Trees with a few gumdrop leaves
Check out these holiday ideas, too:
We’d love to see your gingerbread house ideas — drop us a photo here or tag #imaremodelaholic on Instagram — and be sure to check out all our other Creative Christmas series projects, and holiday printables. Be sure to follow along over on Facebook, Instagram , and YouTube with #CreativeChristmas so you won’t miss any of our Christmas tutorials, recipes, and printables!
This article was originally published on Nov 25, 2015. Updated November 20, 2020
Jenny enjoys making life more beautiful in the details. For her, there's nothing more satisfying than figuring out how to get it done DIY-style! She dabbles in a little bit of everything . . . home renovation and decorating, graphic design, cake decorating and baking . . . whatever strikes her fancy at the moment. You're welcome to follow along with her DIY adventures on her Instagram account @turnip_greens_sweet_tea










I always set out with great ambition to make a super awesome gingerbread house, but then it always ends up looking something like this https://cf.remodelaholic.com/wp-content/uploads/2015/11/kid.jpg
Made me smile.
Jenny!!!!! I’m so happy you are getting the recognition you deserve for you amazing talents!
Melissa, you are much too kind! Thank you!
These are are just beautiful…send these to Pottery BARN!!! Love them
Thanks, Muriel! You’re awfully sweet!
Jenny’s artistic creativity is truly remarkable! How grateful I am that you are now having her contribute regularly to your website. She brings class, creativity, know-how, artistry, and easy-to-follow directions to her outstanding creations. IN short, she makes the world a more beautiful place!
I agree! We are SO glad to have Jenny and her amazing skills!
I think I’m going to try this! How much should I plan to spend on supplies from start to finish for a mid-size house?
You should totally try it! It’s a great holiday tradition that can be as simple or as fancy as you want it to be. If you buy a kit, you’ll probably spend between $10 and $20. It’s likely that your local grocery store or craft store starts selling kits around the week of Thanksgiving. If you’ll be making a house from scratch, most of the ingredients are pantry staples you likely already have on hand. Even if you don’t, you’re probably looking at under $20 to buy what you need to make the gingerbread. As for the icing . . . the meringue powder can be a little pricey—-I wait until I have a 50% off coupon for my local craft store and then use the coupon to buy the meringue powder. Just add powdered sugar and water to the meringue powder to make the royal icing you’ll need for the “glue” to put your house together. The cost of the rest of the house is up to you. If you want to use only icing and maybe a few accent pieces of candy, that’ll be cheapest. If you want to use a lot of candy, it gets more expensive. It’s up to you.
Wow, wow, wow! Thanks, Jenny, for bringing me Christmas delight with your amazing talent.
You are AMAZING Jenny McArthur!!!! You AMAZE me!!! BEAUTIFUL!!!!
You are AMAZING Jenny McArthur!! You AMAZE me!!!! Beautiful work!!!
These are tremendous! I was wondering how often you make royal icing if you decorate a little everyday. Does it last a few days if the pastry bag is kept air tight?
Hey, there, Cyndi! Thank you! I try to make only as much royal icing as I plan to use for that day’s decorating. While I’m working, I cover the bowl of royal icing with a damp towel (to keep it from drying out and forming a crust on top). And, I wrap the tip of my pastry bag in Saran wrap when I’m not using it, also to keep it from drying out. You’d want to do those things for sure if you were saving your royal icing to use the next day, but my first recommendation is to use what you make the day of whenever possible.