Stair Banister Renovation Using Existing Newel Post and Handrail
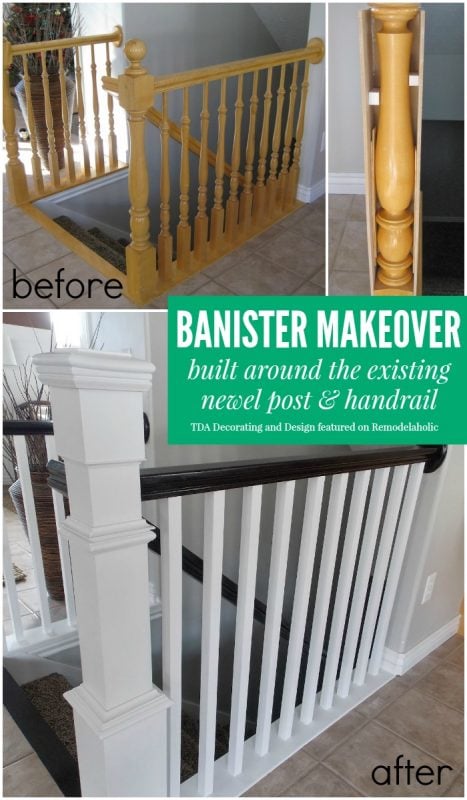
Need a banister remodel? If you banister is dated, and you want a new look without completely removing the old one, follow this tutorial to get your newel post updated quick!
If you like this post you might also like these top ten stair remodels, carpet to wood stair treads staircase update, or this painted wood staircase remodel.
I really love seeing the tutorials and projects we share here used in your homes. We poured so much love and energy into our stair remodel — I am just beaming that Trish took inspiration from it when she wanted to redo her builder-grade basic stair railing.
But, rather than remove the newel post like we did, she just built a new style newel post right around it! And then replaced the spindles, leaving the existing handrail. Talk about working smarter and savings some cash!
Here’s Trish to give you full dish on her stair banister renovation:
I want to start off by saying thank you to Remodelaholic for having me here today, I am so excited! My name is Trish and I am visiting from TDA Decorating & Designs.
I am a stay at home mother of four, and married to the most patient and supportive man who constantly puts up with my never ending projects and redecorating.
Over the years, friends and family would ask for my help in redecorating their homes, which led me to starting my own decorating business back in 2008. More recently, my interest in building things picked up which has allowed me to explore my creativity and save money in the process. My mother has even started calling me, “her little Gepetto”.
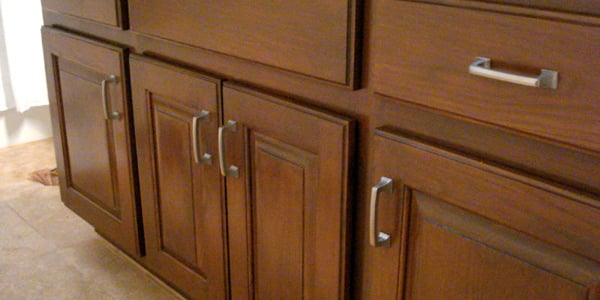
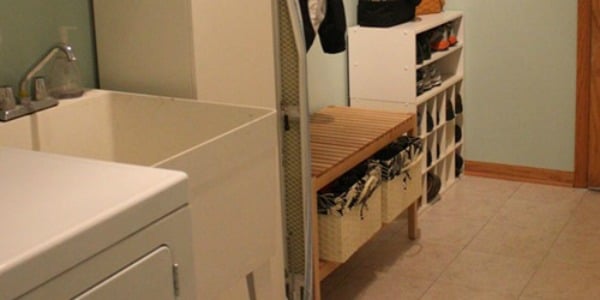
One of my very favorite projects to date is the custom cabinets I made for my laundry room here. All for only $200 dollars!
before — after
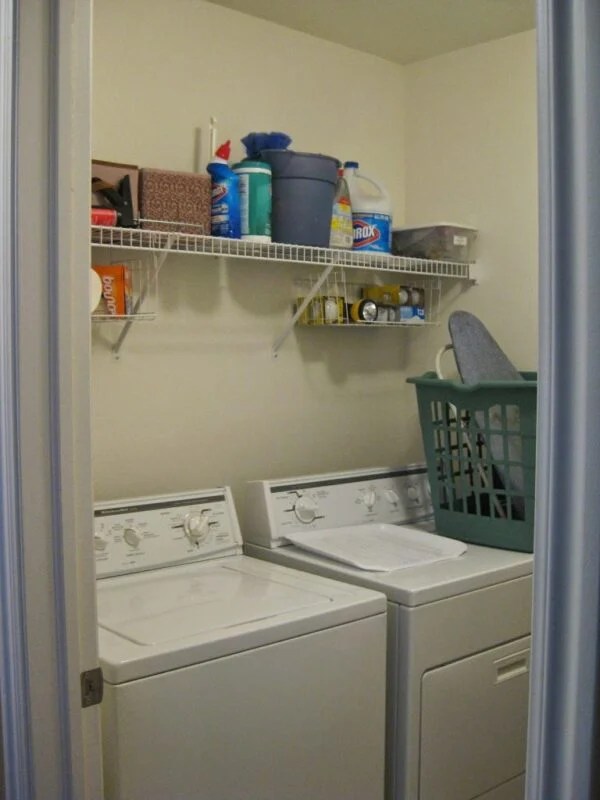
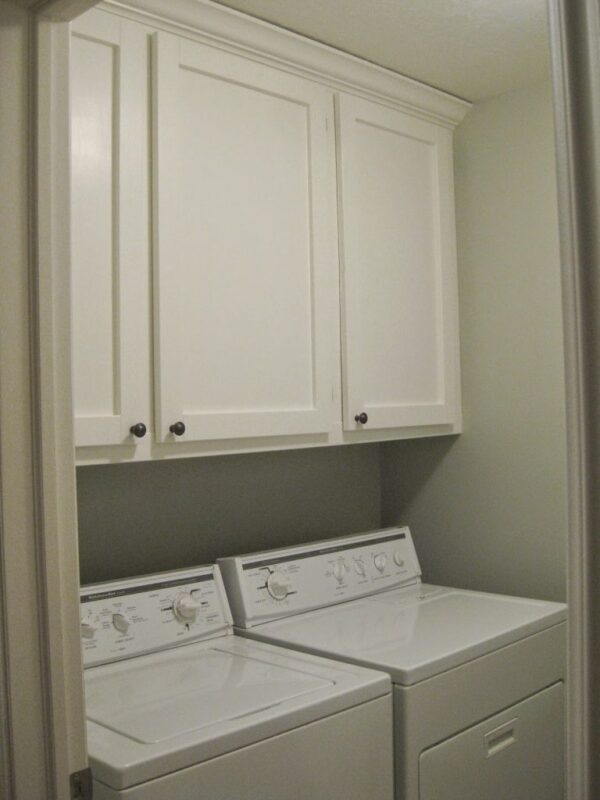
However, today I am excited to share with you my most recent project that has turned into one of my favorites as well…my stair banister makeover.
I had been drooling over Cassity’s Park House Staircase ever since I first saw it, and knew that was stair railing ideas she used was the exact style I wanted in our next house.
When we moved into our “new to us” old home in March, this was what our stair railing looked like:
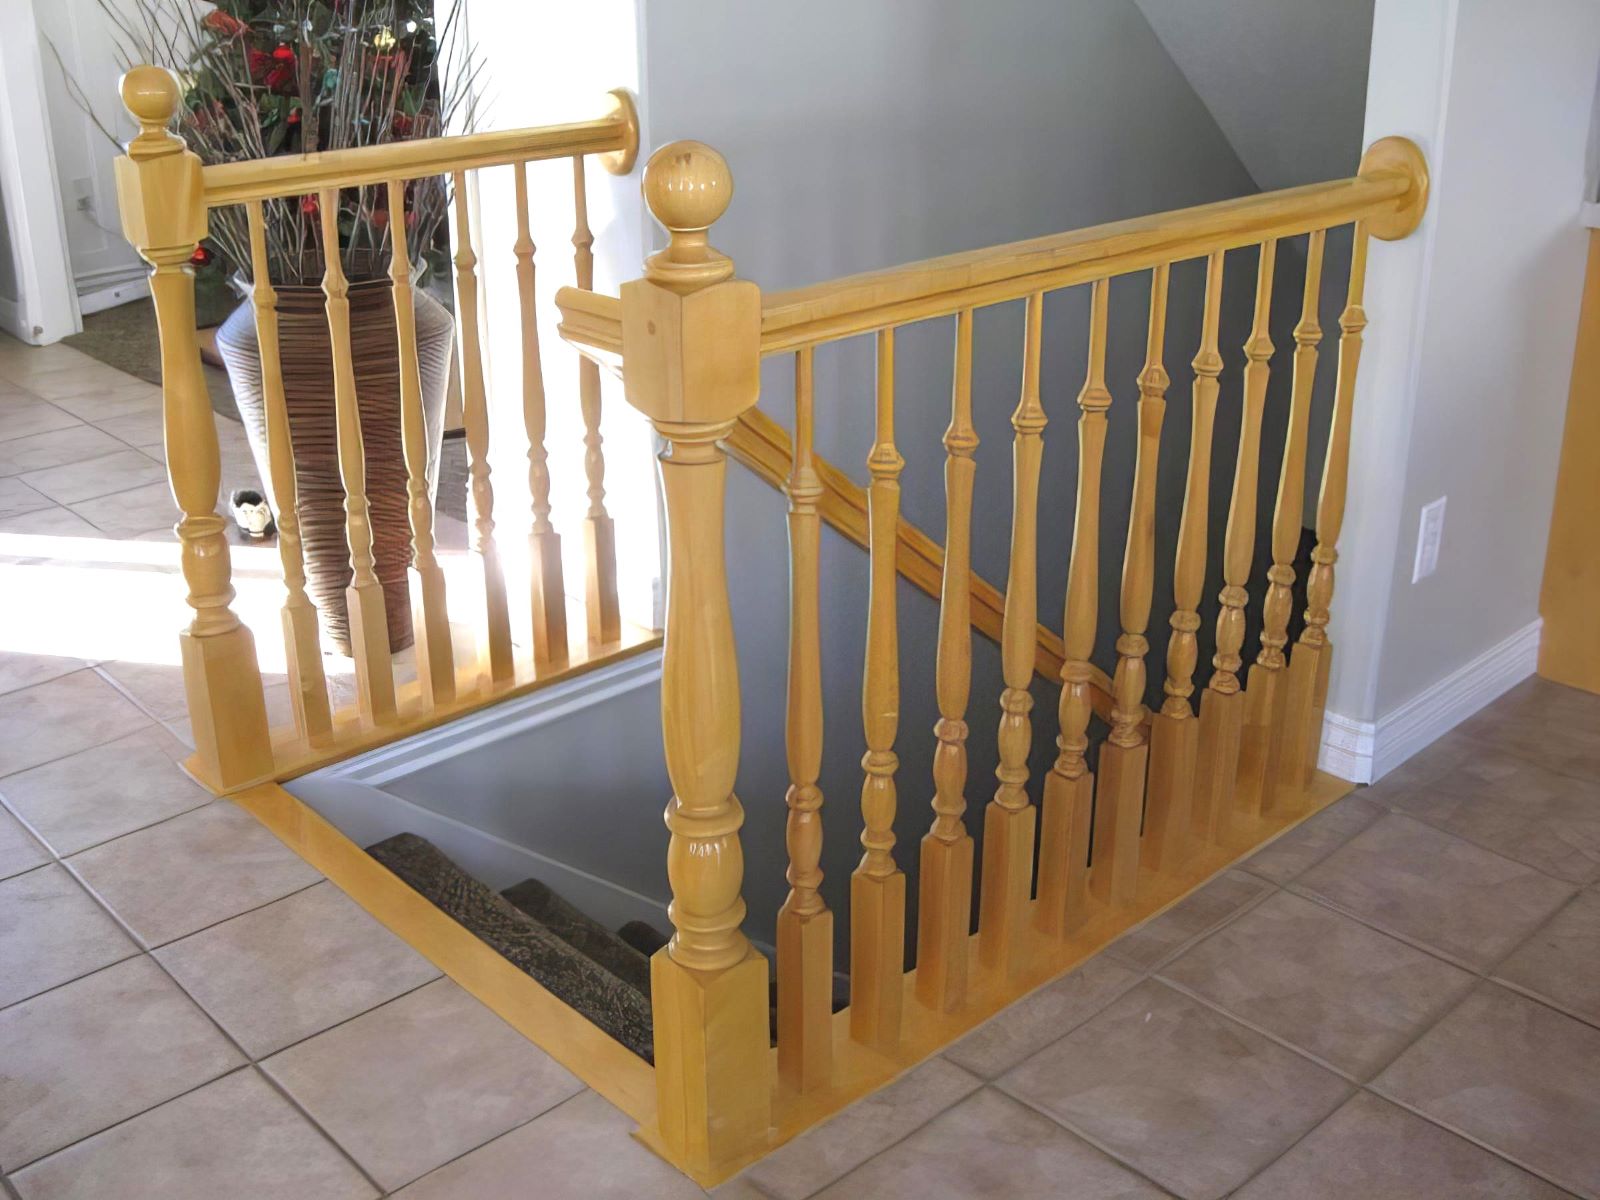
It definitely isn’t bad, just not the style I was hoping for, it felt very builder grade basic, and definitely not a modern design.
I had a contractor come and give me a bid for this short section of stairs. It was going to be $900 for two new craftsman style newel posts and square balusters.
With the remodels we were doing around the house, and the desire to finish our basement…there just wasn’t $1,000 around to throw into it. Not to mention, the price seemed SO high when I just knew there had to be a way for me to do it for much less.
I seriously stared at this banister in thought for months asking myself, how can I modernize this old banister? I knew I could build newel posts myself, or even buy them at Home Depot, but I just couldn’t find a reason to disrupt and tear apart this perfectly stable and secure wooden handrail that was already in place.
That’s when I got the idea to try to build AROUND the existing newel post.
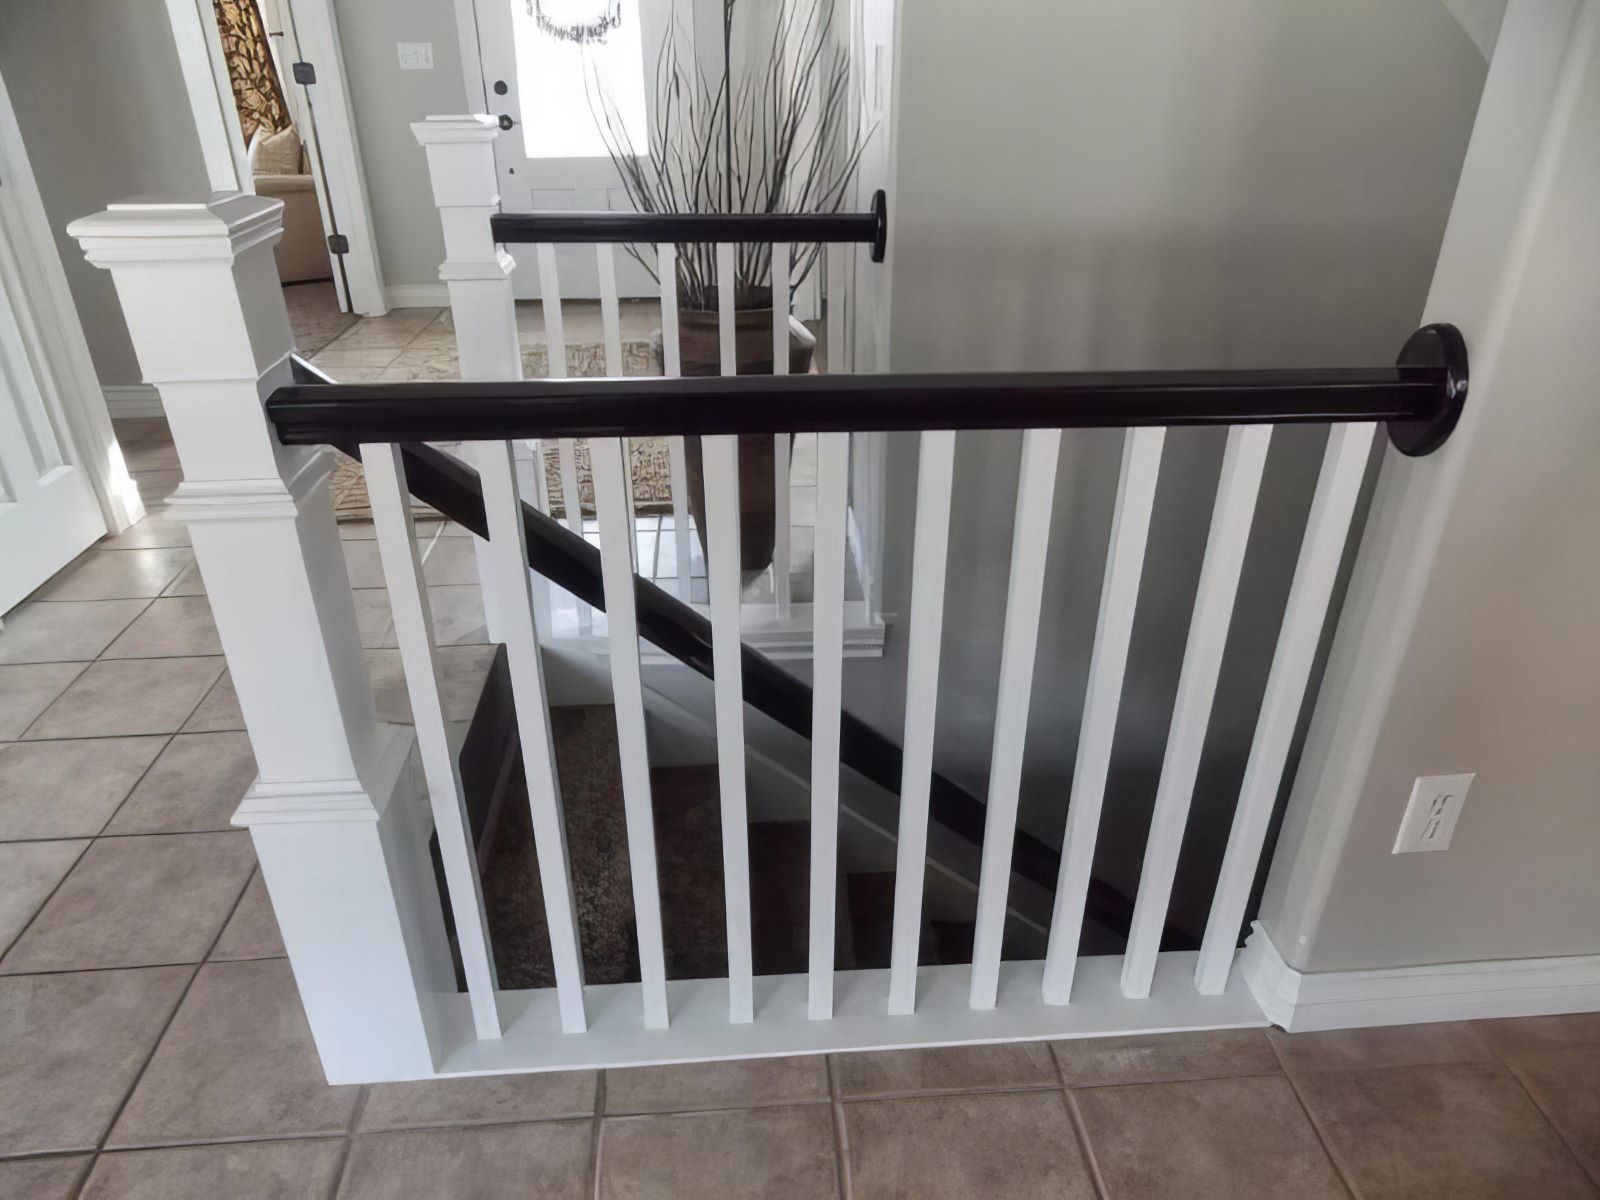
Which led me to end up with this:
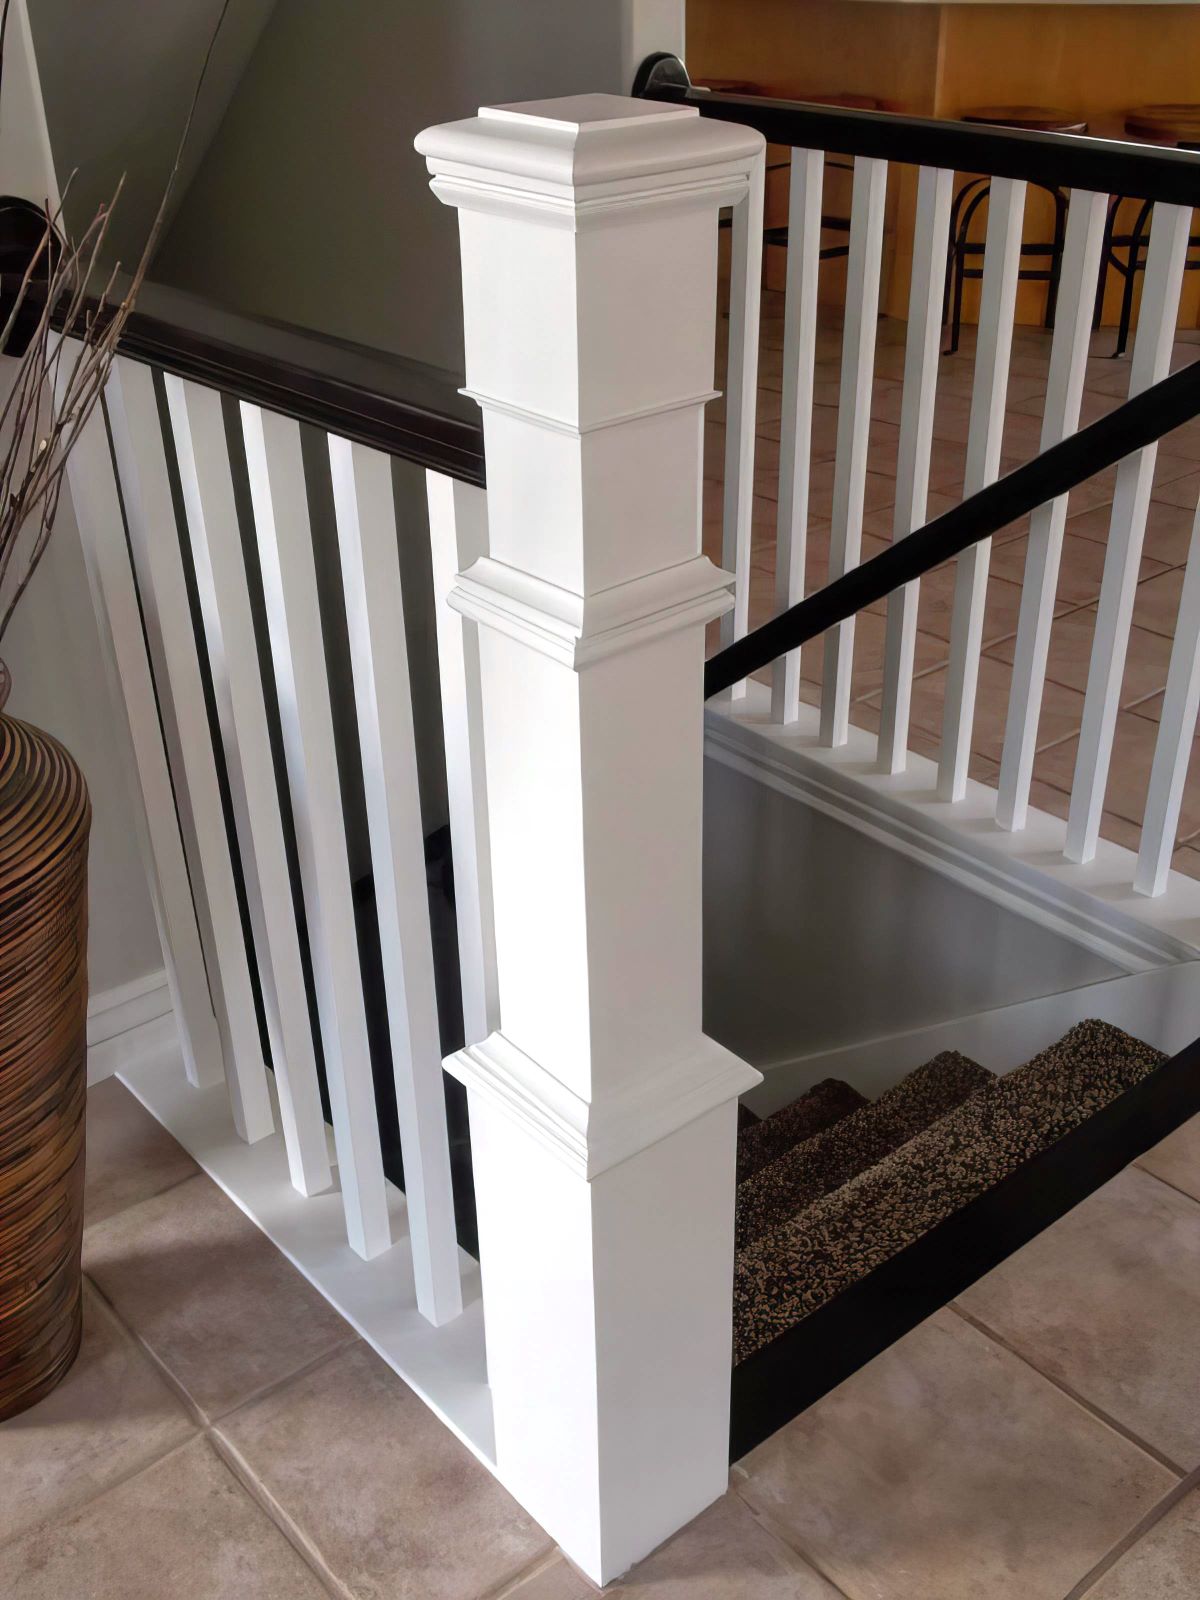
I was able to complete this project for about $150 (price includes the gel stain and top coat to finish it).
I started by measuring the existing newel post and figuring out where to start and stop the different thicknesses in the new post I was creating. I also had to figure out how to cover the “ball” on the top of the original newel post because my hubby didn’t like my idea of taking a chain saw to it like Clark in “National Lampoon’s Christmas Vacation”.
Let me share the whole process.
Stair Banister Remodel Tutorial
To keep the cost down, I decided to use MDF material instead of real wood. Since I wanted the new posts white, I knew the MDF would be the cheapest and easiest option to paint.
CUT LIST:
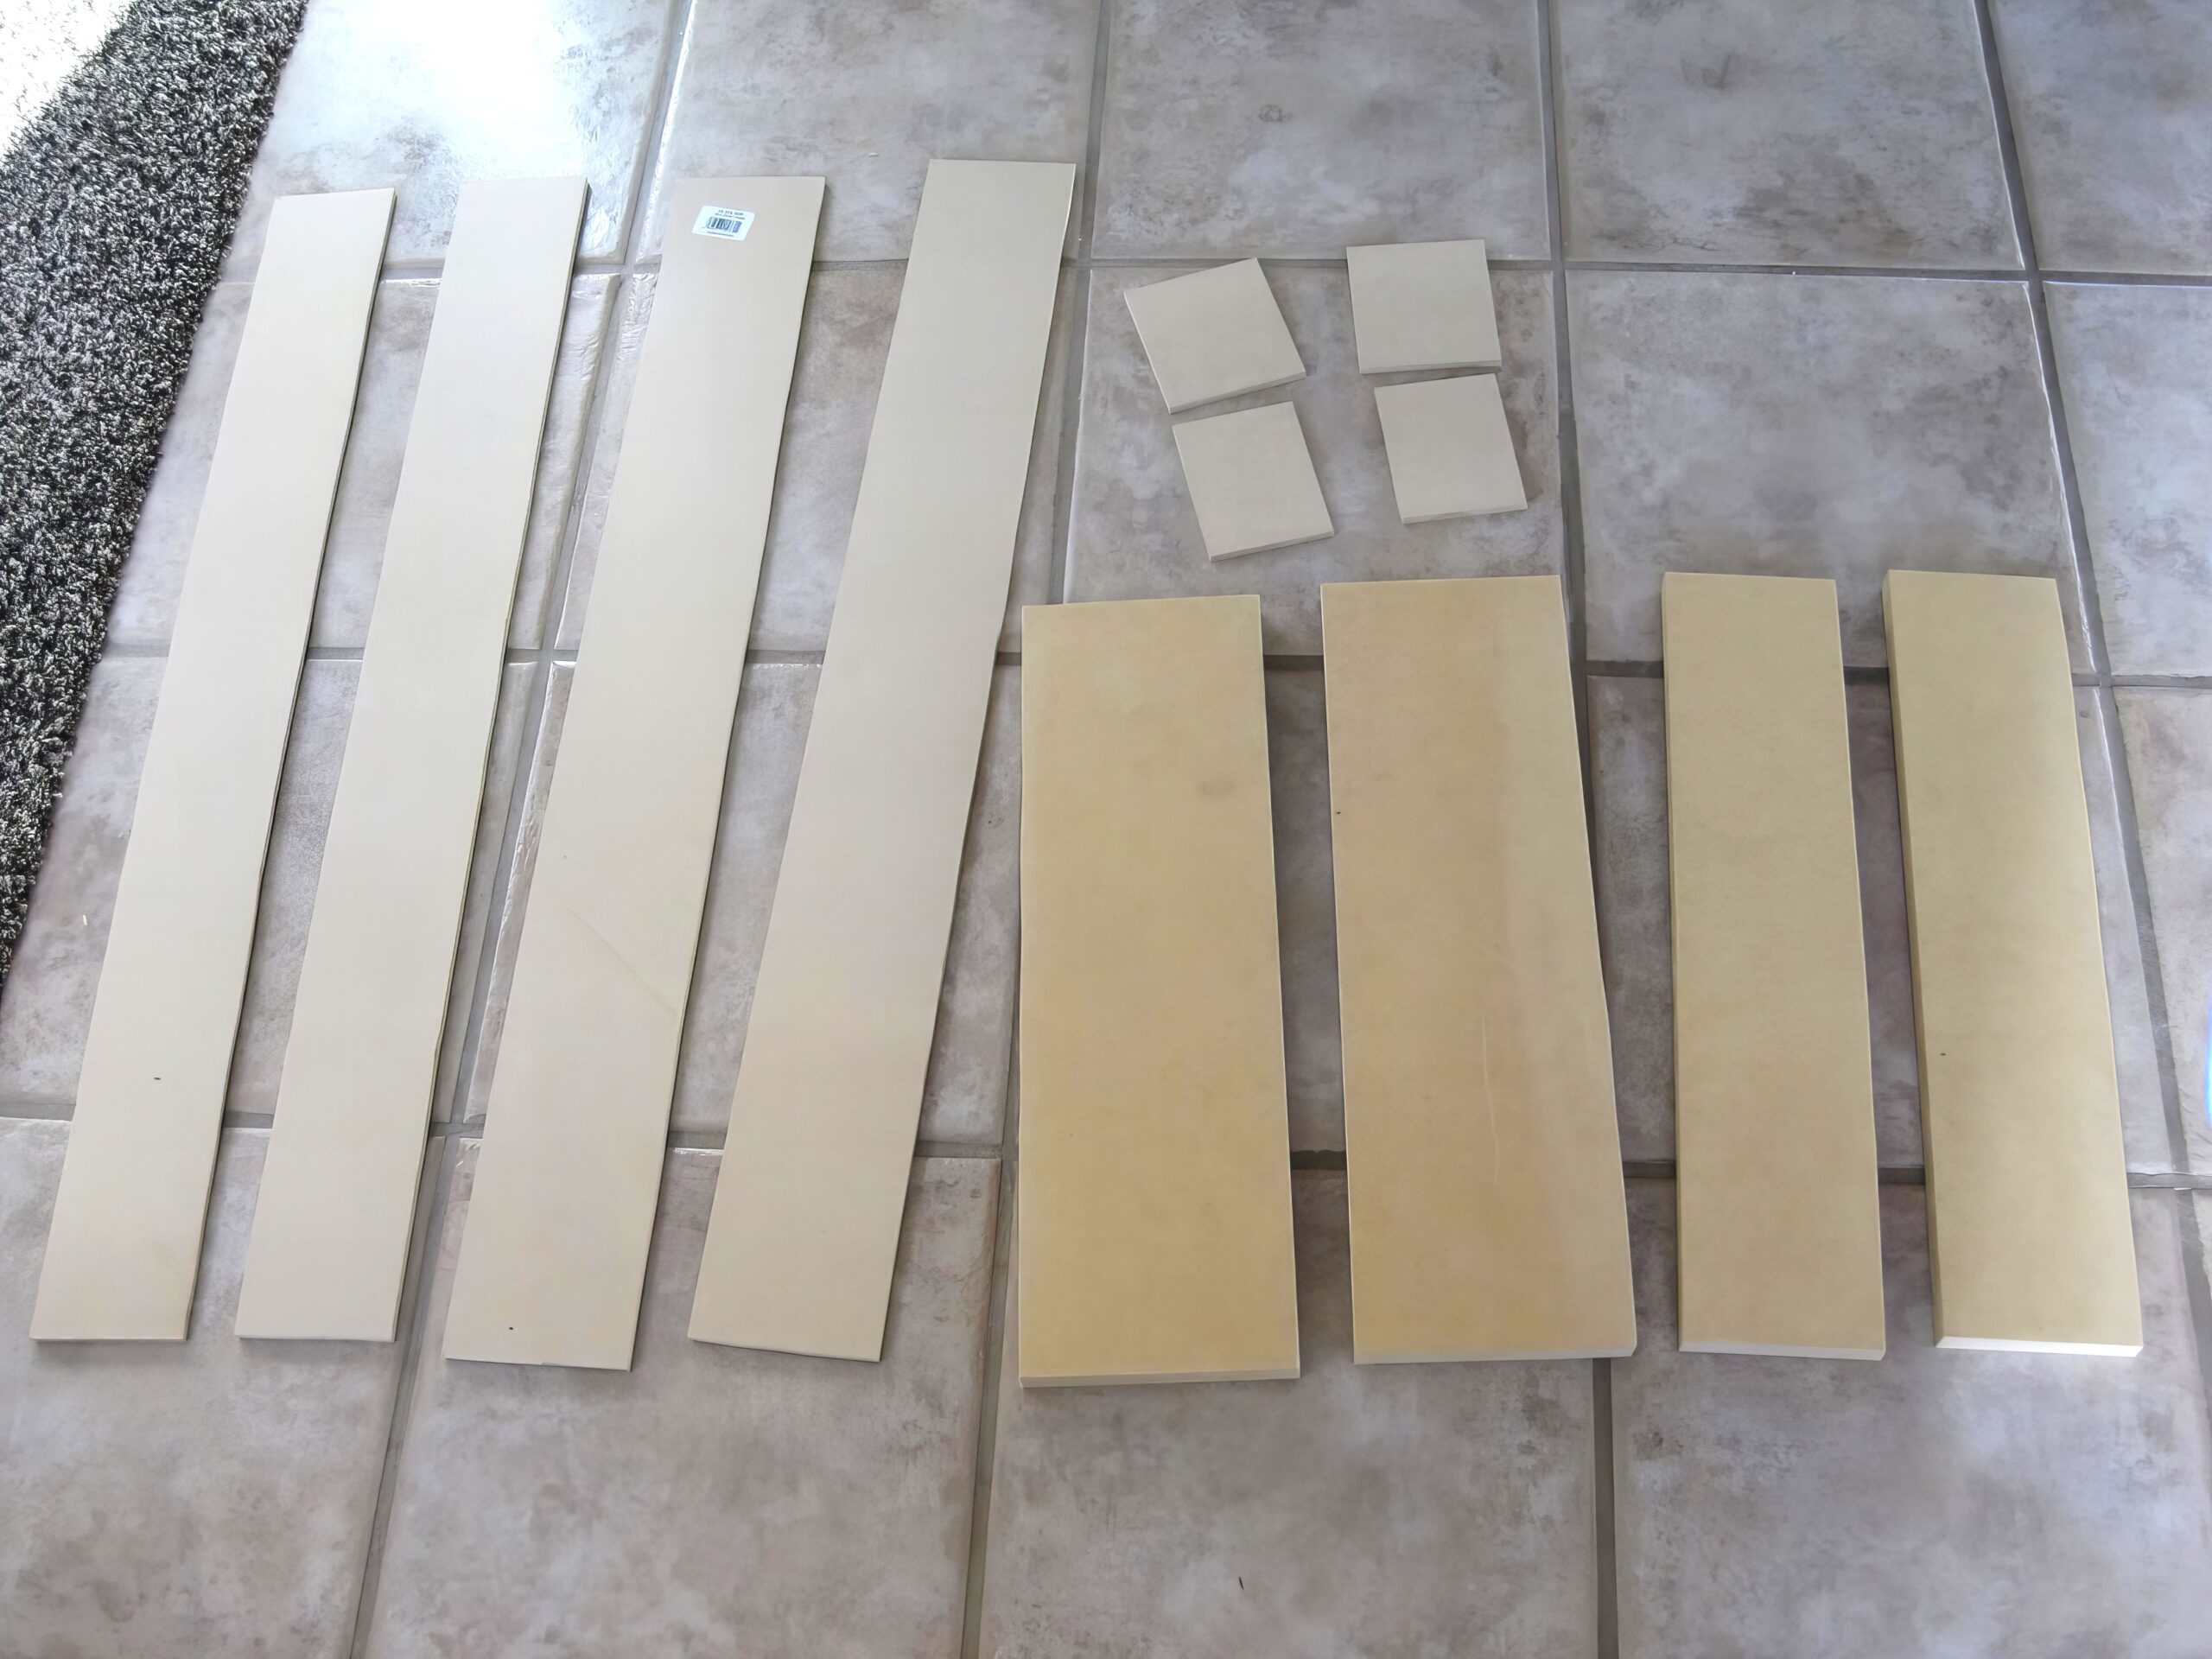
I cut out the following for each of the newel posts:
- (x2) of 3/4″ MDF) 4″ x 18″
- (x2) of 3/4″ MDF) 5.5″ x 18″
- (x2) of 1/4″ MDF) 4″ x 32″
- (x2) of 1/4″ MDF) 3.5″ x 32″
- (x2) of 1/4″ MDF) 3.5″ x 4″
- (x2) of 1/4″ MDF) 4″ x 4″
Molding used:
- Panel SD186 HEM 1/2 x 1 -1/16
- Cove WM100 HEM 11/16 x 11/16
Total cost, $158 (when originally done; 2014)
Here is the breakdown:
$60 – For all MDF pieces, AND moldings for BOTH newel posts
$14 – 2 outdoor fence post caps
$64 – 16 square Home Depot Spindles
$20 – General Finishes Java Gel Stain
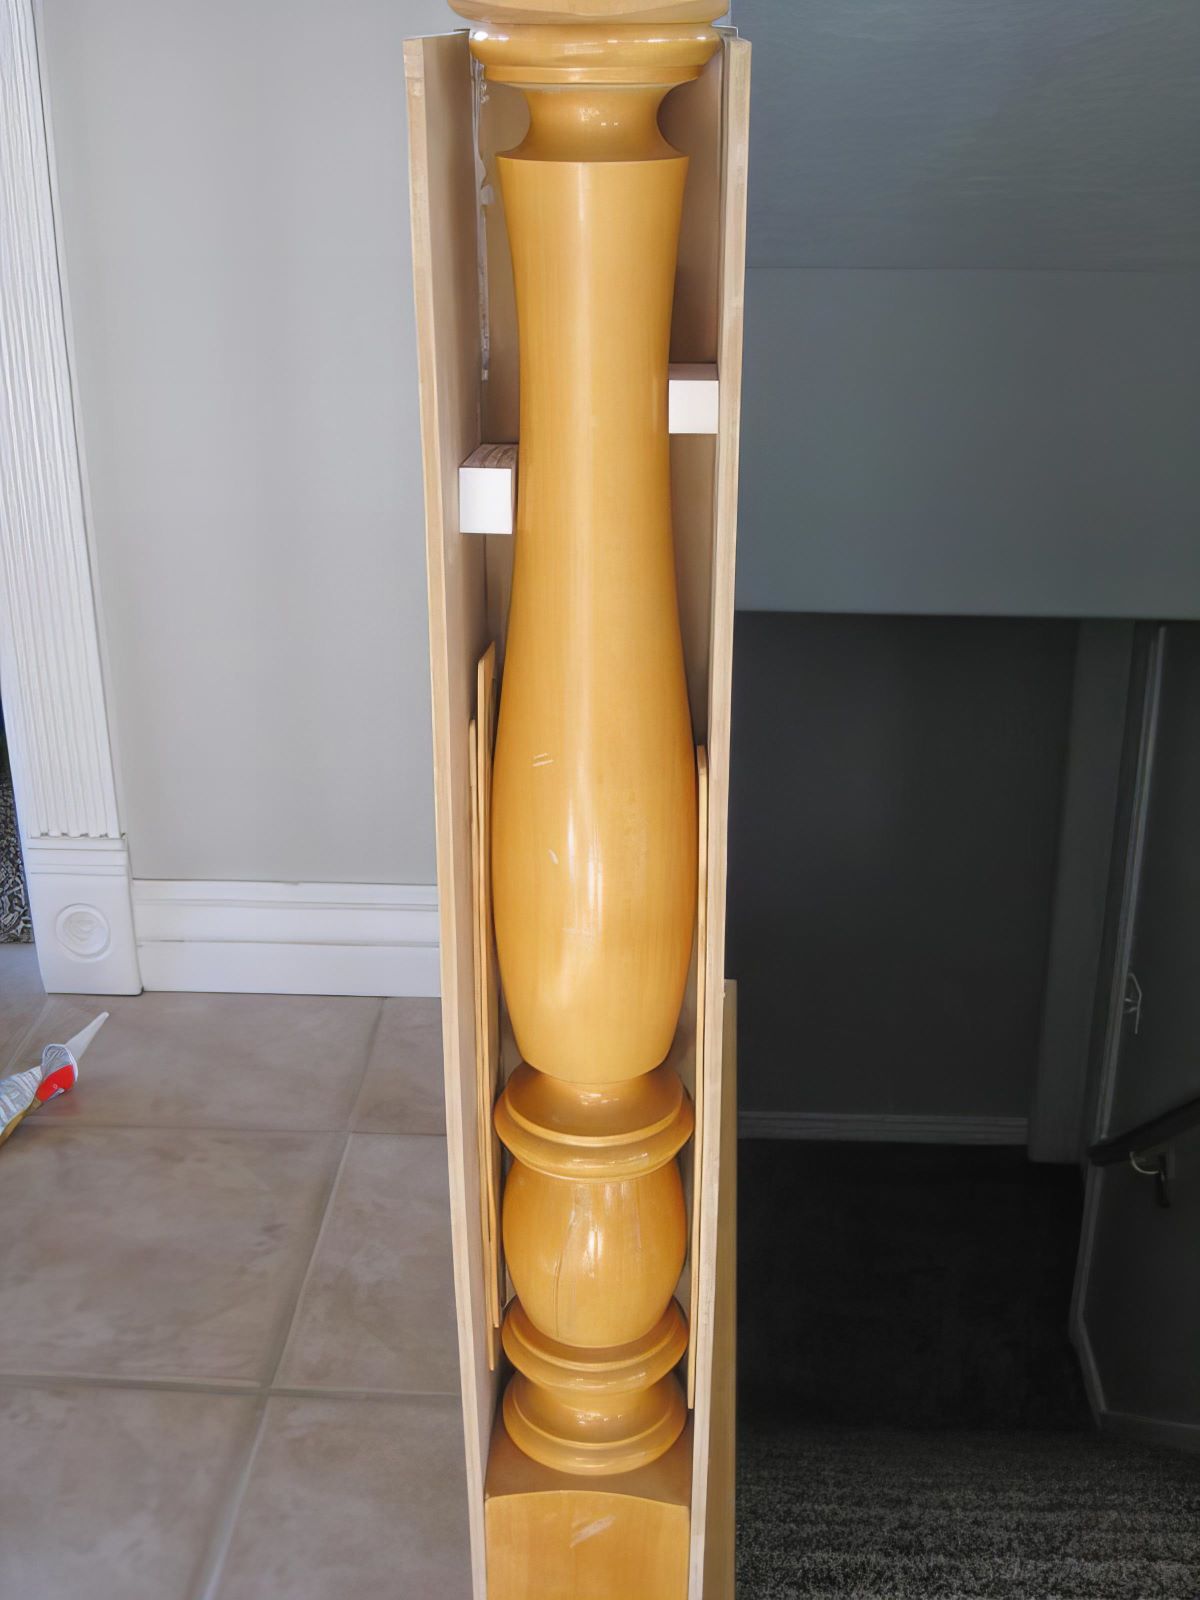
Step 1 – Square the Banister
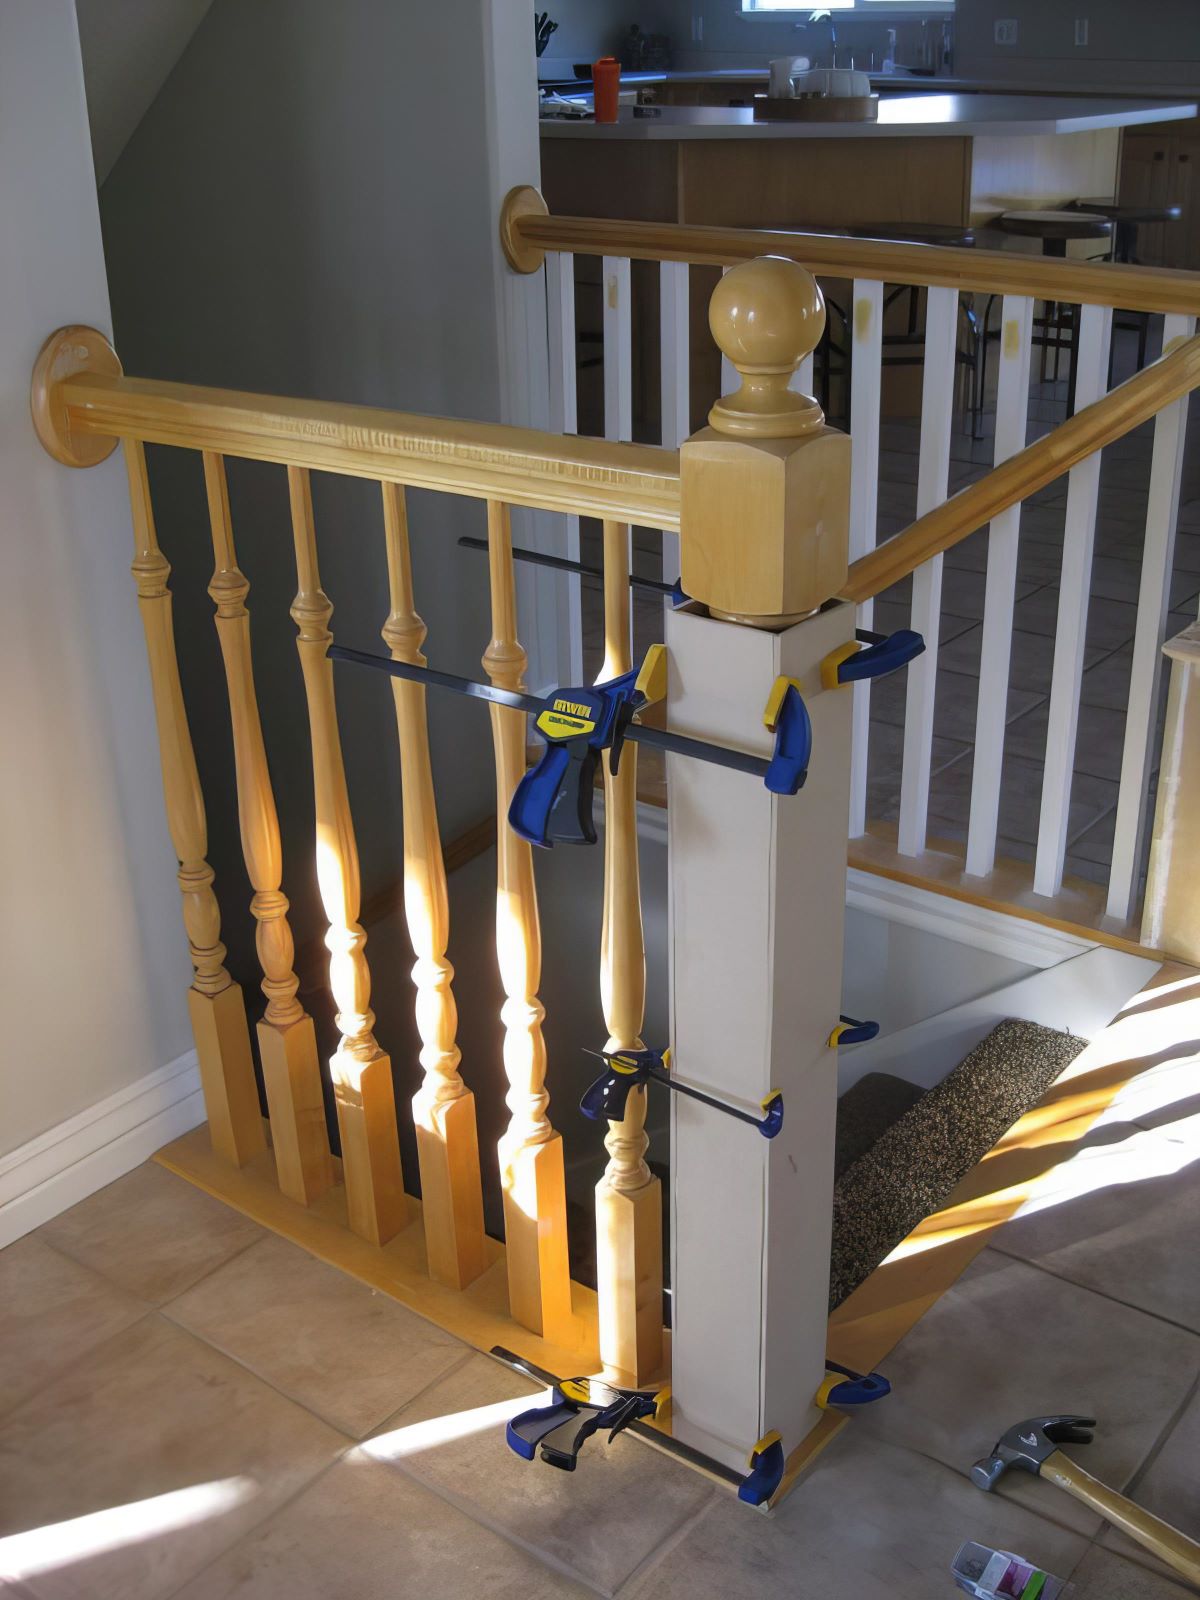
Start by placing the 1/8″ thick 32″ long pieces around the base of the newel post. Prior to clamping, add Liquid Nails to the edges and added supports on the inside with wood scraps and paint sticks. Then nail them to the post from the outside (definitely nail through the supports you put in there for extra stability)
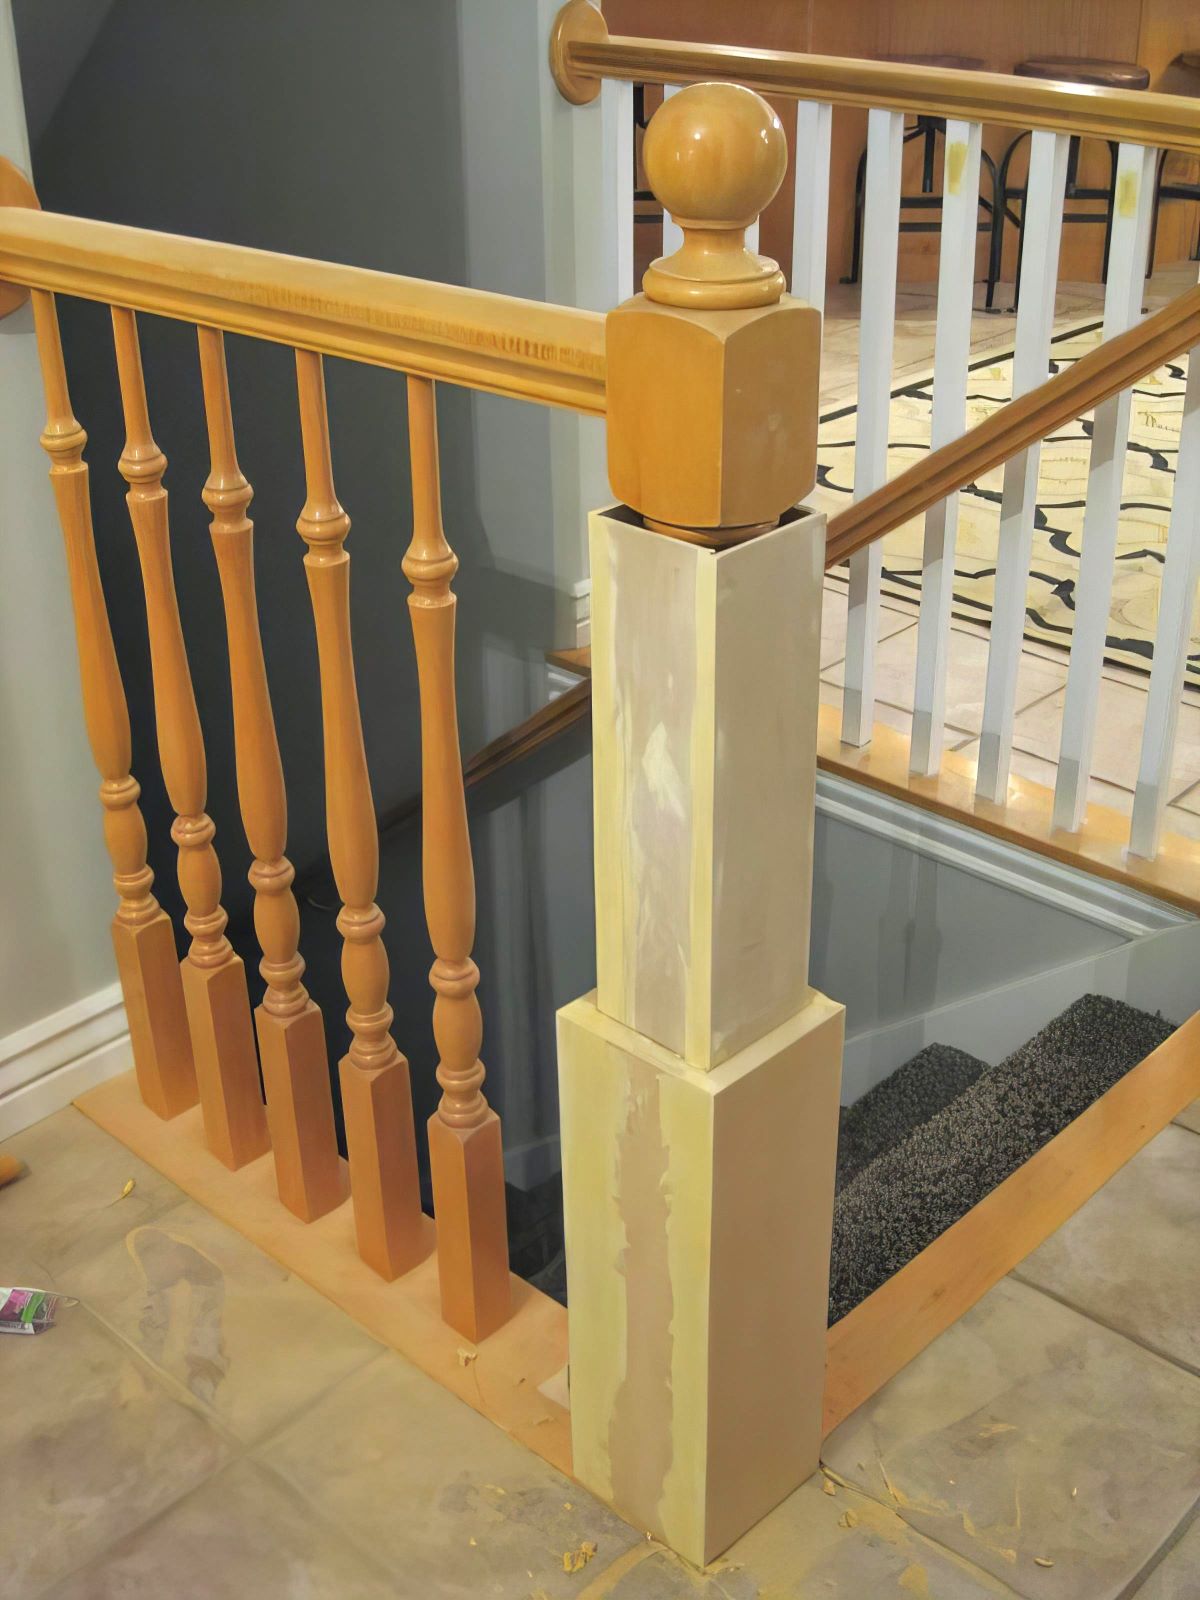
Step 3 – Bulk up the Base
Now it is time to build up the base of your squared newel post. Do this by adding the 3/4″ thick 18″ long MDF around the very bottom, and follow the same steps of wood glue, clamps, and nails.
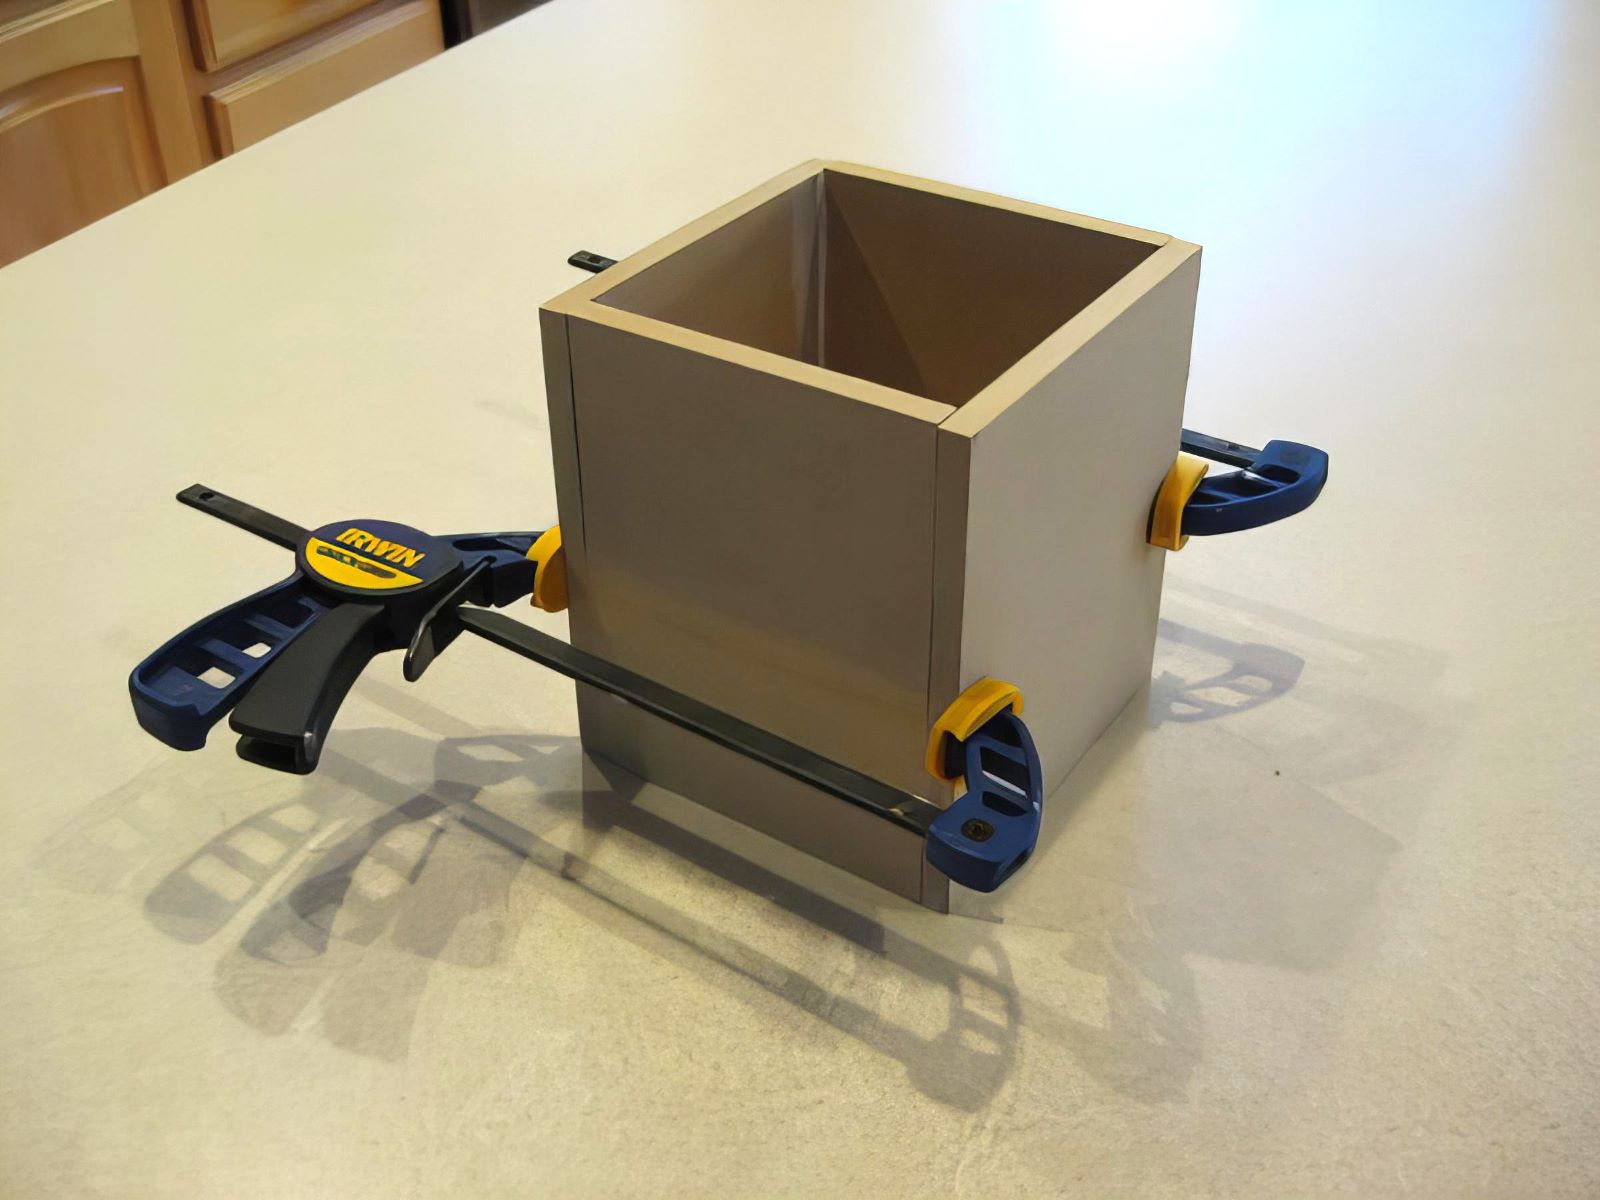
Step 4 – Build Cap For Top of Post.
To cover the “ball” on the end of the post, put together a smaller box of the 1/8″ thick mdf. Use wood glue, clamps, and small 3/4″ finish brad nails to hold the box together until the glue is dry.
Step 5 – Attach Cap To Box
Once your box is dry, use an outdoor fence post cap from Home Depot and liquid nail it to the top of your box.
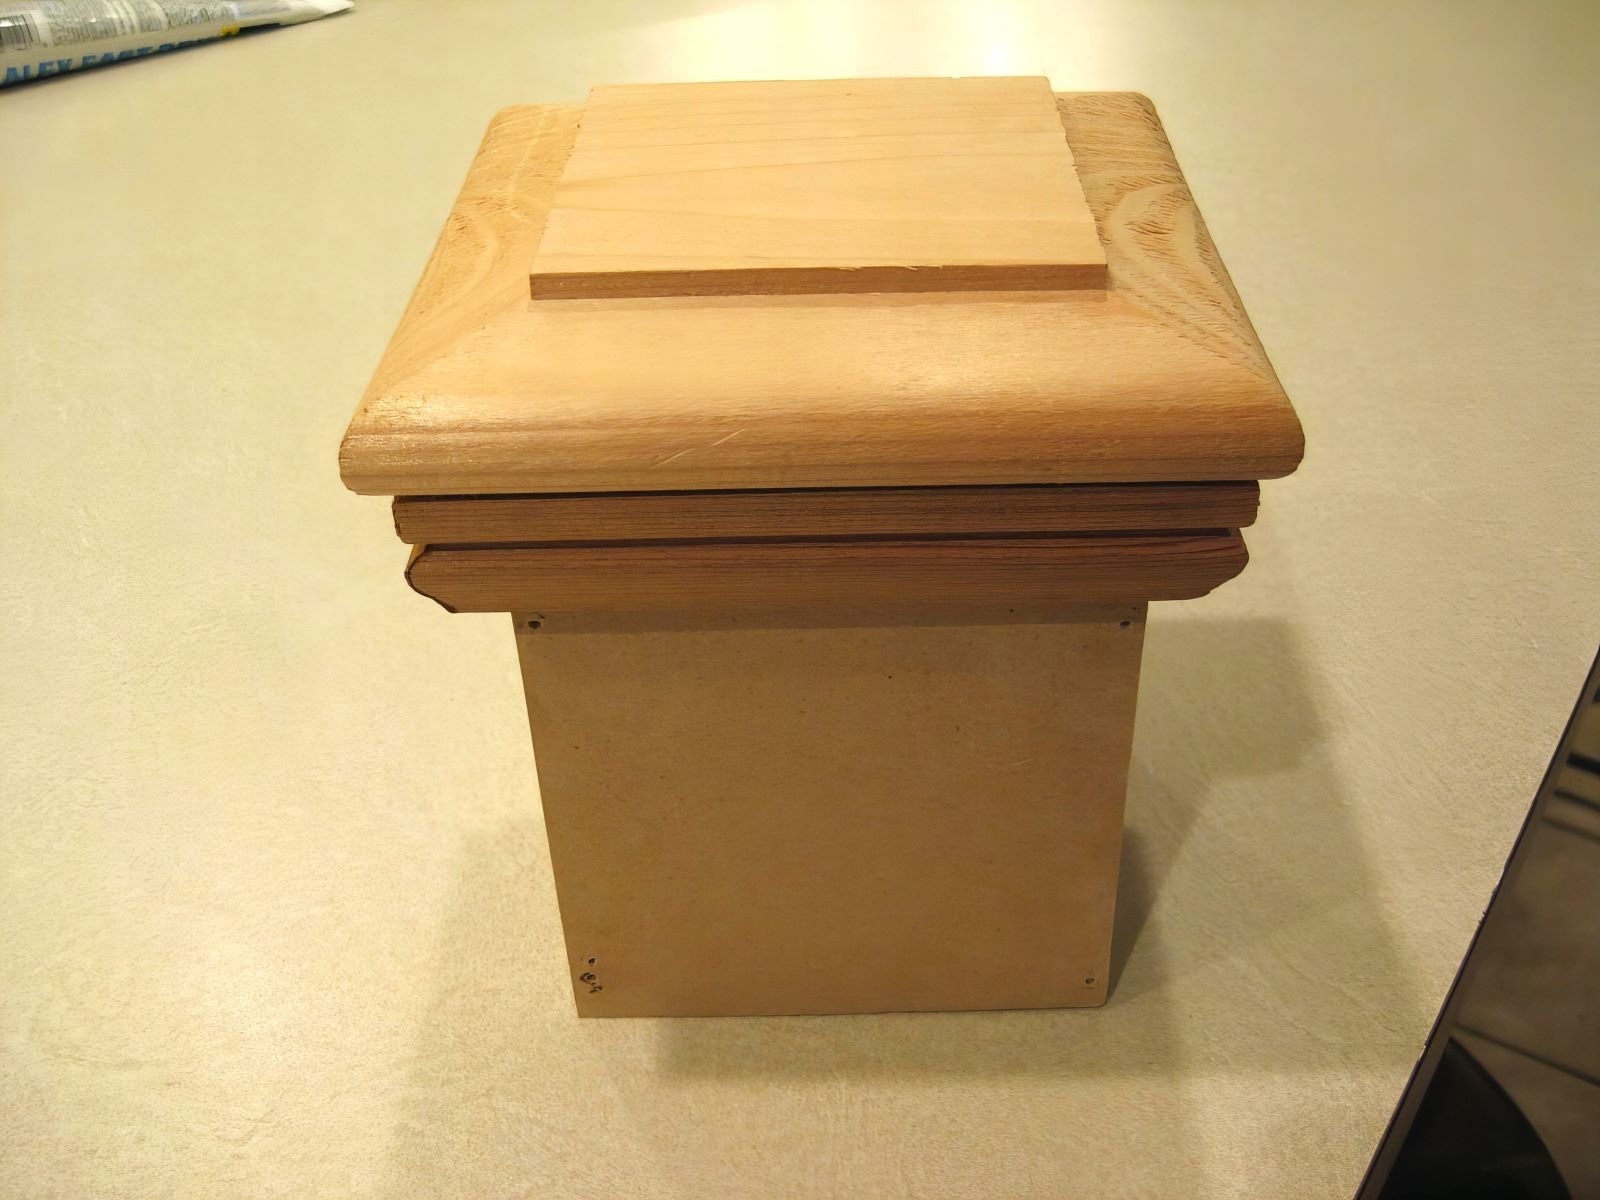
Step 6 – Glue and Nail in Place
Before using your nail gun or hammer and nails to attach it to the existing “ball”, put some liquid nails inside. Make sure to nail gun the top of the cap onto the “ball”, as well as the sides of the box into the rest of the post.
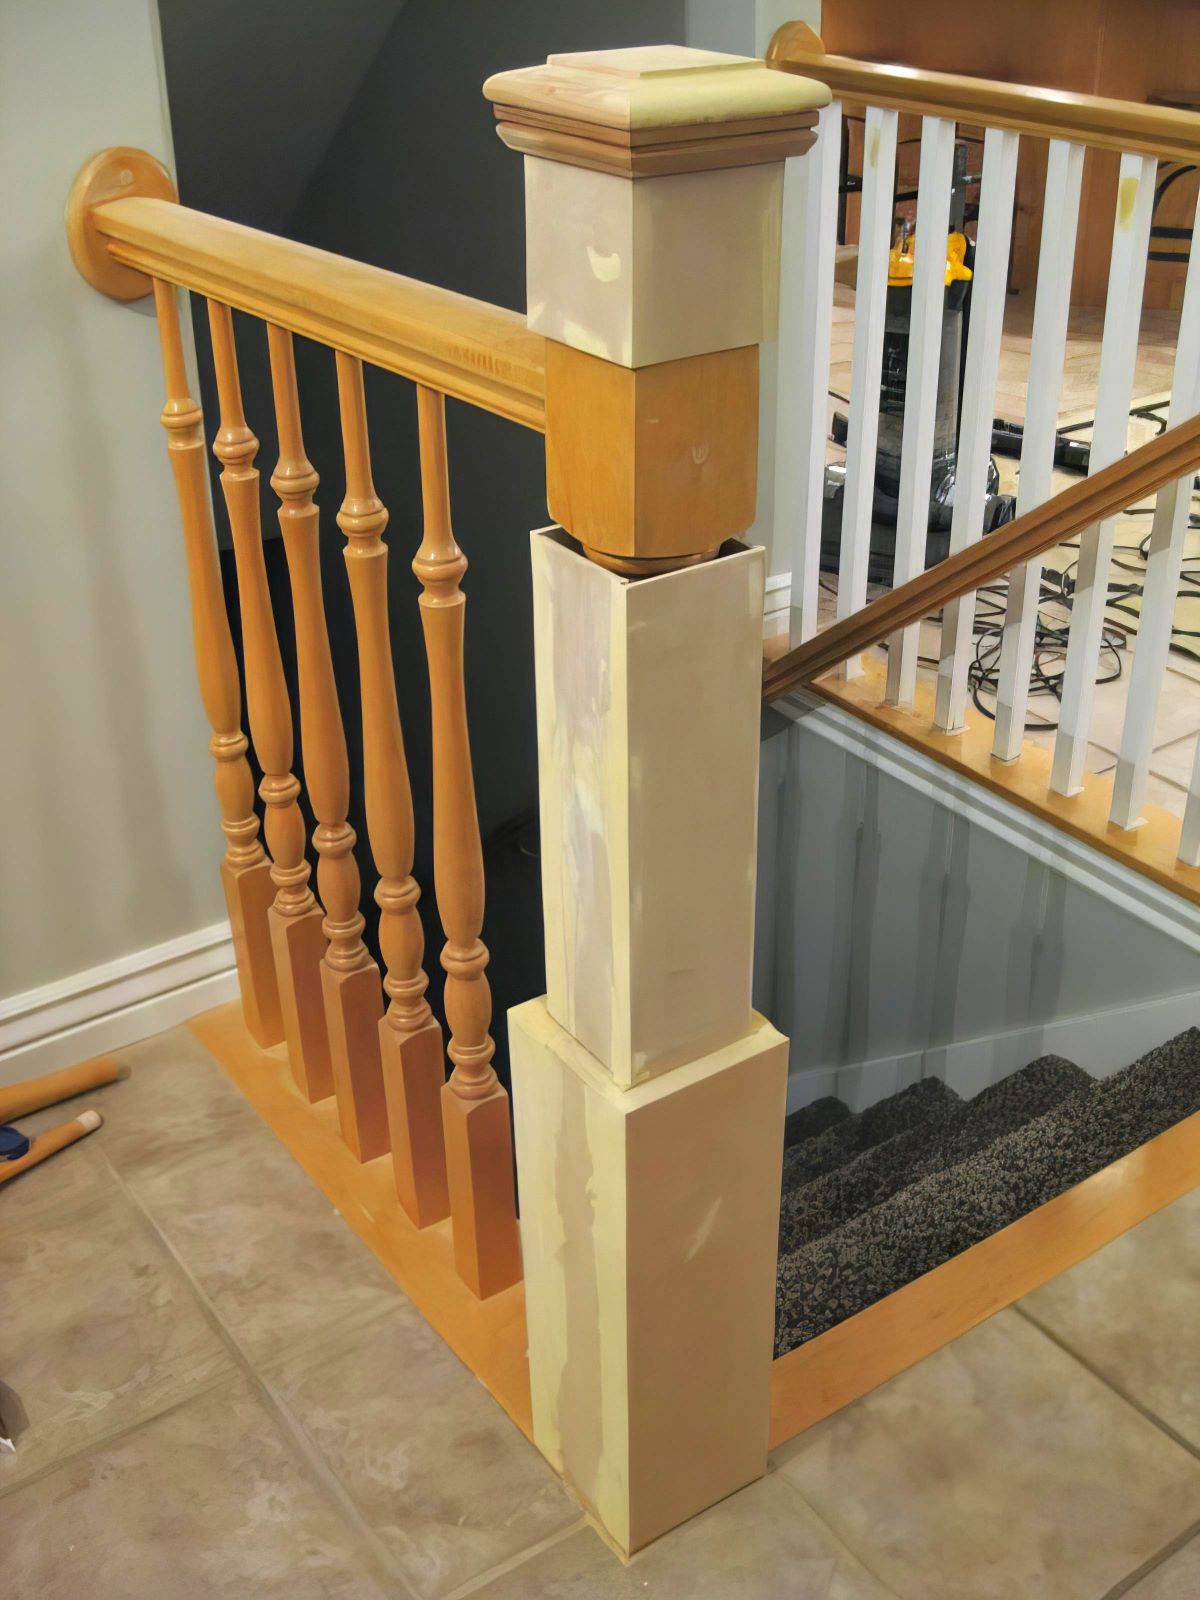
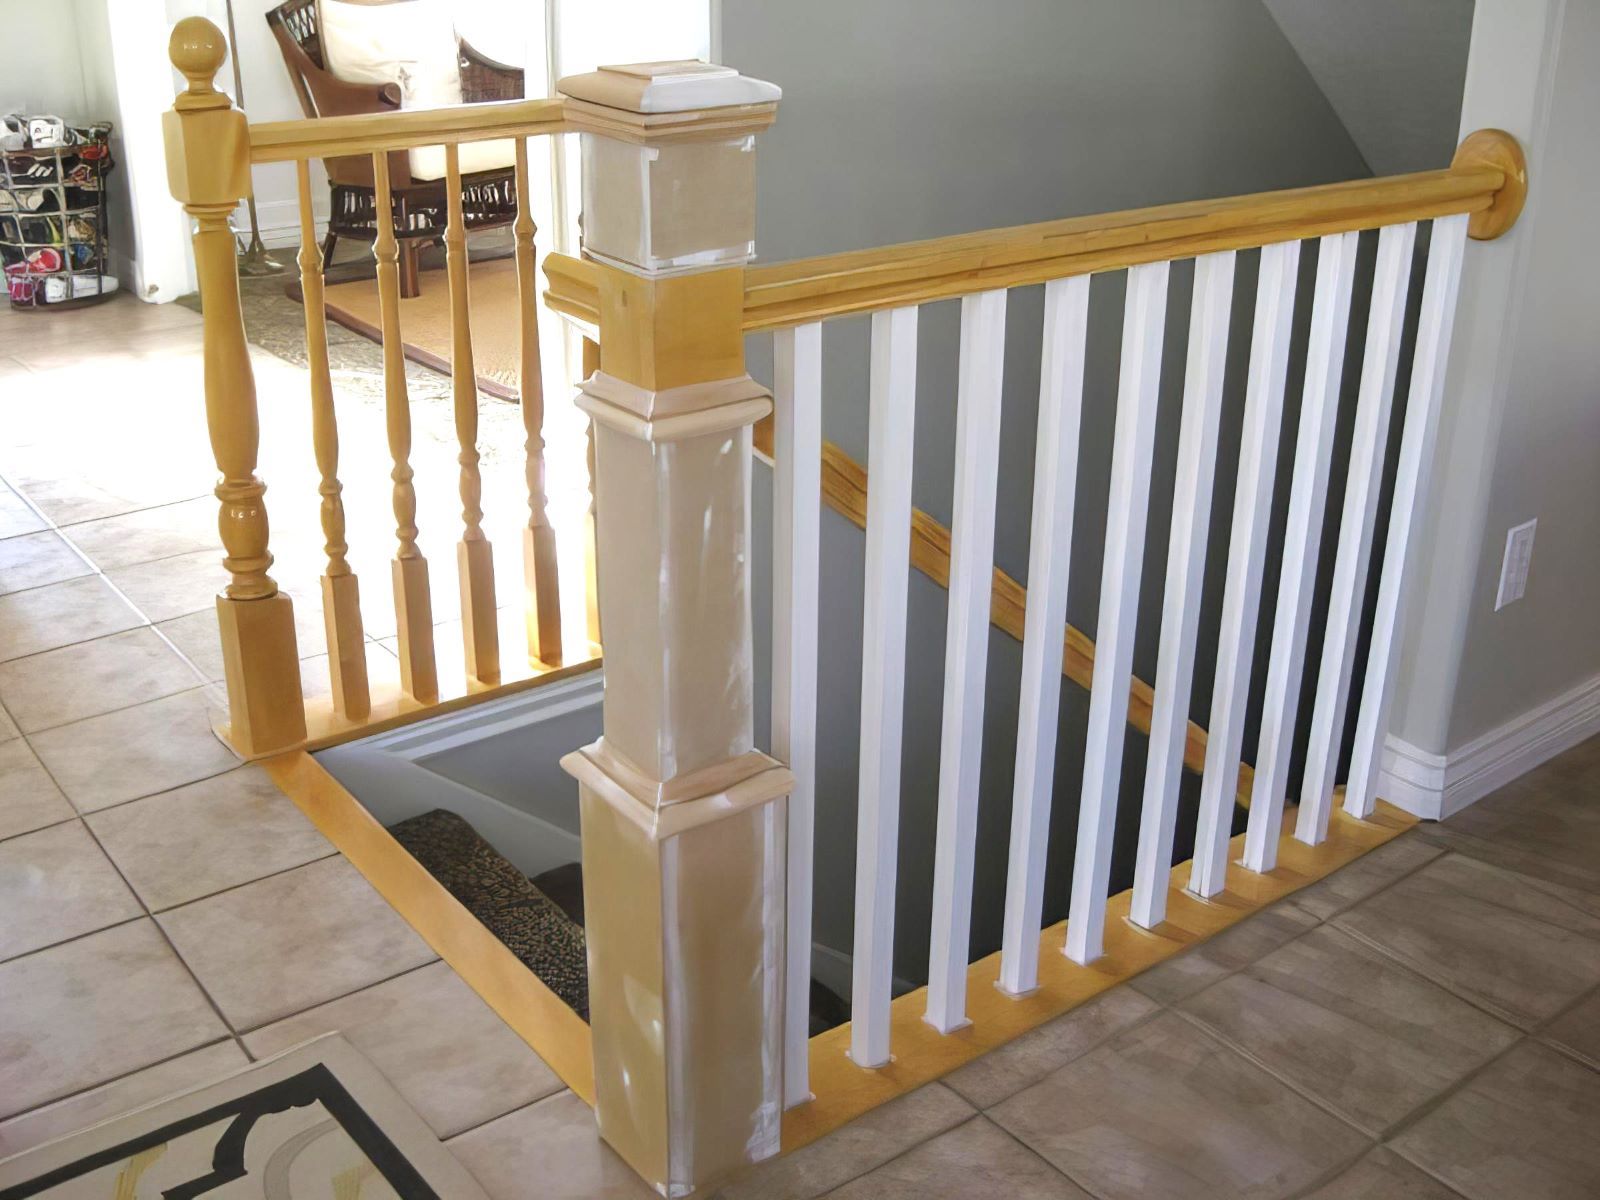
Step 7 – Add Moldings to Cover Transitions
Now that your newel post is square, you need to add molding to close the gaps and beautify it. (I found that I didn’t need to nail these pieces on. I simply cut them to fit, liquid nailed them in place, and used some painter’s tape to hold them in place until the glue was dry.)
Put the same two moldings where the 3/4″ MDF box ends, as well as where the 1/8″ MDF box ends.
You can use your choice of molding; however, I used cove and panel molding. Here is the specific info for both of those:
- Panel SD186 HEM 1/2 x 1 -1/16
- Cove WM100 HEM 11/16 x 11/16
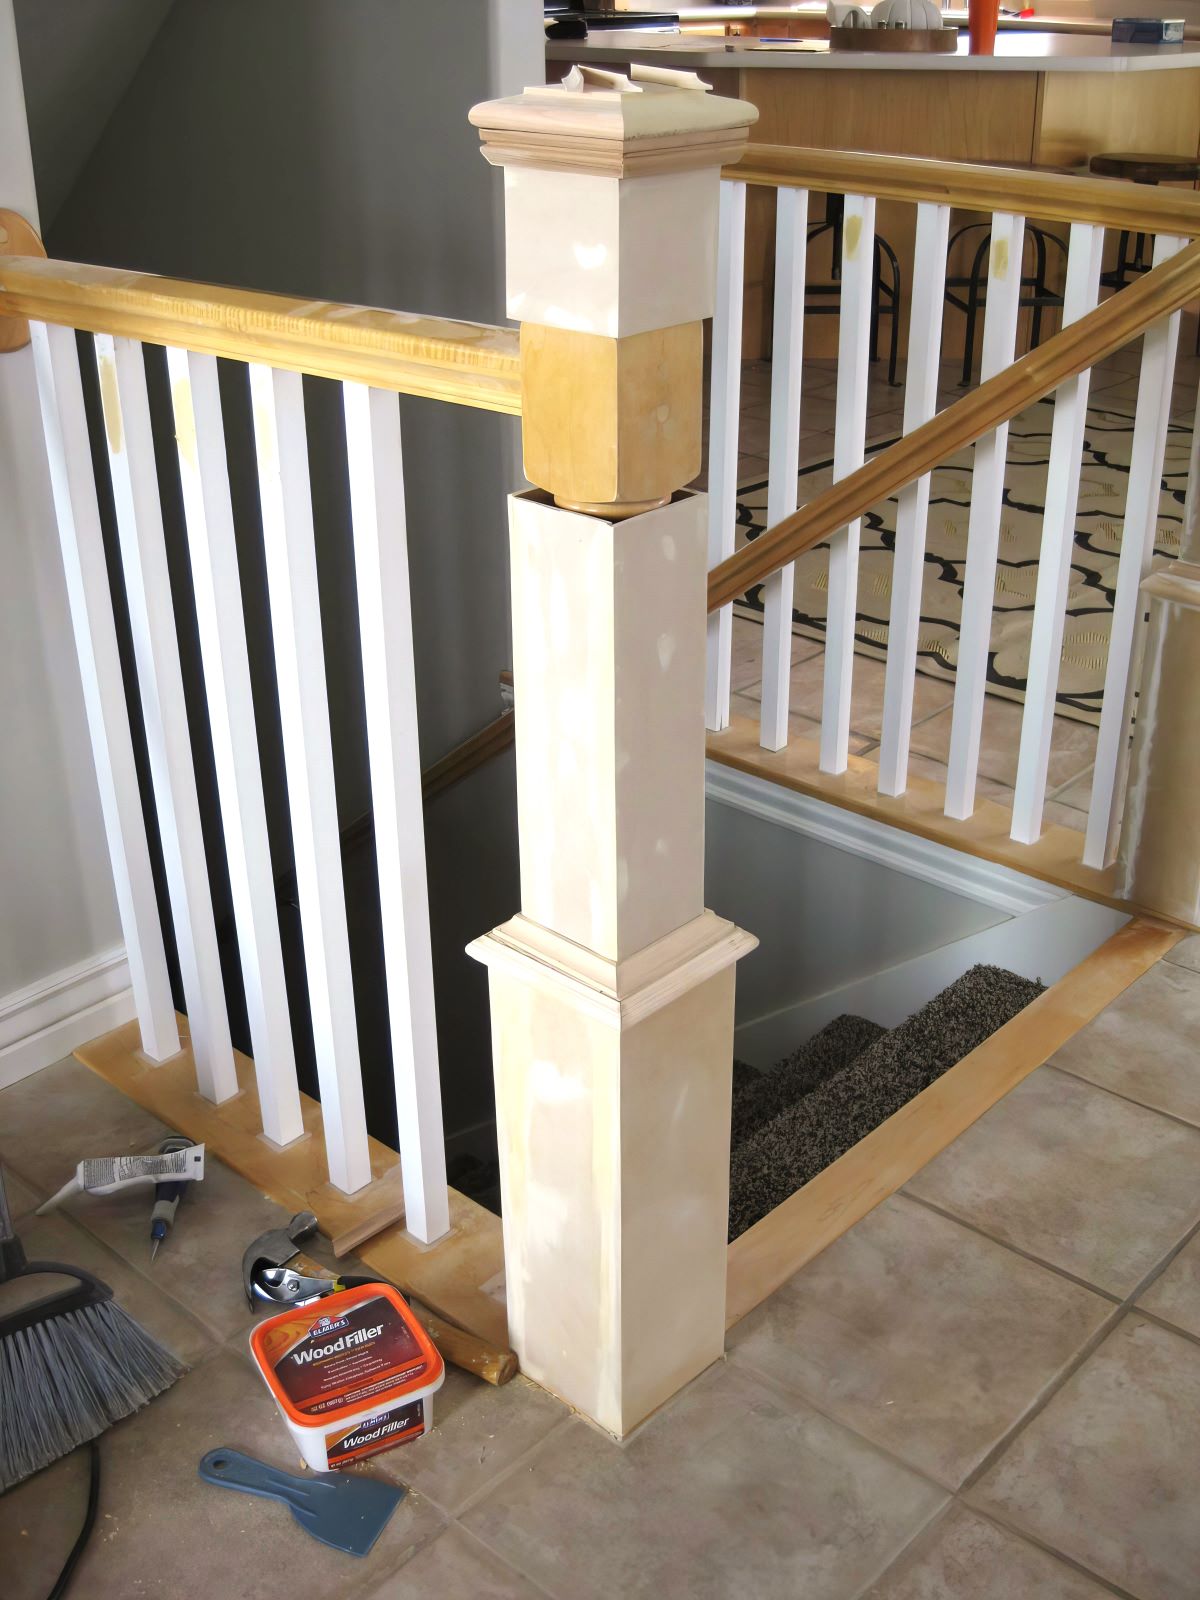
Step 8 – Add Moldings at Each Transition
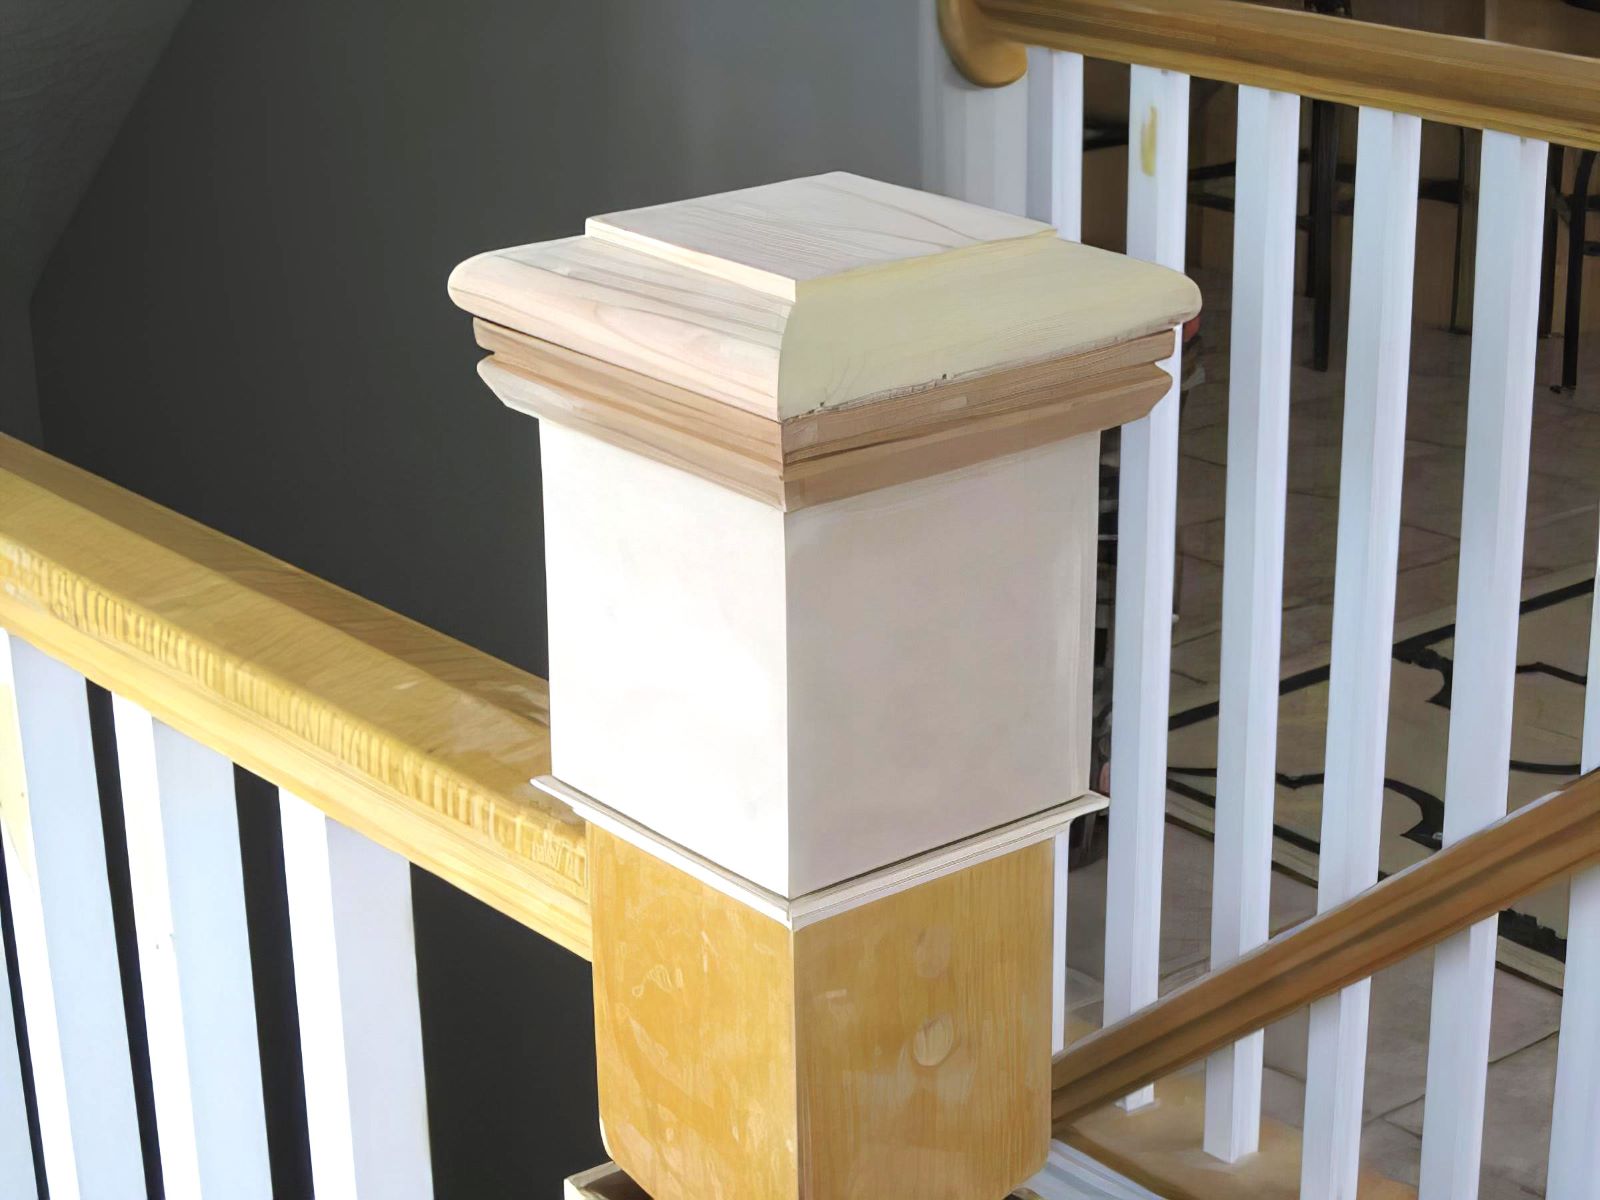
Add a small molding like the one below at the base of your top box. (I found the one I used in Home Depot’s Molding aisle in the little bin sections with other small molding that comes about 3 feet long.)
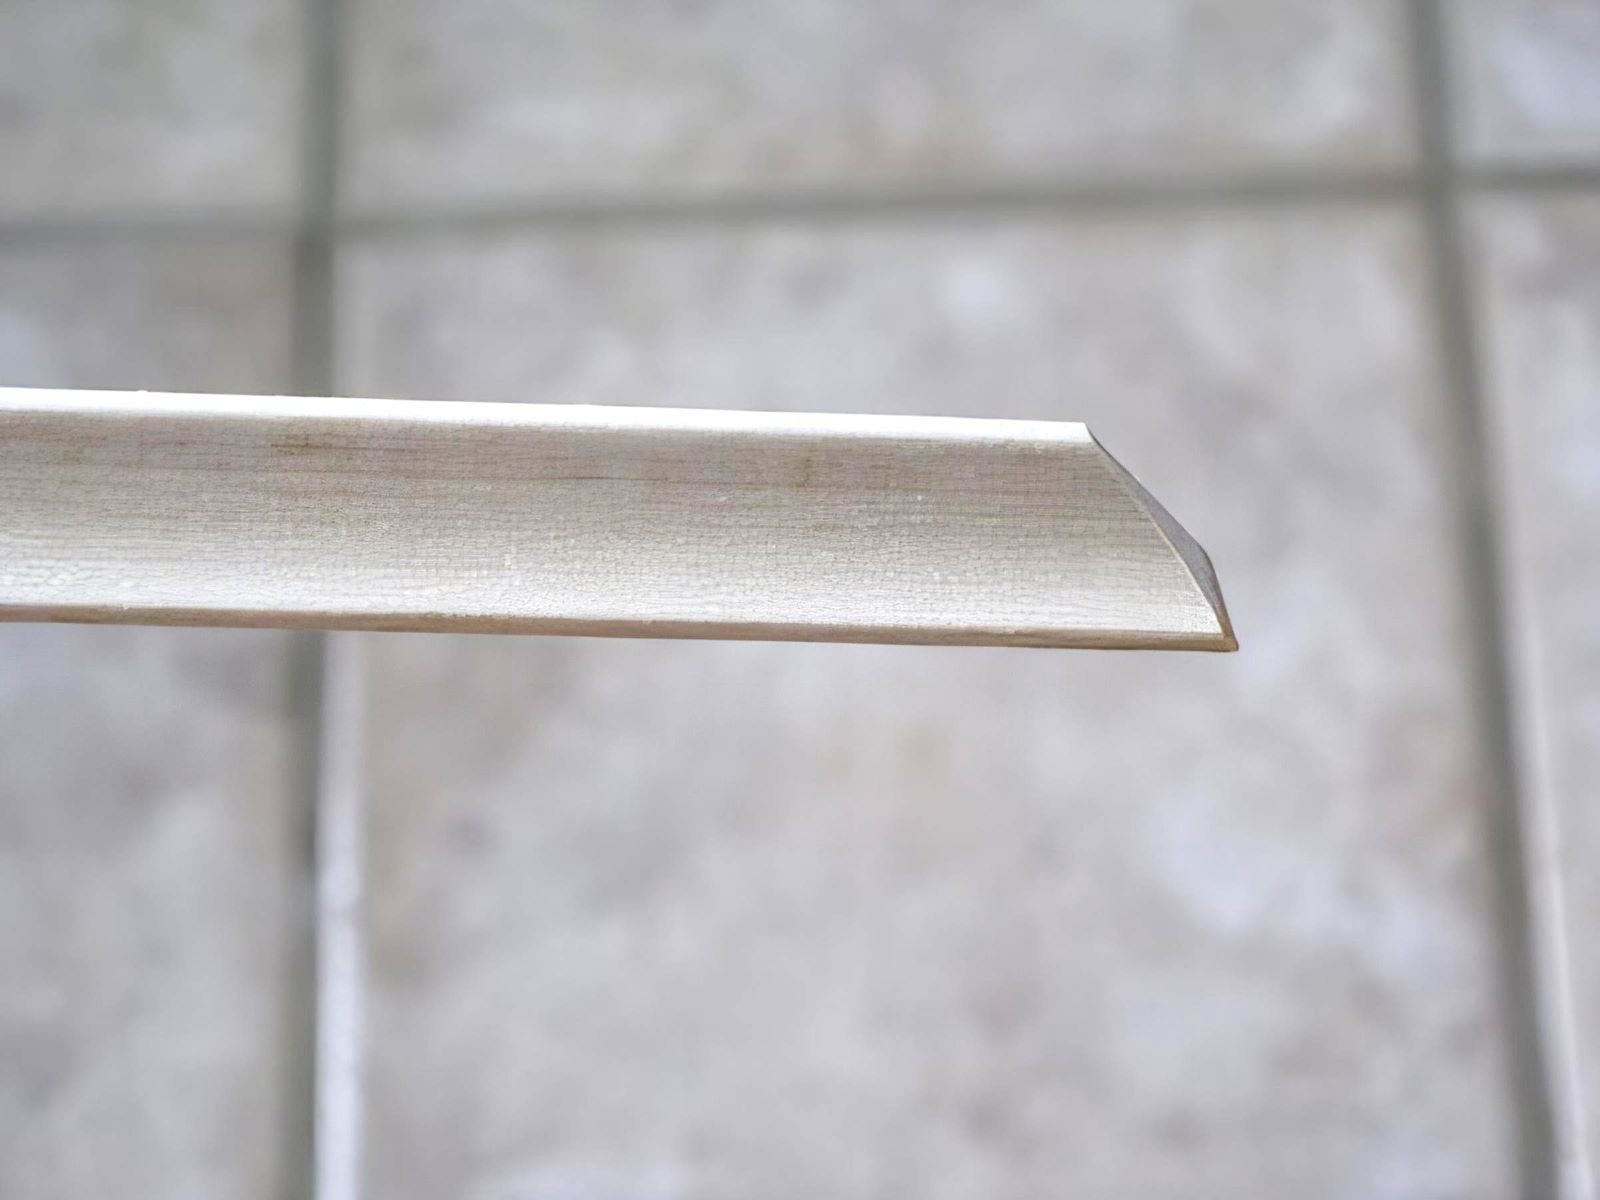
Here is a closer look at the molding in place at the base of the top box.
Step 9 – Begin Removing the Balusters (Spindles)
After finishing the new newel posts, move on to replacing the spindles.
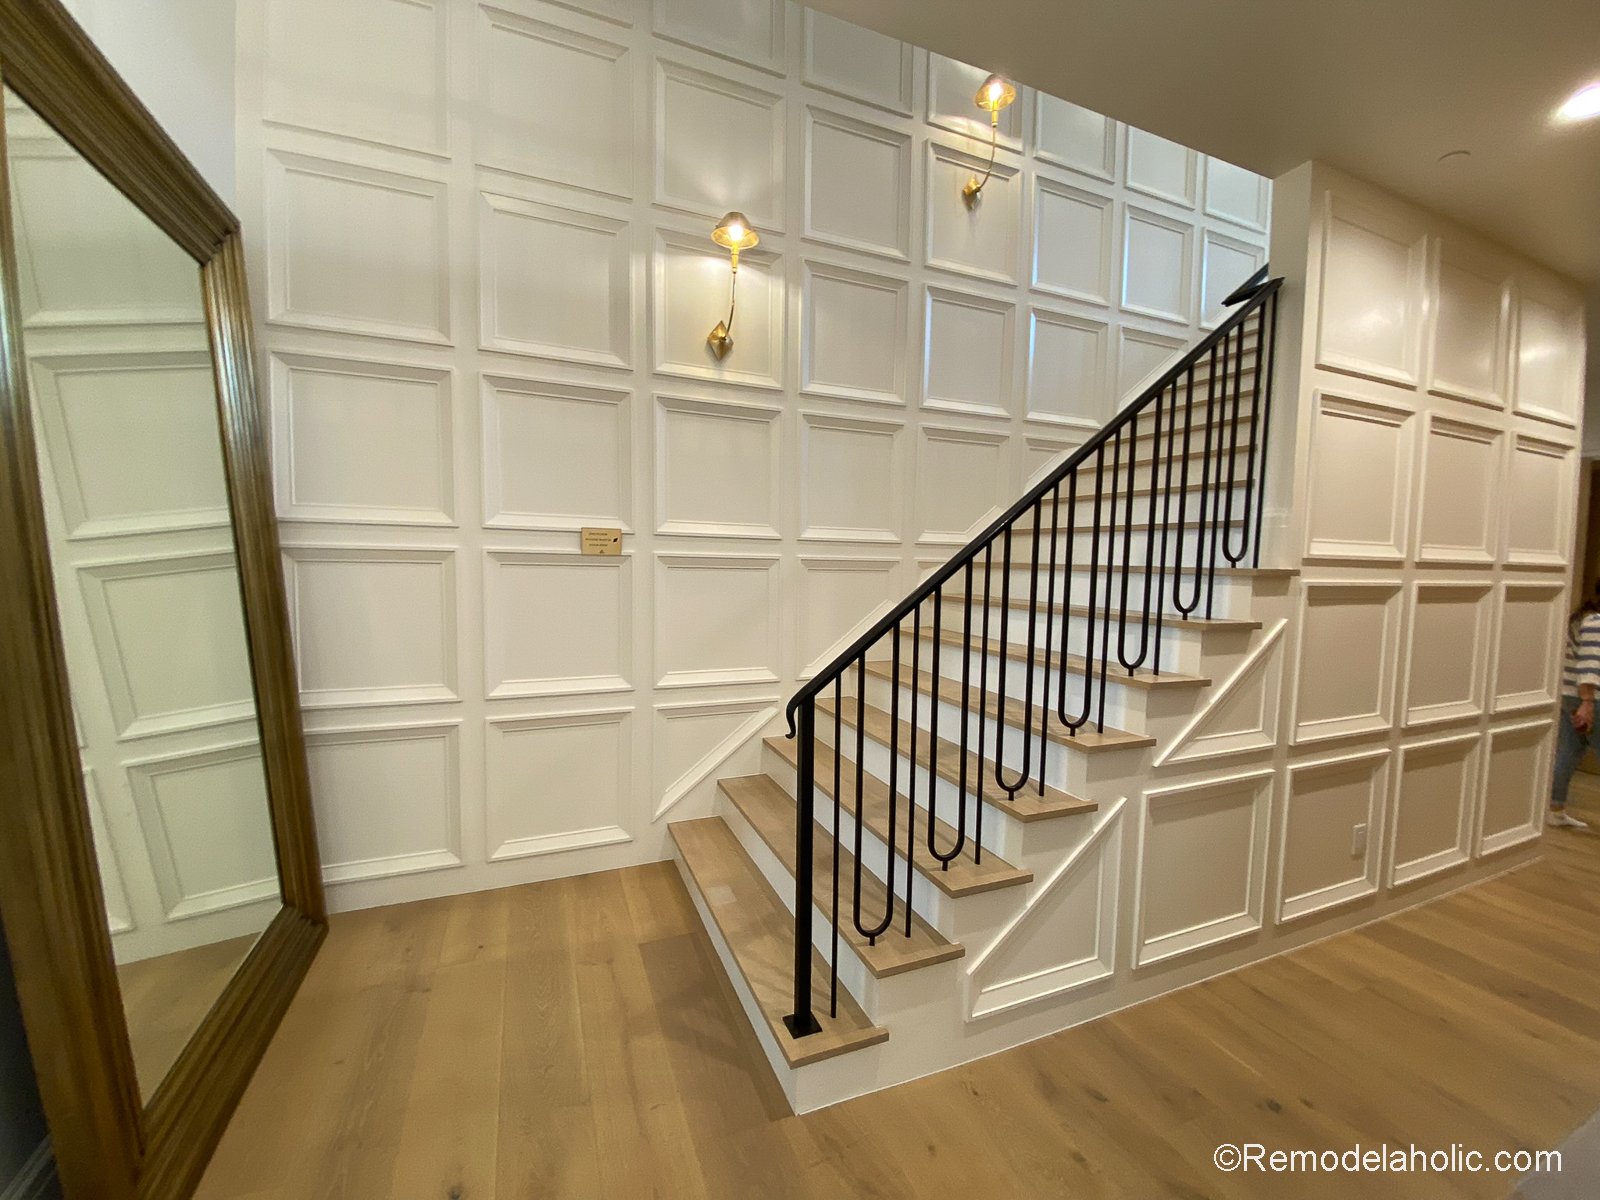
You could use any style of balusters you like. I chose an affordable square block style, to match my banister shape but there are many styles from iron balusters (shown in image below) to more ornately carved options available online if you like that look.
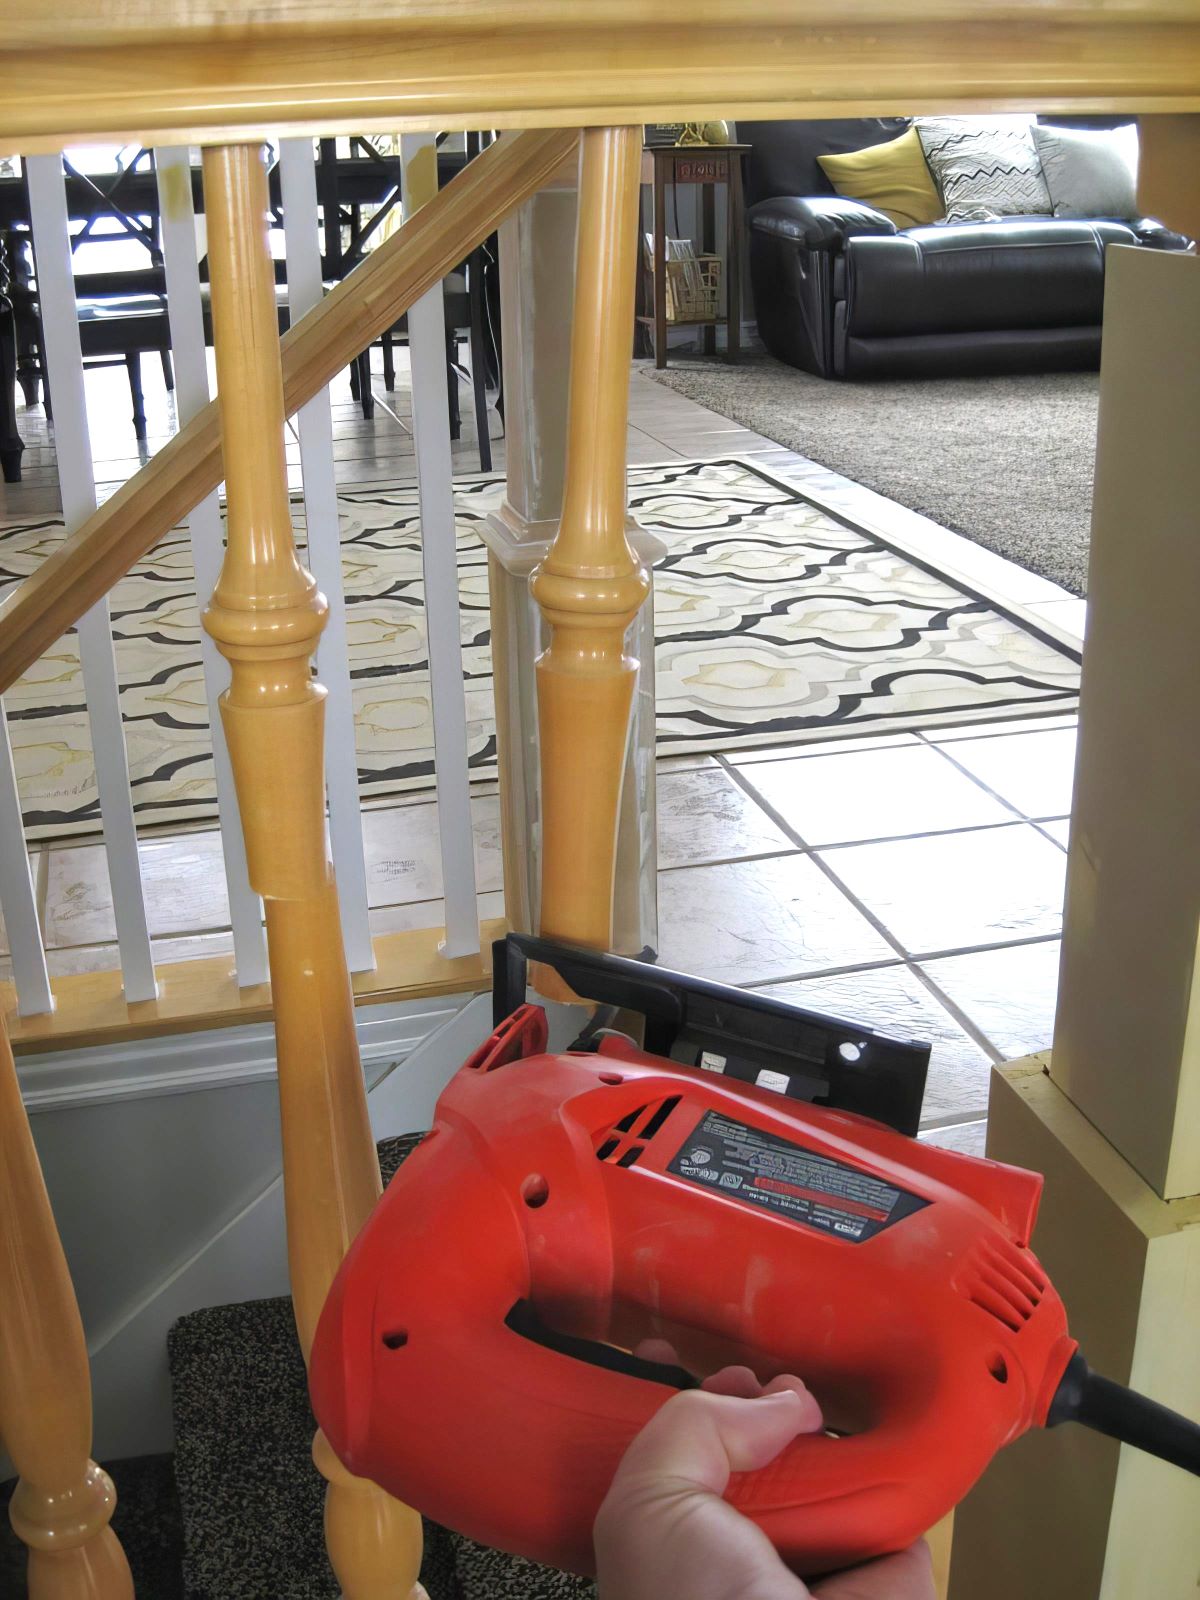
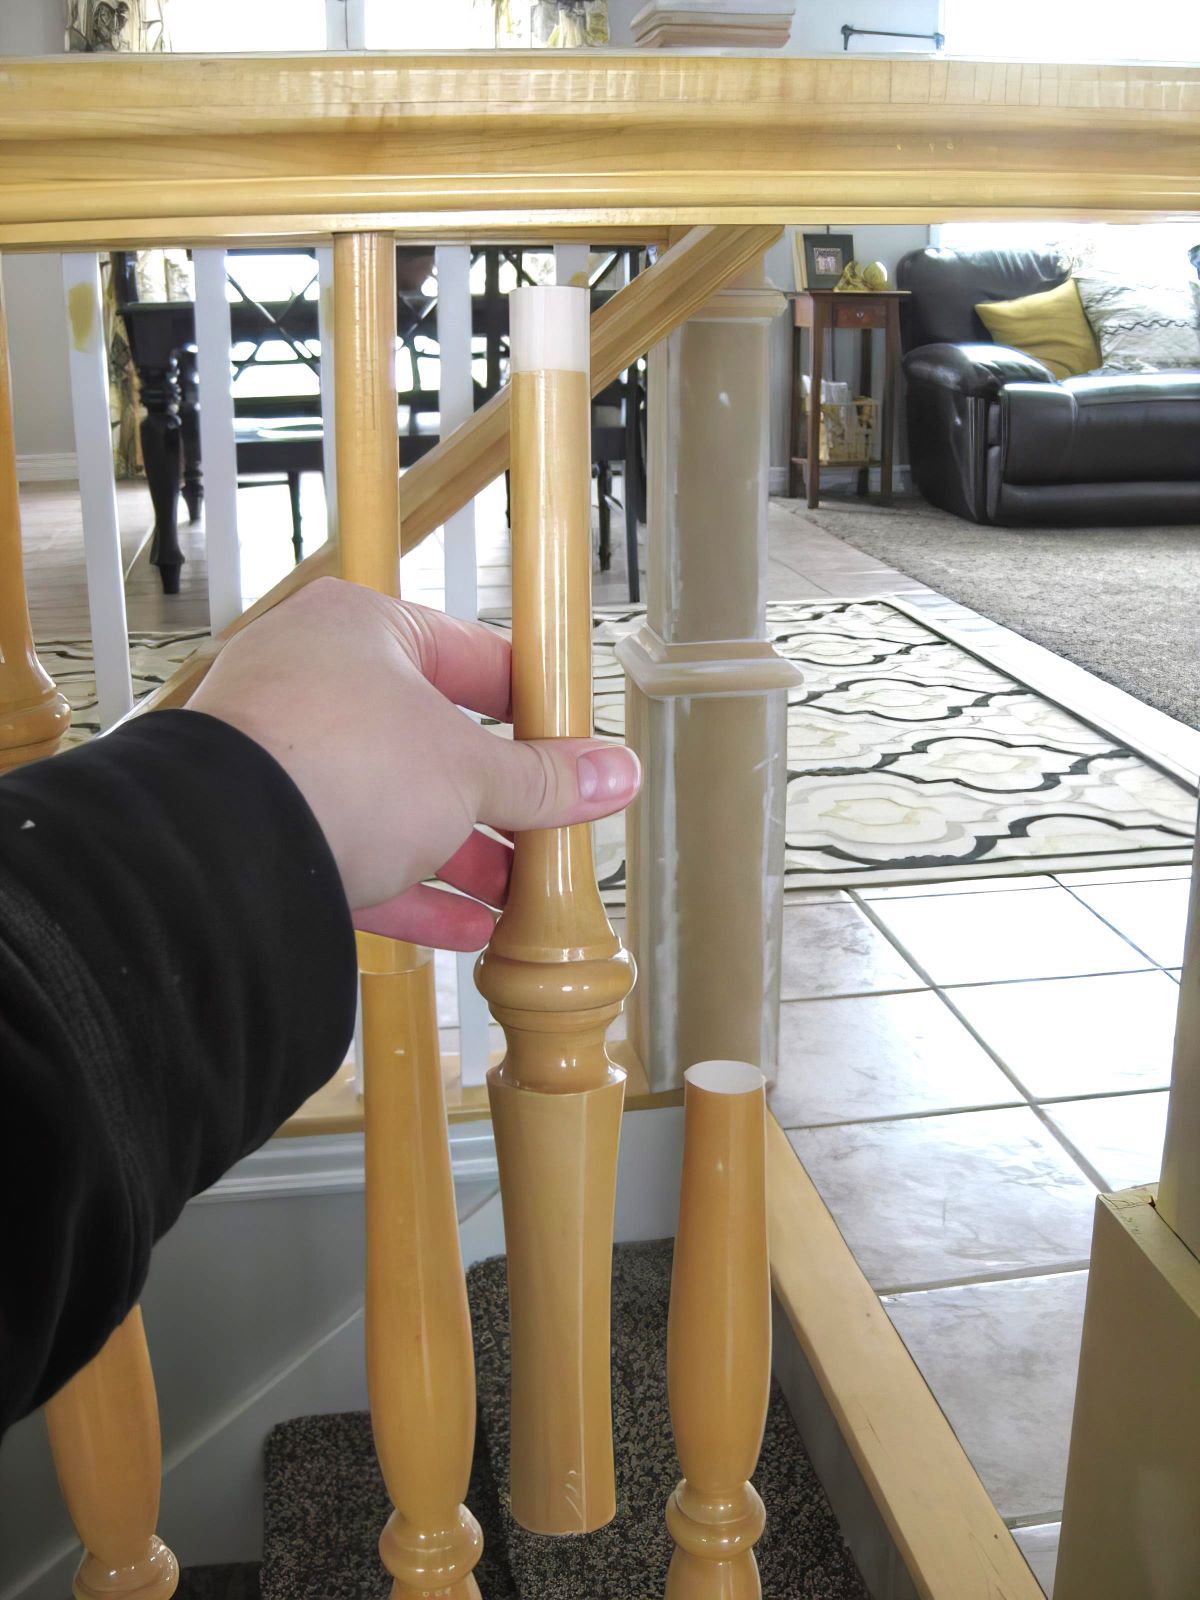
Use a jig saw or reciprocating saw to cut the spindles in half and remove.
Step 10 – Replace the Top Portion of Baluster into Handrail
Next, cut the top of the spindle off (where there is no varnish, making it flush with the rail when inserted) with a miter saw and use liquid nails to glue it back up inside the top rail. (I did this to have some solid wood for my screw to go into when I put the new spindle in.)
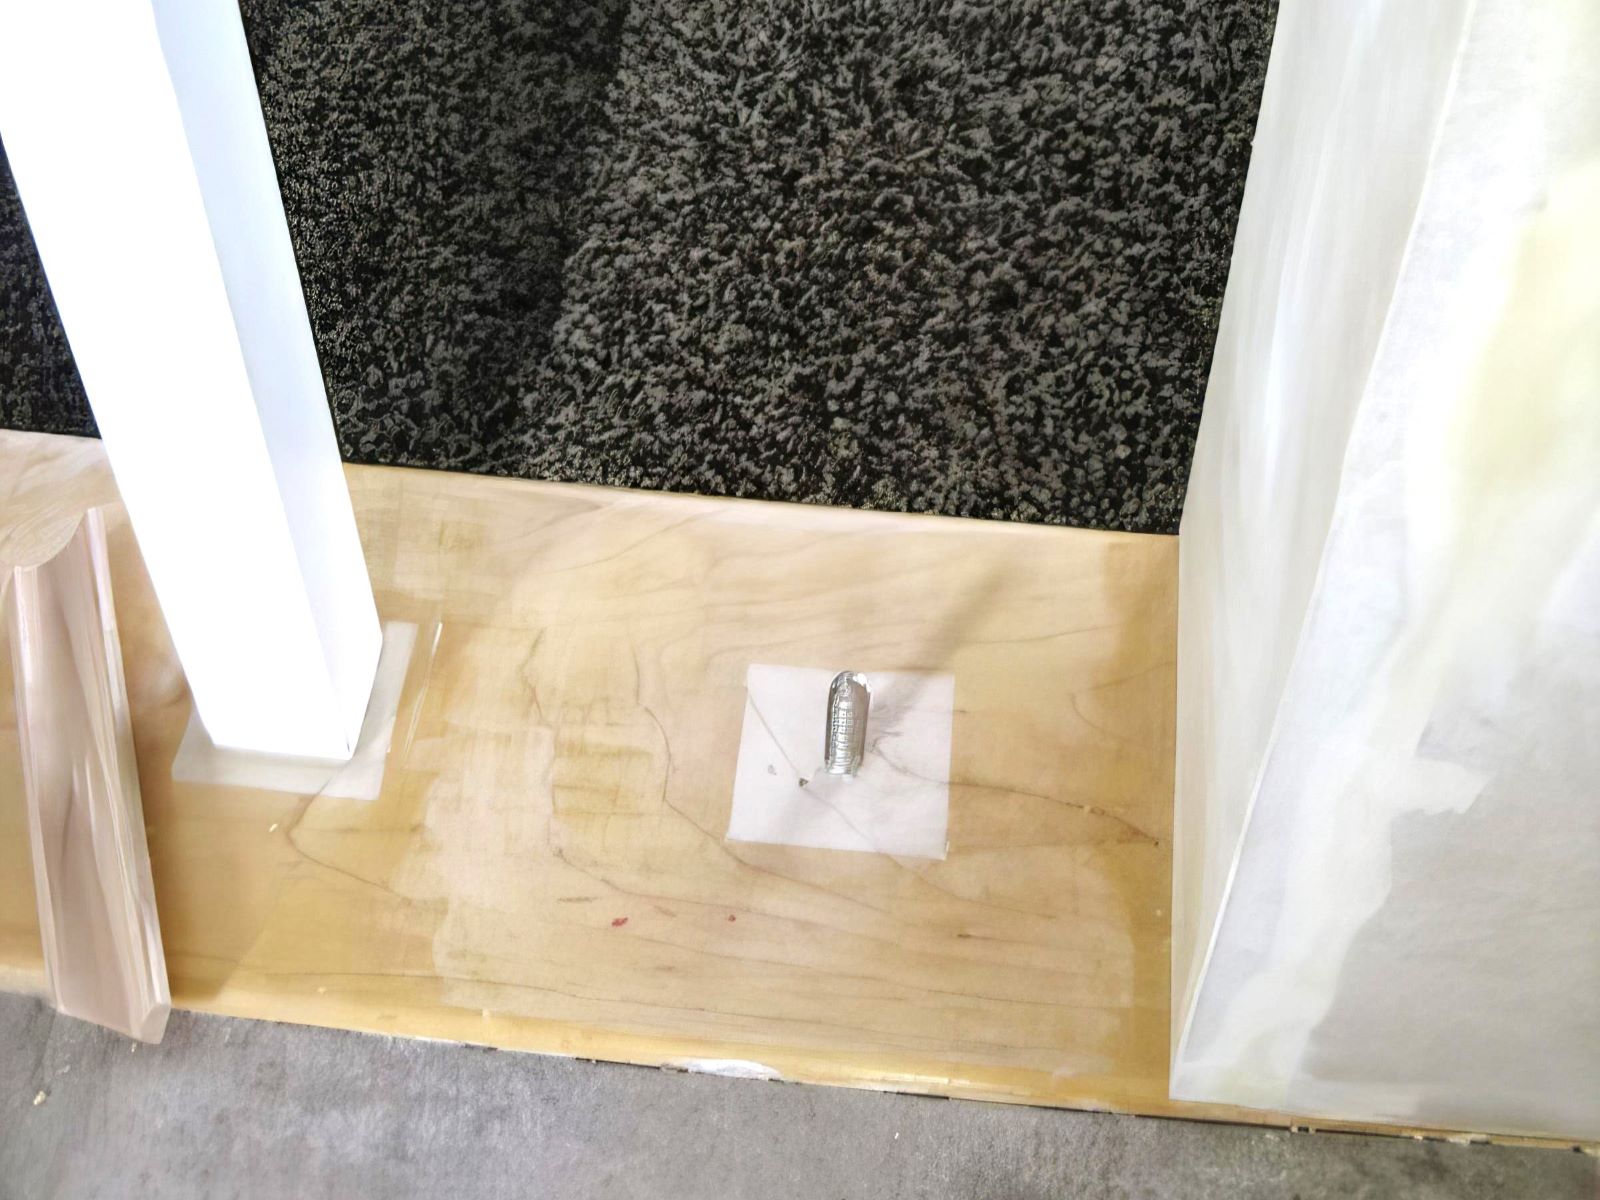
When I removed the old spindle, I unscrewed it off this screw which ended up being helpful in re-screwing my new spindle back on to.
Step 11 – Cut Balusters to Finished Length Needed
Cut your new spindles to the desired length needed allowing them to fit snug between the top and bottom rails.
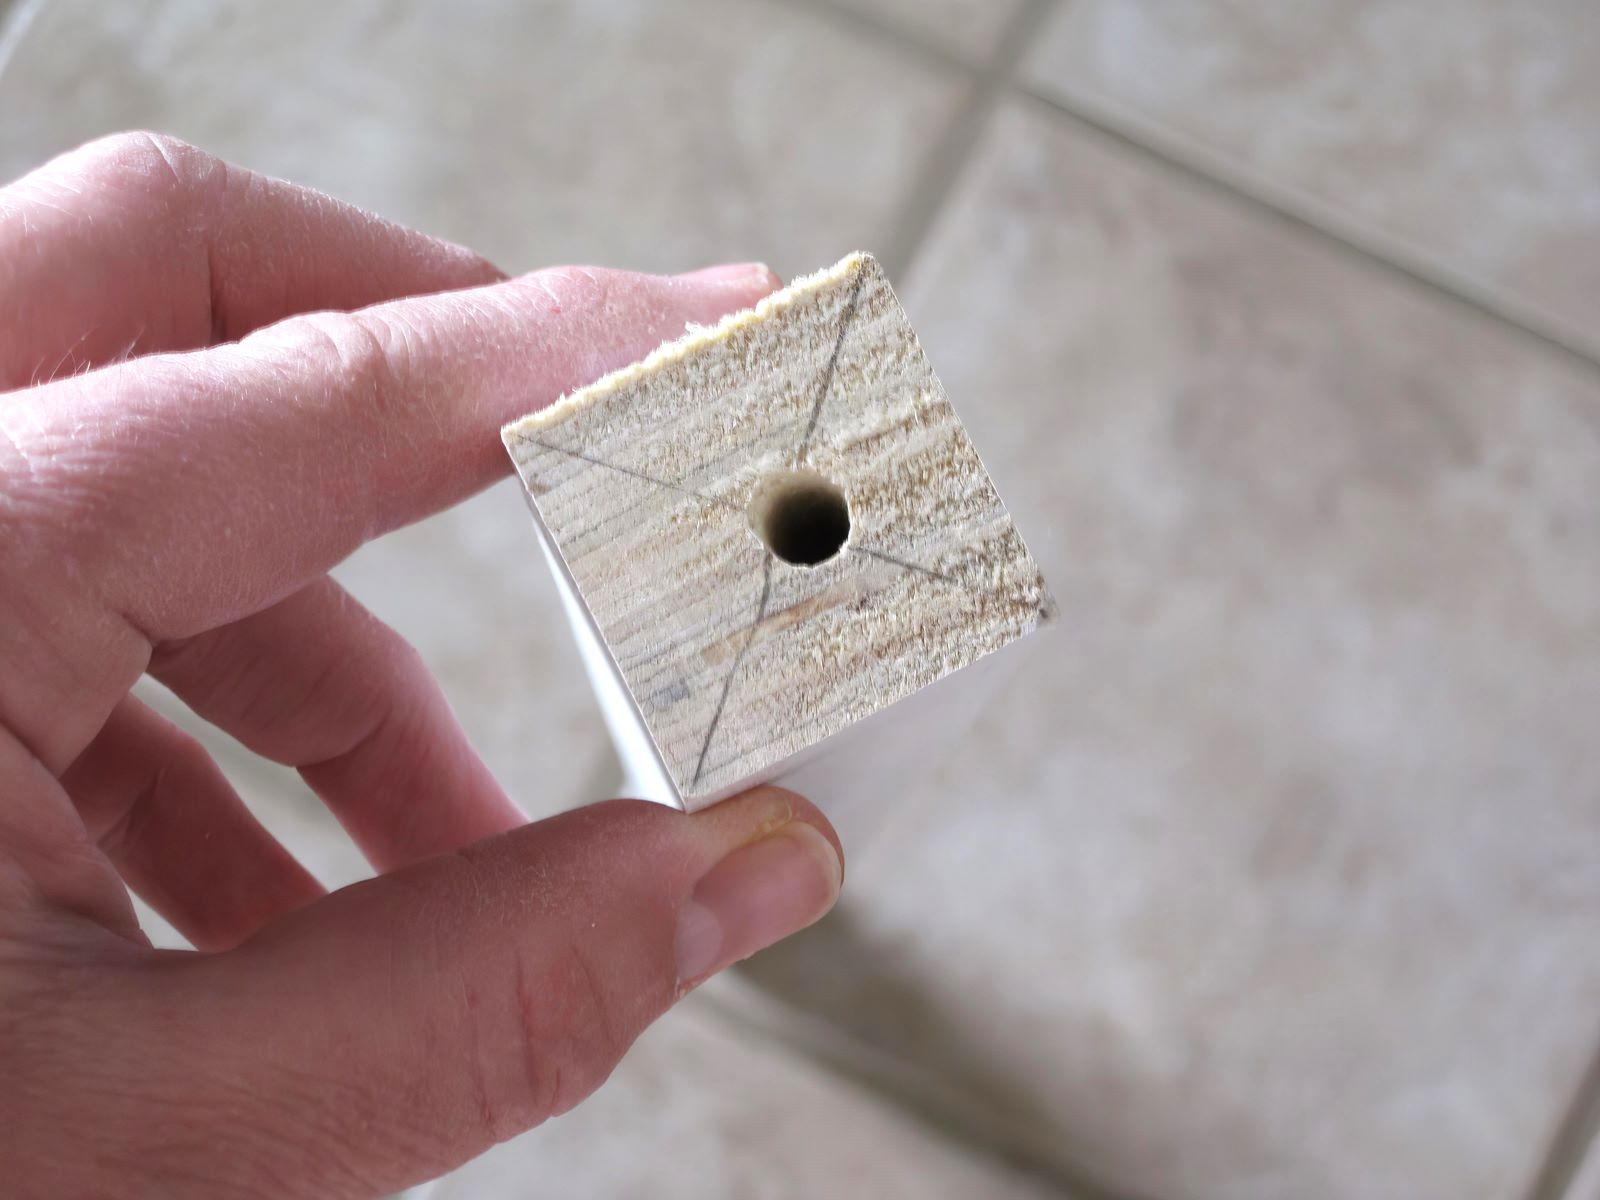
Step 12 – Drill Hole in Center Bottom of Baluster
Next, find the center on one end and drill a hole into it so that it can be screwed into the screw pictured above.
(yes, I do know that I didn’t quite hit my center below 🙂)
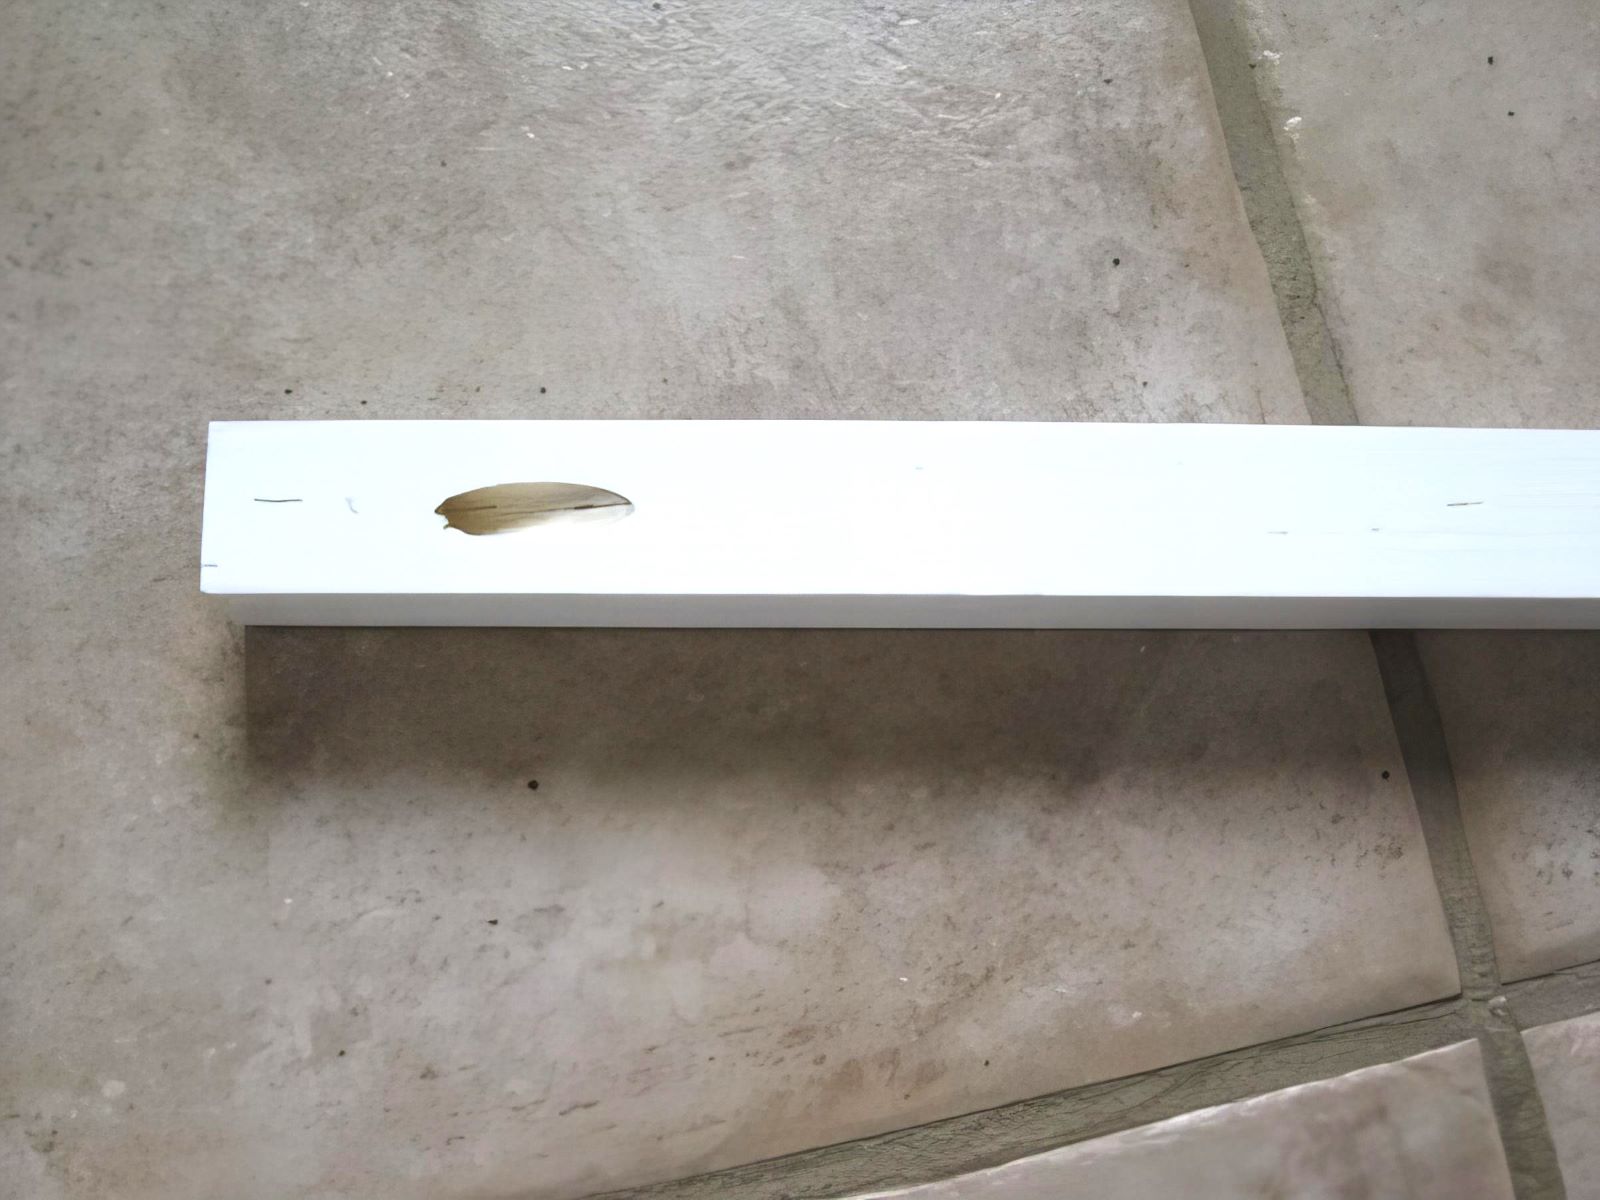
Step 13 – Add a Pocket Hole to Top of Baluster
Lastly, use a Kreg Jig to make a pocket hole on the opposite end of where you drilled the other hole:
Step 14 – Glue and Screw Balusters in Place
I added Liquid Nails to both ends and screwed the spindle on to the bottom screw. Once in place, put a 2 1/2 inch pocket hole screw in the top attaching it to the top railing.
Be sure to check for level on each spindle before securing the top screw in it’s final position.
Step 15 – Caulk, Patch and Sand
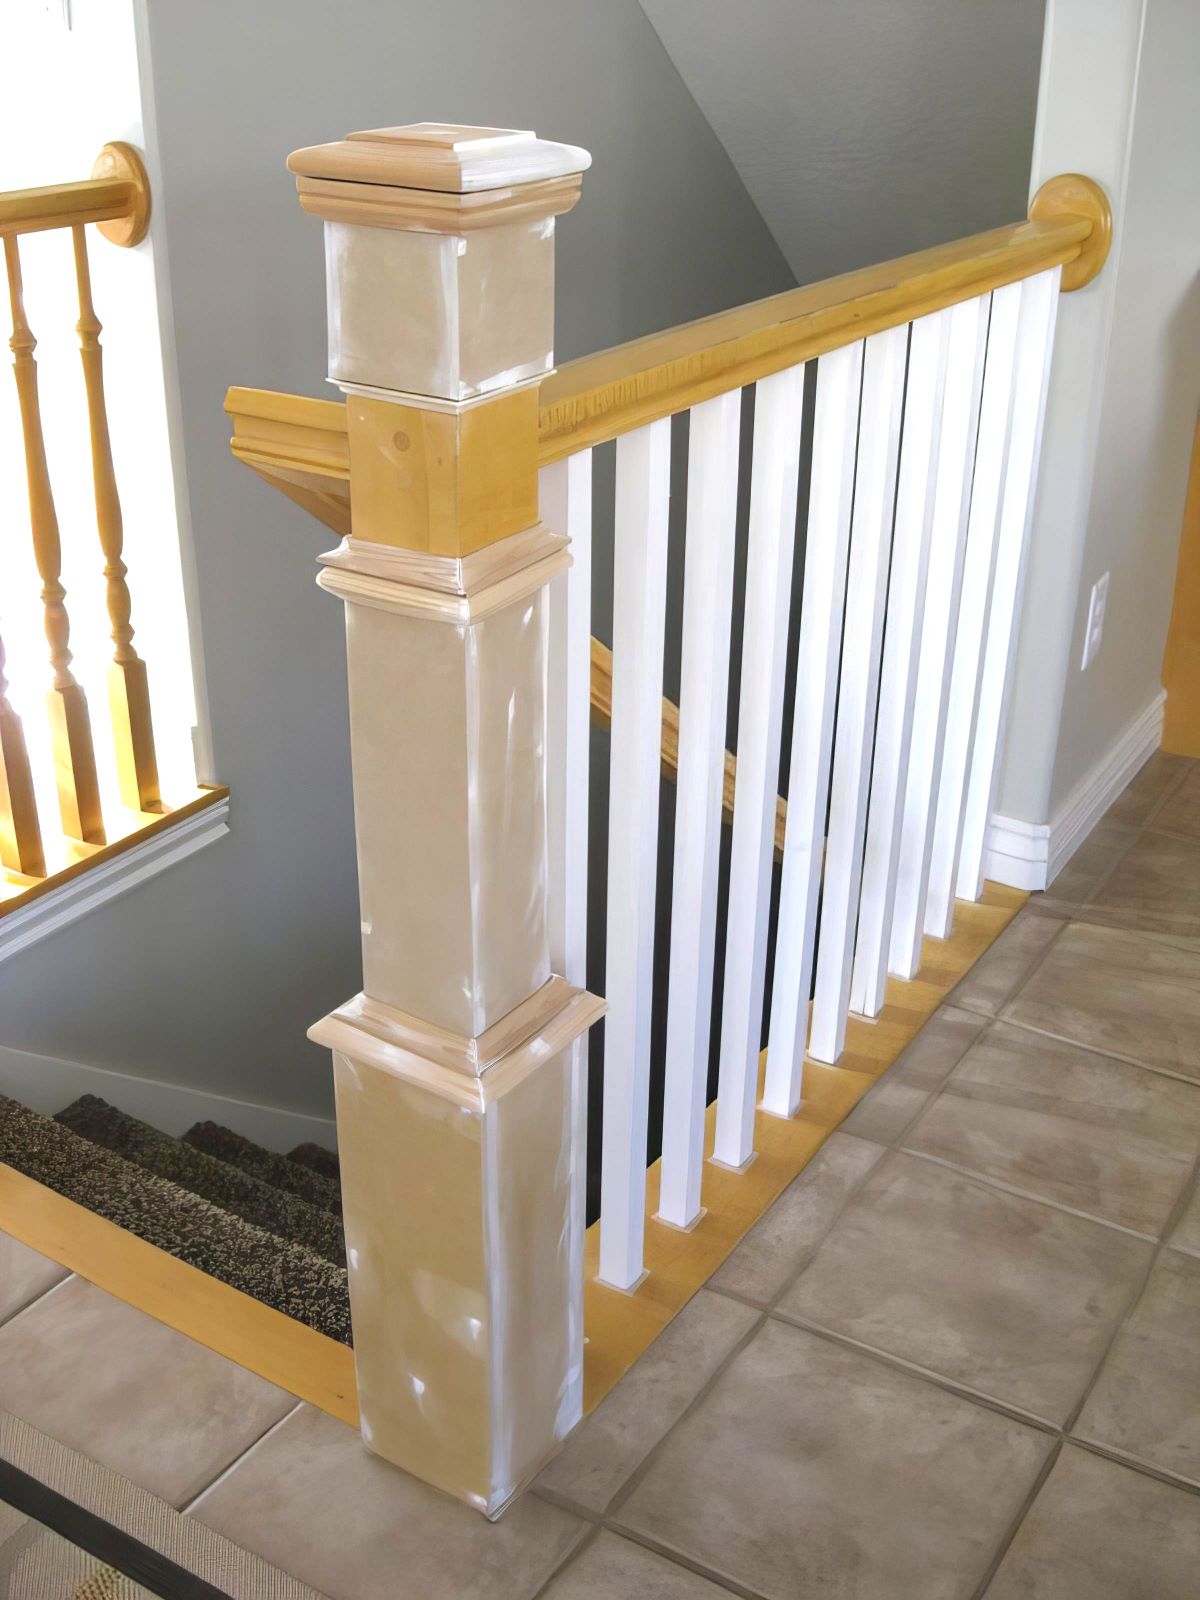
Caulk the newel posts and the tops and bottoms of the new spindles. Glue pocket hole plugs into your pocket holes, and use wood filler to fill any nail holes, gaps, and seams on the new newel posts and spindles.
Being sure to do good sanding so that all seams will be hidden nicely. This prep matters for the final look so much .
Step 16 – Paint
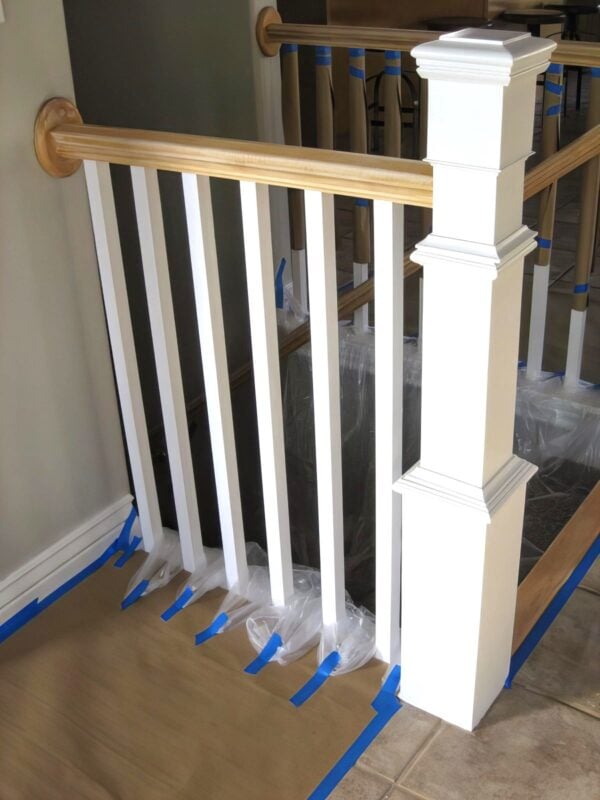
Paint the newel post, bottom rails, and spindles first. (I used the same white paint I had on hand that matched the moldings in my house.)
Step 17 – Stain Handrail
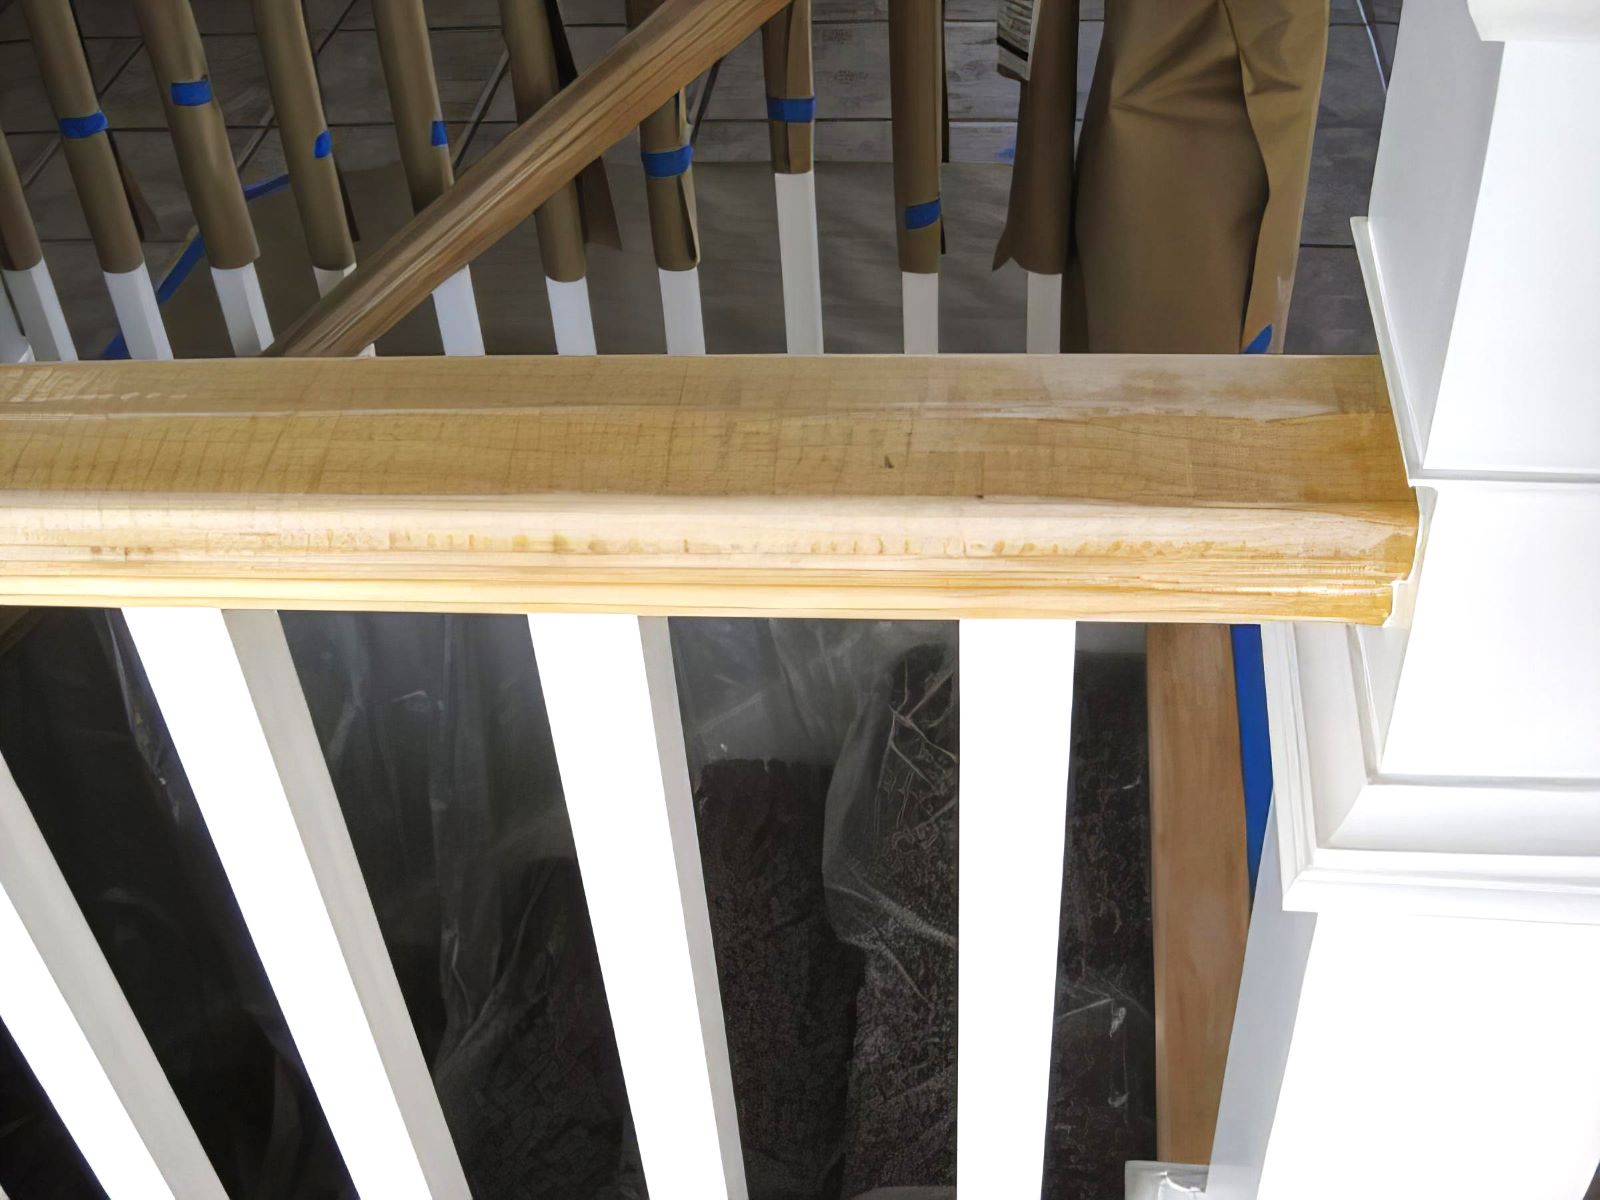
After those were painted, I followed the steps and tutorial on using General Finishes Gel Stain in Java on the hand rail, and top rail.
Step 18: Enjoy Your New Banister
Before:

After:
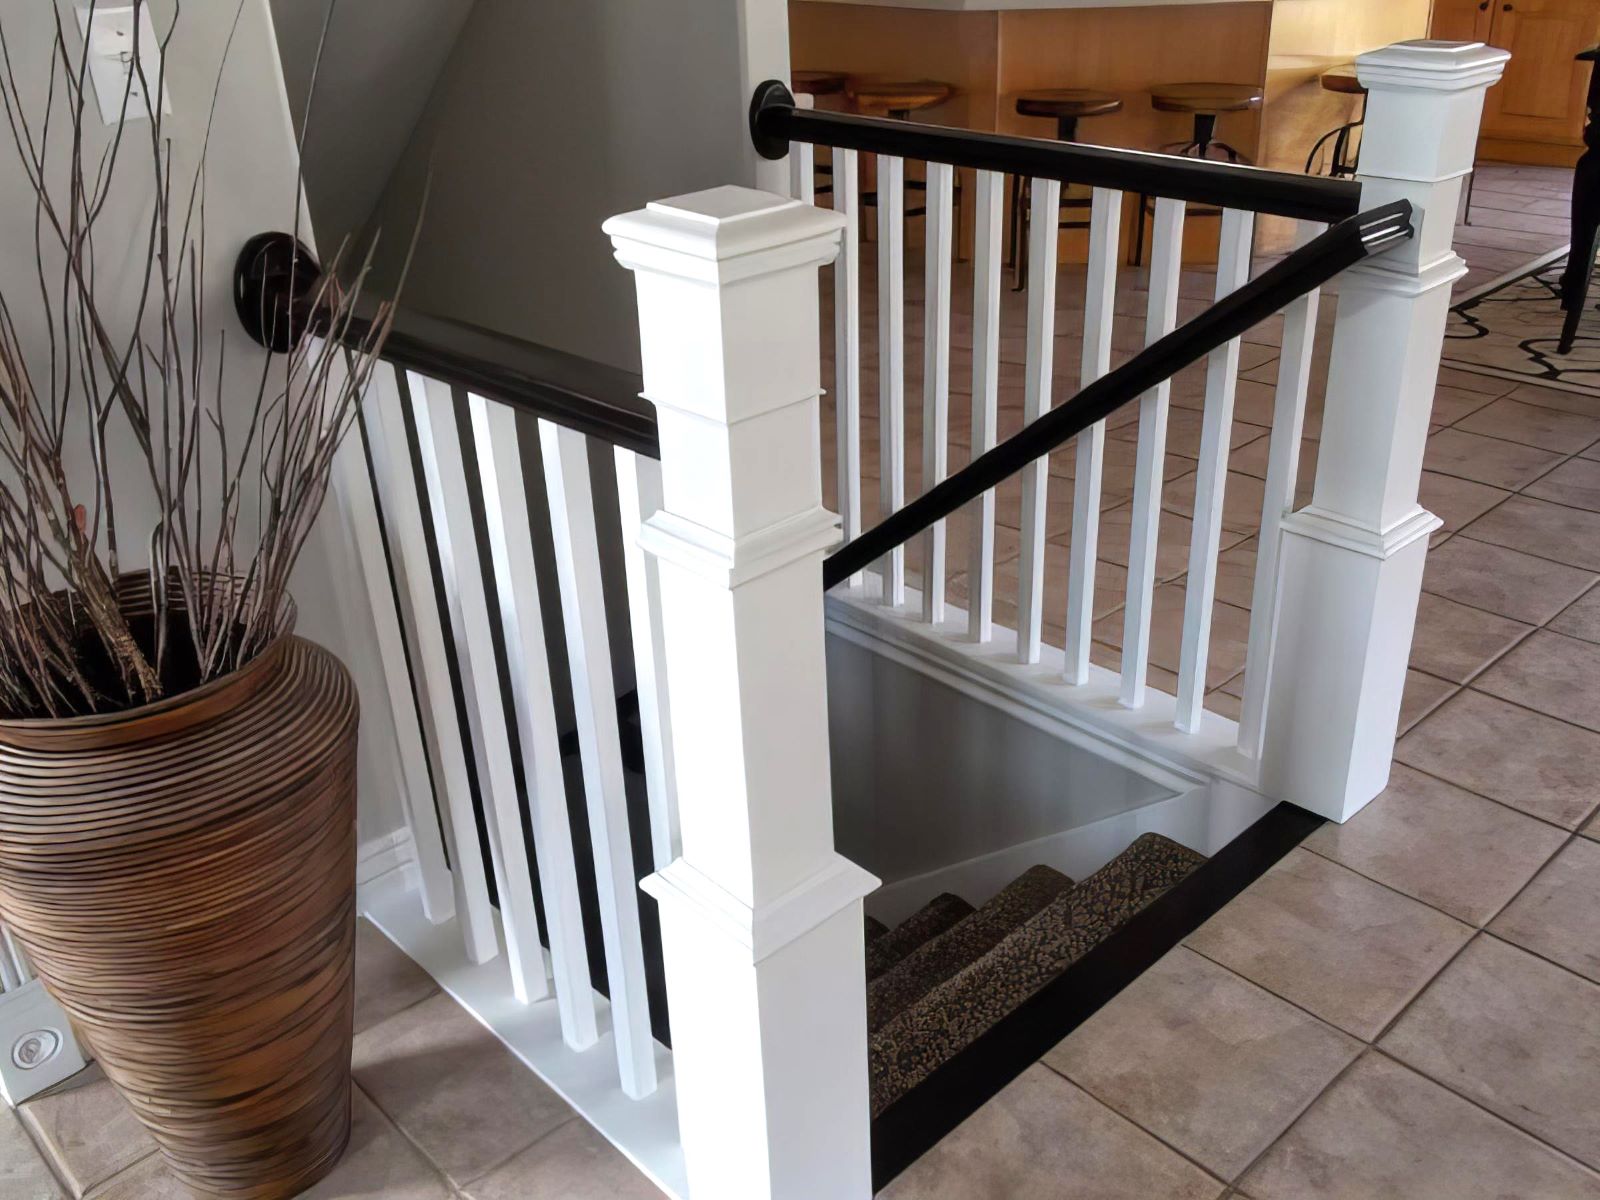
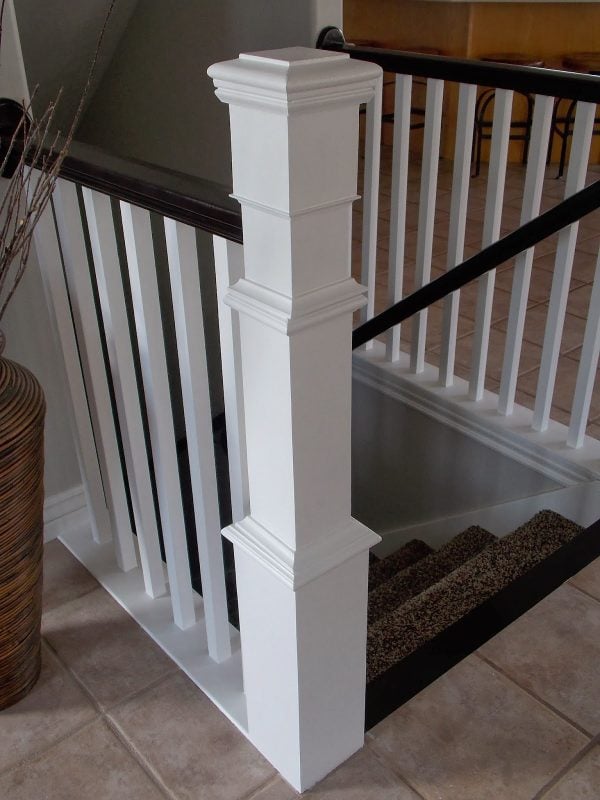
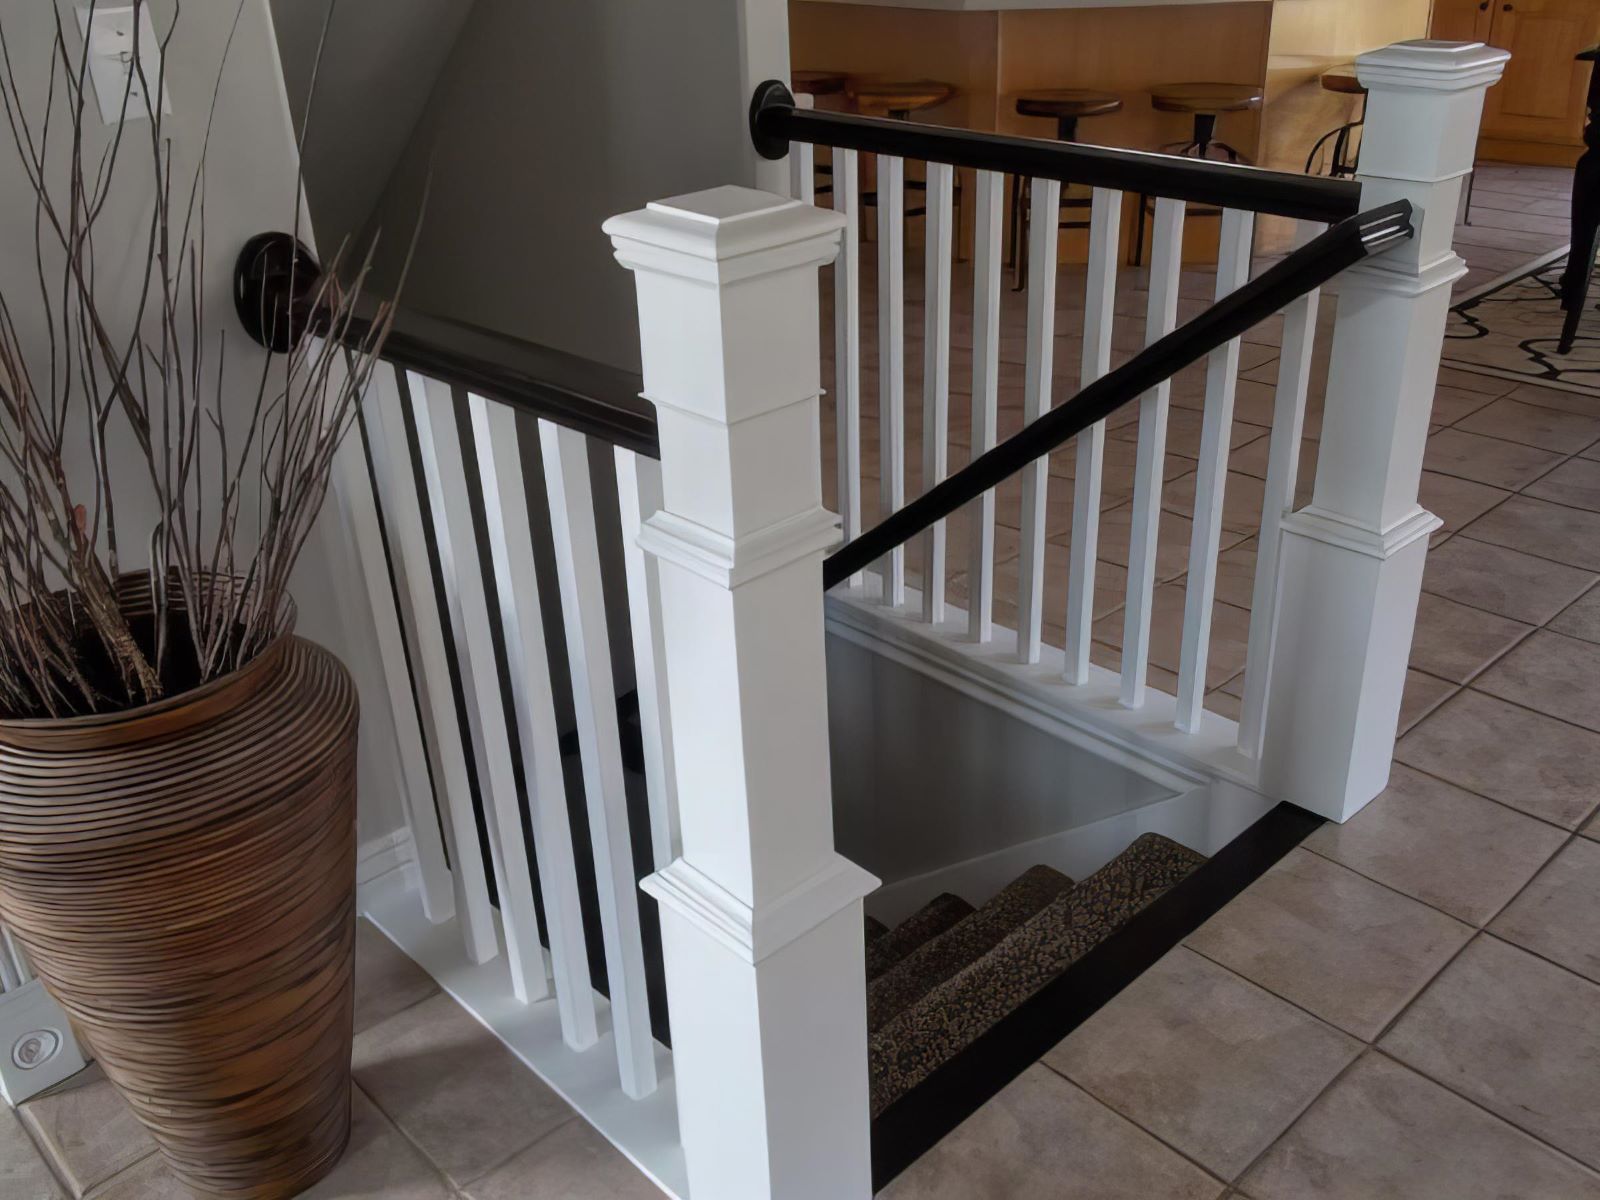
Here are a couple more shots at different angles
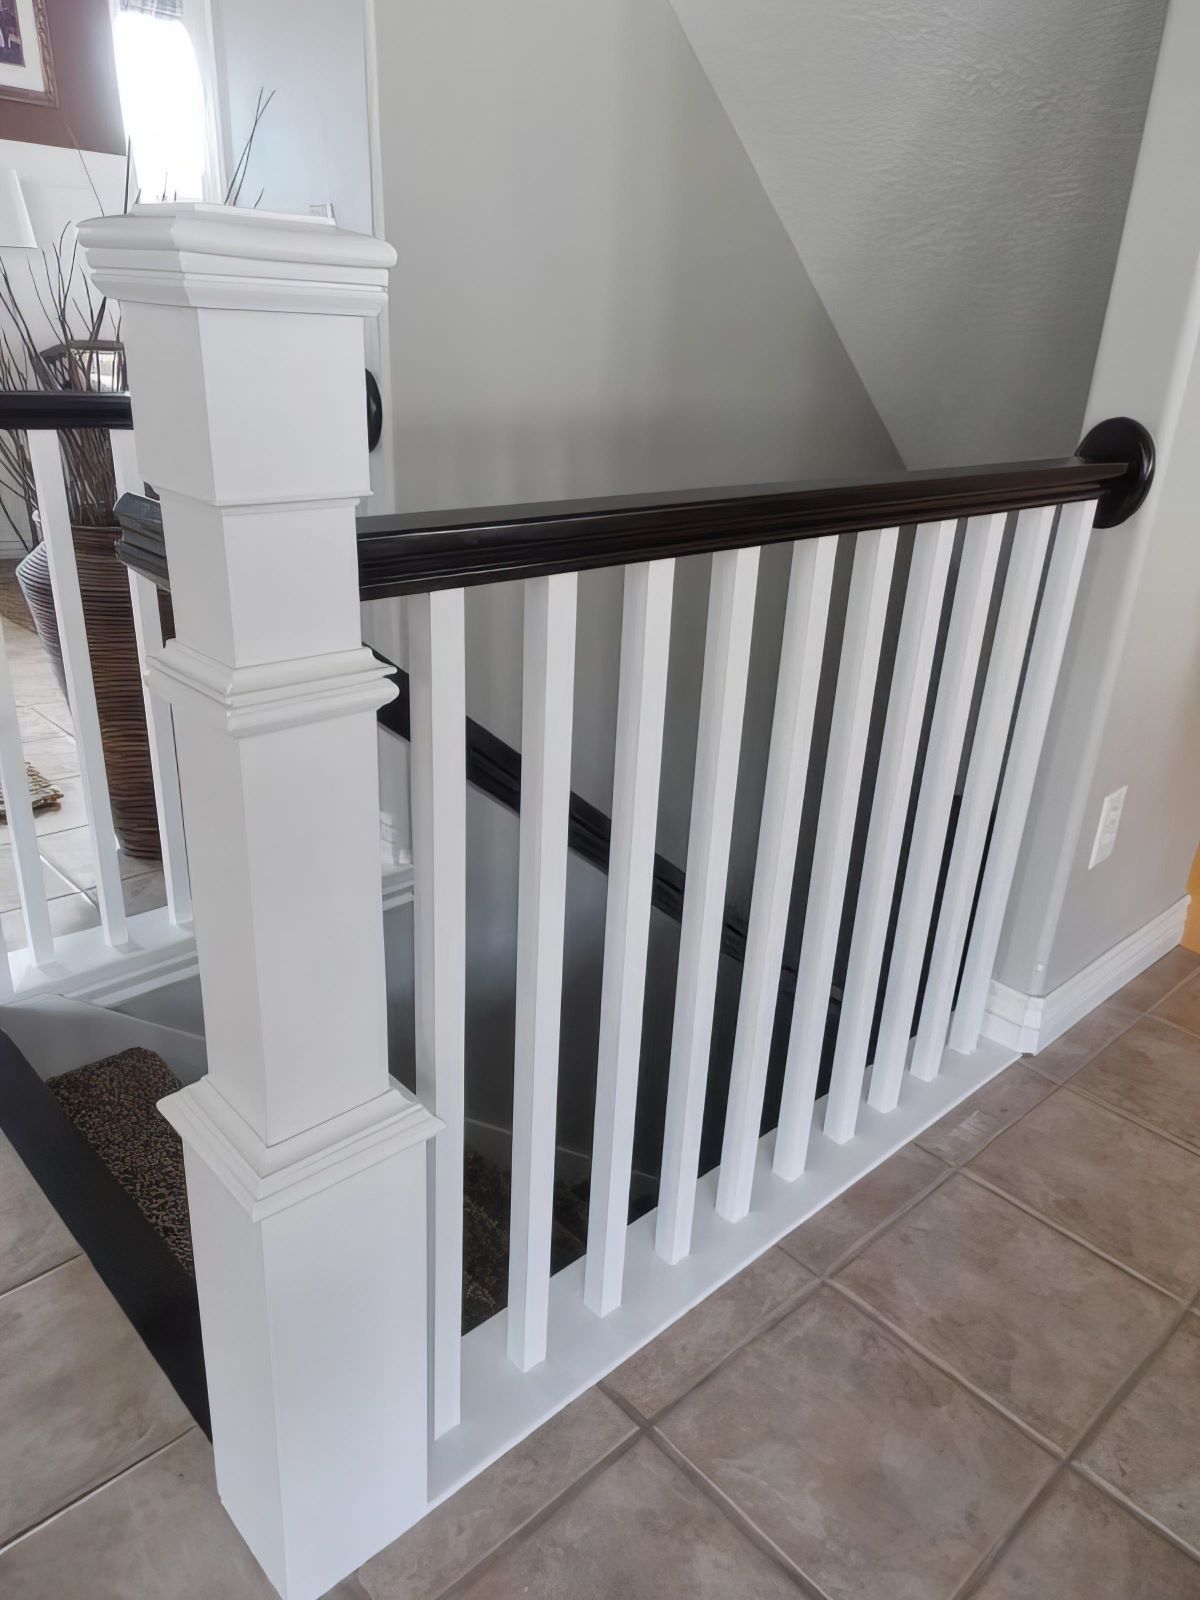
Total cost for this awesome DIY, $158.
Here is the breakdown:
$60 – For all MDF pieces, AND moldings for BOTH newel posts
$14 – 2 outdoor fence post caps
$64 – 16 square Home Depot Spindles
$20 – General Finishes Java Gel Stain
After completing the shorter section of railing on our main floor, I decided to tackle our upstairs staircase railing. I followed the same steps and can’t think of anything I would do different to make it simpler. I just love the modern stair railing look up here. It refreshes the whole space and the look of your stairs without having to change the actual stairs themselves.
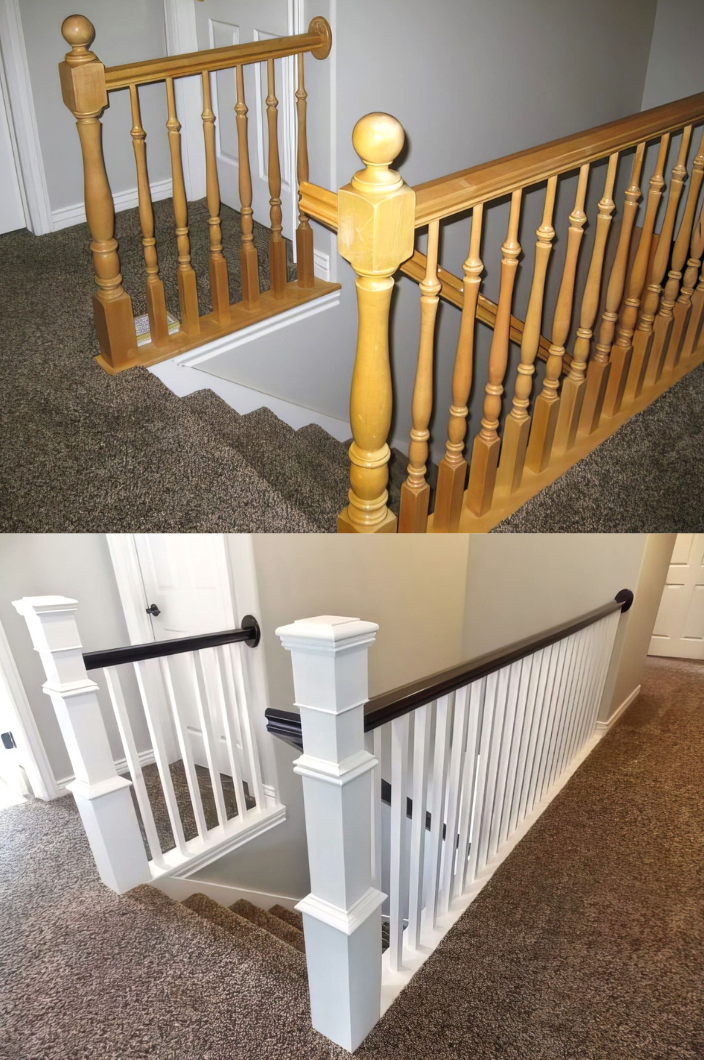
I hope this helps anyone wanting a similar look on a very low budget!!
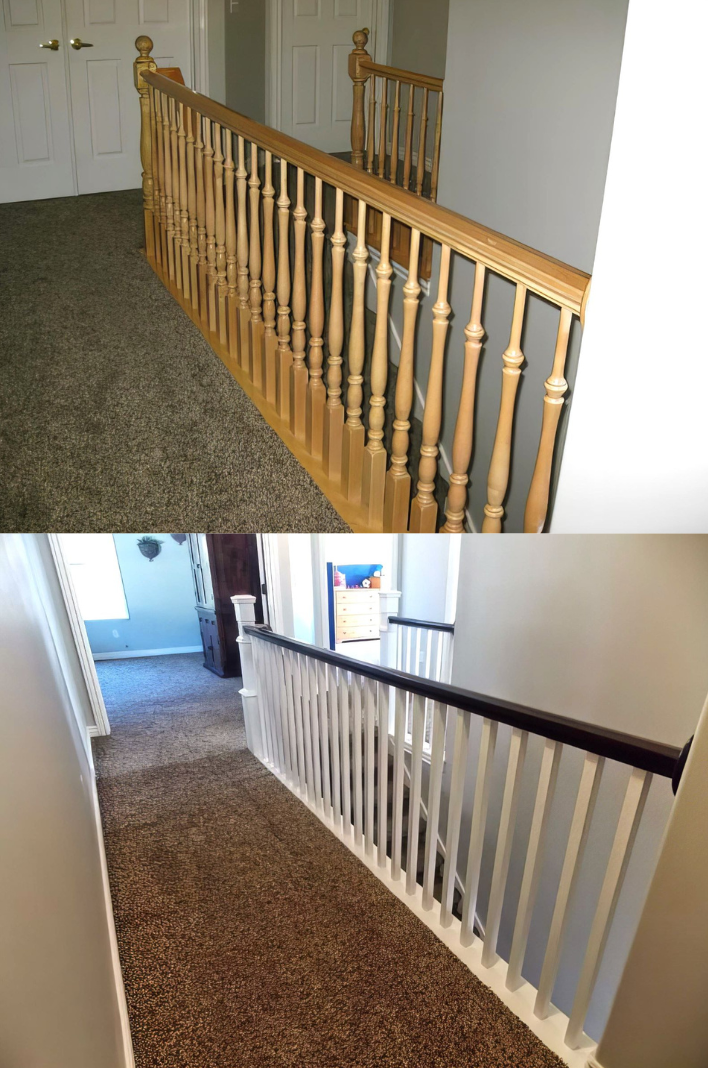
This is wonderful, Trish! Thank you so much for visiting today and sharing with us!
Remodelaholics, make sure you pay Trish a visit over at TDA Decorating and Design — she and I have a shared affinity for built-ins 🙂 Check out her built-in home organizer, built-in shelving, and built-in wall ironing board!
Plus, be sure to subscribe to follow Remodelaholic by RSS or email so you don’t miss a single one of our amazing holiday guests (plus our other awesome posts, of course!)
You can also follow along on social media: Facebook | Instagram | Google+ | Twitter | Pinterest
Want to be featured here on Remodelaholic? Submit your best project here.
More stair renovations? Yeah, we’ve got that….

Cassity Kmetzsch started Remodelaholic after graduating from Utah State University with a degree in Interior Design. Remodelaholic is the place to share her love for knocking out walls, and building everything back up again to not only add function but beauty to her home. Together with her husband Justin, they have remodeled 6 homes and are working on a seventh. She is a mother of four amazing girls. Making a house a home is her favorite hobby.

Wood pieces needed list calls for 1/4 MDF . . . all your instructions say 1/8 MDF . . . . I’m confused. Please help!
So sorry, I don’t know how I switched that up in the tutorial. It is 1/4″ mdf.
Could you leave links for where you found the items? I tried finding the items online and I cannot find the spindles or anything else.
Could you please comment on the molding and how it was applied to the area that did not have a box made around it. ie; just below the railing.
There are two different types of molding pieces just below where the railing is. The bottom one is glue directly onto the thin box, and the second molding above it is glued onto the actual original wood newel post.
I have a hand rail and spools on one side of my staircase. After removing the carpet, how do I install wooden floors with 2 spools on each of the 13 steps???
Thanks and am anxious for your reply!
Elayne Powers
How were you able to get the new spindles on the existing bolts then under the banister? That step seems to be missing. If they were cut to size how did you have room to get them on the screw?
Bryan,
I didn’t realize they don’t respond to people, including me! (the first questioner)
Anyways, we couldn’t figure that out either, even with the kreg jig, after agonizing for hours . . . we cut the screws off the banister and spent a little more $$ on wrought iron and it was so easy to install and so worth the extra $$ spent.
If you post your email address we will send you before and after pics of ours.
Annie & Scott
Hi Bryan and Annie! Sorry about that. Since this is a post from a guest, I’m not much help in telling you anything more than what is in the post. I will go check in with Trish and see if she can come answer your questions!
I apologize for not getting back to you on here, I assumed people would contact me through my original post asking questions and did not think to check back here for questions.
I cut the spindle to size, and tilted it so that the bottom screw started to thread through my drilled hole. After twisting until the top was flush and in place I then used the kreg jig hole to screw it in through the top. Hope that helps! – Trish
Thanks for checking in, Trish!
This transformation is AMAZING!! I cannot wait to do myself!
I’m going to giove this project a try! Gorgeous! What is your wall color at the top of the stairs and white trim color?Sincere thanks! Tanya
The wall color is Sherwin Williams Repose Gray, and the trim is Jones Paint & Glass White/White.
Thanks, Trish!
The newel posts are completely out of scale with the rest of the railing.
AWESOME…absolutely perfect. Exactly what I’m looking to do. Thanks for the great detail and info.
Next project after the basement is complete!!
Cheers!
Hello, what color and finish did you use for the handrail? black or espresso? Thanks
I absolutely LOVE what you did here, and plan to do something similar to my newel posts. I was wondering if you’ve ever seen the same thing done to a fireplace mantle?
My husband and I are also in the middle of a major renovation and the budget is exhausted. The staircase – which terminates in our living room — is a mess with painted colonial style spindles, a yellow bannister and grey industrial-type carpet (the kind with the different coloured specks in it). The house was listed as Arts and Crafts style (heavy emphasis on the word “style”) and so this is driving me crazy (I won’t even mention the little “Victorian” style curlicues that bracket all the outdoor posts…sigh). In any case, like you, I tried to conceive of some way to build Arts and Crafts newel posts around the existing posts but then drew a blank on the spindles. Your solution is wonderful. I now face two problems….a lack of tools and opposition to me using my carpentry skills. I am a contractor’s daughter but he trumps me as an architect used to hiring professionals. I’ll find a way to do this….somehow….so thank you for the inspiration. I think it looks fabulous and I also think everything is entirely within scale. Yes, spending thousands of $$$ would have yielded a perfectly proportioned staircase but for your investment, well, you have achieved perfection. I salute your creativity. This is inspirational.
How was she able to use square balusters on the handrail that’s designed for pin top balusters? We’re in the process of redoing our steps and our contractor said this would be difficult to achieve.
This is amazing banister renovation, it really looks great and awesome. you have a good taste. I surely love this design of yours, thank you for sharing this one.
This looks amazing! What a transformation. Pinned & on my ‘to do’ list!
cannot find the molding SD186, can you send a picture of how you place these moldings, with thanks